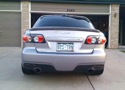
Going to install CAI on my MS6
Going to install CAI on my MS6
any tips or tricks I should know about. Total noob so wish me luck!
-
Colombia28

- Posts: 4216
- Joined: Wed Sep 19, 2007 9:14
- Location: Lone Tree
- Contact:


For more room remove your Drivers side wheel will allow you to get in there to properly tighten the filter on.......I can do it fast now by just turning my wheel full right for cleaning and replacement......but I have had to do this several times. That may even be in the instructions that came with it.......All and all not a tough install......just make sure everything is tight and no debris got in the system during install........")
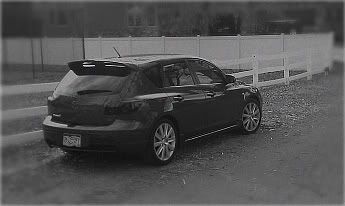
*CP-e CAI
*Turbo Inlet
*ETS 3.5" TMIC
*SU Test Pipe
*RPM Street Springs
*AeroForce Gauge
*RPM LED Side/Rear Markers
*SU Rear Engine mount
*Turbine Tech Front engine mount
*Cp-e Rear Diff Mount
*TurboSmart MBC
[SIGPIC][/SIGPIC]
*Turbo Inlet
*ETS 3.5" TMIC
*SU Test Pipe
*RPM Street Springs
*AeroForce Gauge
*RPM LED Side/Rear Markers
*SU Rear Engine mount
*Turbine Tech Front engine mount
*Cp-e Rear Diff Mount
*TurboSmart MBC
[SIGPIC][/SIGPIC]

Hey GMoney... Mine is shipping and I expect to have it sometime this week, do you know of any online .PDF files or better yet any net sites that have a walk through, that I can follow?
I've never tried anything like this before, so even though it may not be hard, I really want to follow some instructions. Anybody else, please chime in...
I've never tried anything like this before, so even though it may not be hard, I really want to follow some instructions. Anybody else, please chime in...
-
Cesaros
first off. if it came with directions, id read those..thats a good start.
next, remove the entire stock intake.
bolt on new intake.
drive.
expect it to take about 2 hours if it anything like my CAI I installed on my 3.
Its probably the easiest mod you can do...and unless you load a 12 gauge and blow a hole in your engine...you cant break anything...its mechanically un-inclined proof.

Cesaros wrote:first off. if it came with directions, id read those..thats a good start.
next, remove the entire stock intake.
bolt on new intake.
drive.
expect it to take about 2 hours if it anything like my CAI I installed on my 3.
Its probably the easiest mod you can do...and unless you load a 12 gauge and blow a hole in your engine...you cant break anything...its mechanically un-inclined proof.
Problem is, the directions are similar to "remove stock intake". Tut needs directions. (i.e. remove bolt A, B, and C, then pull
 )
)one and one makes two, together we are free
Cesaros wrote:first off. if it came with directions, id read those..thats a good start.
next, remove the entire stock intake.
bolt on new intake.
drive.
expect it to take about 2 hours if it anything like my CAI I installed on my 3.
Its probably the easiest mod you can do...and unless you load a 12 gauge and blow a hole in your engine...you cant break anything...its mechanically un-inclined proof.
Not sure if it's going to have the original directions with it; I'm getting it from a fellow member, who's pretty auto savvy, so we'll see if they got saved.
And while the 3-step approach you just mentioned sounds easy enough, the fact that you also estimated 2 hours of work, has me thinking there's some detail that didn't quite get covered.
I guess before I get too worried about any of it, I'll see if comes with it's own documentation.

~Barn~ wrote:Not sure if it's going to have the original directions with it; I'm getting it from a fellow member, who's pretty auto savvy, so we'll see if they got saved.
And while the 3-step approach you just mentioned sounds easy enough, the fact that you also estimated 2 hours of work, has me thinking there's some detail that didn't quite get covered.
I guess before I get too worried about any of it, I'll see if comes with it's own documentation.
I didnt get instructions when I bought it....I wish I could help you install it. I've been looking around for a DIY thread but no luck yet.
-
Cesaros
~Barn~ wrote:Not sure if it's going to have the original directions with it; I'm getting it from a fellow member, who's pretty auto savvy, so we'll see if they got saved.
And while the 3-step approach you just mentioned sounds easy enough, the fact that you also estimated 2 hours of work, has me thinking there's some detail that didn't quite get covered.
I guess before I get too worried about any of it, I'll see if comes with it's own documentation.
the reason it took 2 hours was because 1 of the bolt I needed to remove the stock intake resonator was in a spot my hands had a hard time getting to. on the mazda 3, those bolts connecting the intake resonator to the engine bay are meant to be removed with the front bumper OFF. but again, i did mine with minimal instruction...i pretty much followed the common sense rule of...if its not coming out, then YANK on it, or remove the bolt holding it in place..lol
oh, but...try pulling back your splash guard to get to the resonator.
id assume removing the stock pieces is similar on the NA3 and MS3 minus the fact that the pipes go to different places.. and since the speed6 and speed3 have the same engine, than its a similar process.....soo, take a look at the INSTALL INJEN CAI in the Mazda3 DIY section. then after u remove all that junk, and its seriously this simple....connect pipe A to inlet, connect pipe B (if its not a 1 piece intake) to pipe A, secure mounting bracket, attach filter, put everything else back to the way it was.
if all else fails...spend a few hours on google...OR you could just email or call the company that makes the intake and request a PDF file of their instructions.
ive installed everything on my car without instructions..minus the springs (cause I didnt want to rip into my suspension..and I didnt own a spring compressor) it just takes a little elbow grease, and some common sense...and patience.


")

^^ what he said...it took me and a buddy an hour and a half to install a CAI and TIP on my car...now that i've done it, I doubt it would take that long at all (granted the TIP was a PITA since you have to get to the back of the engine bay pretty much) but i didn't have to pull my tire, just cranked it one way or the other until it was outa the way.
Lemme know if you need/want help and I would be glad to assist. I'm free just about everyday after 5 for a couple hours.
Lemme know if you need/want help and I would be glad to assist. I'm free just about everyday after 5 for a couple hours.
So I got it put in last night, and Crikey, do I like this way things have changed! I didn't get a chance to do any full-on runs into the higher gears, but the one thing I could notice right-off, was that a huge chunk of the turbo lag that I was used to, is history now!
It's not overly loud if I drive normal, but when you give it the whip, listening to the atmosphere getting sucked into the turbo, and actually hearing the impeller spin-up was pretty awesome. And as cool as that was, I think I got partially erect, when I started shifting gears, and heard the compressor bypass go "Pssssshht..." each time.
For never having owned a turbocharged car before, this was a pretty cool deal. This thing actually has a personality now!
Who is online
Users browsing this forum: No registered users and 64 guests