Build thread
-
$crillaTor

- Senior Member
- Posts: 153
- Joined: Sat Jun 15, 2013 9:14
- Location: Colorado Springs
Re: Build thread
Congratulations on retirement Eric! That's got to be a bittersweet feeling but now you'll be able to experience true freedom again! Yay!
-
speedjunkie

- Senior Member
- Posts: 5365
- Joined: Wed Jan 02, 2008 9:14
- Location: Colorado Springs
- Contact:
Re: Build thread
Saul_Good wrote:Oh snap! This came up quick from our last time together! Congrats and thanks for your service.
Yeah it's amazing how fast it has gone by. I remember when I got here in 2008, feeling like I still had an eternity before I retired. And honestly I was planning on staying as long as I could. But procrastination and the changes that have been occurring in the AF are forcing my hand. It's kinda weird but I feel like if I'd never bought this car I might have stayed in longer because it wouldn't constantly be on my mind and I could focus on my career lol. Thanks! And thanks for your service too!
RX-7 Chris wrote:I didn't realize that is how it is going down. Thanks for your service. What are your plans now?
Looks like you are getting really close on the car. Let me know if you need any help.
How what's going down, the time off before actual retirement or what? Thanks for your support and friendship, it's been a pleasure serving. I'm planning on staying here and probably getting a job locally with a contractor. I wouldn't mind getting far away from gov't work, but I feel I would miss the people and it would be stupid not to use my clearance. That makes it easier to get a job, and they are also higher paying because of it. I might get some welding certifications eventually and try to start doing that, but we'll see. I spoke with a lady that owns a welding company with her husband and she said they pay for the certifications and that they need welders.
Yeah I'm really hopeful to get it done before next weekend. We'll see. I'll let you know if I need help, thanks!
Shadowden wrote:Thanks Junkie! I hope you have a fantastic last day and that you continue to have great memories of the service you provided to your country. I know you will have great success in the civilian world, but wish you the best of luck anyway.
I'd also like a ride in your car when you are up and running again...say at HPR or PMP?
Thanks! It was a pretty good last day. I even did a little bit of work lol. I took a change of clothes along but I didn't get washracked, mainly because we had so many things going on today and we even got early release due to the weather. If it weren't for those things I have no doubt the guys would have had me strapped to a cart outside and pouring food, condiments and whatever else on me and hosing me down with water, regardless of the snow and cold temps lol. I hope you're right and I find success in the civilian world lol, thanks!
Yeah I'll take you for a ride. I'll have to get on one of those track days. I really need to find a way to install my seat so I can fit with the helmet and get some track time.
$crillaTor wrote:Congratulations on retirement Eric! That's got to be a bittersweet feeling but now you'll be able to experience true freedom again! Yay!
Thanks! Yeah it's definitely bittersweet, but I'm hopeful this feeling goes away and I can just find happiness again and learn what freedom feels like lol. There really isn't much freedom that I didn't have, or at least didn't feel like I really missed. The main things I guess is random drug tests (that don't seem so random) and PT tests. I've never done drugs and don't have any desire to, and I love to eat and hate to work out lol.
As far as the car, I haven't done any work tonight and probably won't. I'm getting up around 430 tomorrow to go to the airport and see people off. I only have a few things to do that I can think of before getting the other suspension arms and brake calipers back. I asked David about them and he said they're all prepped for coating but he hasn't done them yet.
-
speedjunkie
- Senior Member
- Posts: 5365
- Joined: Wed Jan 02, 2008 9:14
- Location: Colorado Springs
- Contact:
Re: Build thread
Well, I'm about ready to burn the car down again.
I tested for fuel leaks, no leaks. Topped off the coolant. Put the diffuser back on. Checked the oil.
Then I tried to start it. Now it has the slow cranking problem ALWAYS. I thought these larger cables would help. Apparently not. Or it's grounding somewhere or something. I hooked up the battery charger, didn't change a thing. I'm getting really sick of this shit.
-
chickenwafer
- Posts: 2515
- Joined: Wed Mar 11, 2009 9:14
- Location: Greeley
Re: Build thread
Electrical gremlins again? Oh noes sorry dude.
Amd congrats on retirement! That's awesome. If you're unsure what to do, you could always get into the automotive reupholstery business, I hear the old ladies in that line of work aren't good
What are you running for brakes? Did you get a BBK?
If you need a hand, let me know! Haven't been to the Springs in forever. I'm hoping to have the REPU running well enough to drive it down there this summer.
-
$crillaTor
- Senior Member
- Posts: 153
- Joined: Sat Jun 15, 2013 9:14
- Location: Colorado Springs
Re: Build thread
Man... that slow cranking problem has been plaguing you for a while now. I'll put my thinking hat on and see if I can come up with something for you to troubleshoot that you haven't already. I wouldn't hold your breath though because I swear you've checked every inch of that car lol.
-
speedjunkie
- Senior Member
- Posts: 5365
- Joined: Wed Jan 02, 2008 9:14
- Location: Colorado Springs
- Contact:
Re: Build thread
chickenwafer wrote:Electrical gremlins again? Oh noes sorry dude.
Amd congrats on retirement! That's awesome. If you're unsure what to do, you could always get into the automotive reupholstery business, I hear the old ladies in that line of work aren't good
What are you running for brakes? Did you get a BBK?
If you need a hand, let me know! Haven't been to the Springs in forever. I'm hoping to have the REPU running well enough to drive it down there this summer.
Yeah I'm seriously over this shit lol. Electrical gremlins make me want to get out of cars for good.
Thanks! Yeah I hear the auto reupholstery business is severely lacking hahaha. Smartass.
I'm switching to the RZ brakes, which also came on the Spirit R. Both front and rear are larger diameter, but the fronts are also thicker with better ventilation on the rotors. The rears use the same caliper as USDM but an extended bracket, and the front calipers are wider obviously but the pistons are different sizes, which the larger piston at the front of the rotor if I remember right and the smaller in the rear. Something about better wear of the pads. But they use the same fluid capacity and brake bias is the same as USDM. So you can basically get a full BBK for around $1700 with brand new slotted 2pc rotors.
Well you're welcome to stop by any time, especially now that I'll most likely be home any time of day this summer, unless I start working during that time. I'm not sure yet how that's going to turn out. I want to see that REPU too though.
$crillaTor wrote:Man... that slow cranking problem has been plaguing you for a while now. I'll put my thinking hat on and see if I can come up with something for you to troubleshoot that you haven't already. I wouldn't hold your breath though because I swear you've checked every inch of that car lol.
Yeah it's really starting to piss me off. I have an idea of what MIGHT be causing it, but it's a tad far fetched. I have a feeling I'll be let down again so I'm putting off trying it haha. But there's still a possibility that might be what it is.
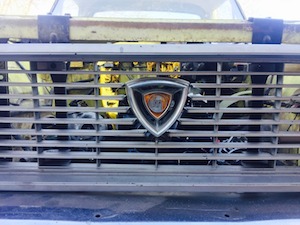
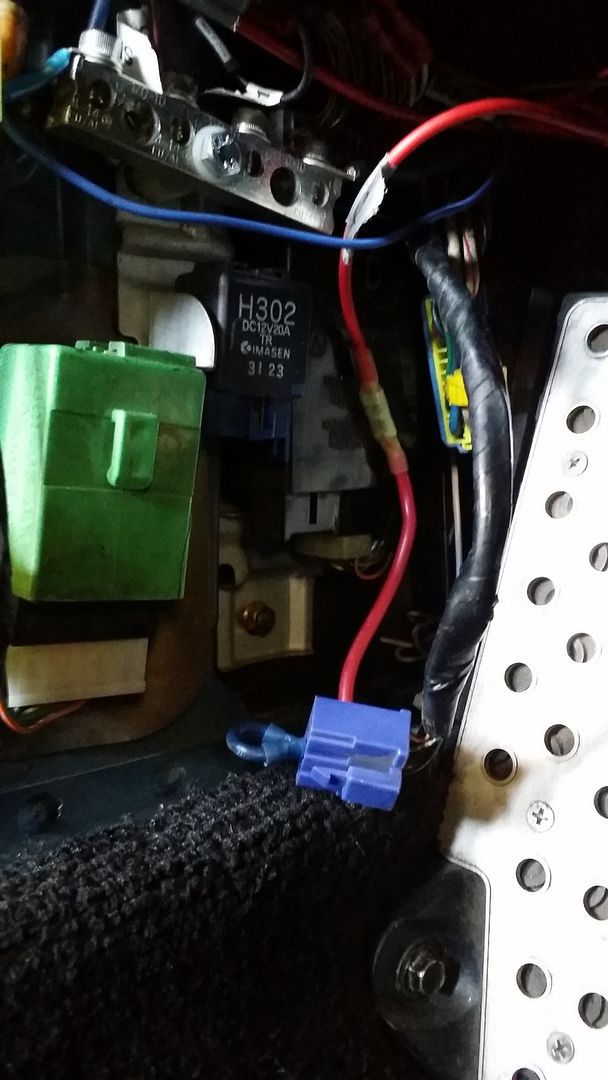
There is a spade connector at the top of the joint box (and fuse box) next to the clutch pedal that gets 12v when the key is turned to accessory. I have several things plugged into that...the 3 water injection breakers, radar detector, stereo, backup camera, radio antenna, all the gauges in the gauge cluster (Speedhut and SPA), and I feel like I'm forgetting a couple things...ALL run off that one spade connector. I have a 10ga wire coming from the connector to a buss bar where I have all the wires screwed into, but that still doesn't account for the fact that so much is run on the spade connector. So whether it fixes the problem or not, I plan to use the fuel pump rewire schematic and use either one or two relays and run battery power to those relays and have that spade connector just switch the relay. That way those things still get 12v accessory power but they're drawing power directly from the battery. I was planning on just using one relay, but if I do that I'd want to run a 4ga wire from the battery to the relay and I'm not sure it would be good for the relay OR that I'd find a solderless spade connector that would accommodate such a large wire. So if I do two relays I'll just use 10ga wire from the battery to each relay and from each relay to the buss bar, then smaller wire from the joint box spade connector to each relay since it's just used for switching.
What do you guys think? I'm going to unplug the current 10ga wire and try cranking first to see if it fixes the problem. Then I'll probably use a multimeter and do some testing to make sure the battery cable isn't grounding to chassis and make sure the starter is getting 12v, and I might jump the starter to see how it cranks there.
-
speedjunkie
- Senior Member
- Posts: 5365
- Joined: Wed Jan 02, 2008 9:14
- Location: Colorado Springs
- Contact:
Re: Build thread
Here is what it looks like so you guys know what I'm talking about.
Ok, I did some testing.
I unplugged the wire to the spade connector, thus unplugging all of those other components. It still cranked slowly.
I got under the car and jumped the starter. It cranked fast at first so I let off. Then I tried it again and it no longer turned the engine, it just spun the starter.
I got back in the car and tried starting it and at first it would just click several times, then it cranked fast and tried to start the car, but no luck.
I plugged the wire back in just to see, and it cranked slow again.
I unplugged the wire and it cranked fast again.
So I think I'm on the right track at least. I'm still not sure why it cranked slow to begin with after unplugging it though.
Last edited by speedjunkie on Tue May 03, 2016 9:14, edited 1 time in total.
-
$crillaTor
- Senior Member
- Posts: 153
- Joined: Sat Jun 15, 2013 9:14
- Location: Colorado Springs
Re: Build thread
There is a spade connector at the top of the joint box (and fuse box) next to the clutch pedal that gets 12v when the key is turned to accessory. I have several things plugged into that...the 3 water injection breakers, radar detector, stereo, backup camera, radio antenna, all the gauges in the gauge cluster (Speedhut and SPA), and I feel like I'm forgetting a couple things...ALL run off that one spade connector. I have a 10ga wire coming from the connector to a buss bar where I have all the wires screwed into, but that still doesn't account for the fact that so much is run on the spade connector. So whether it fixes the problem or not, I plan to use the fuel pump rewire schematic and use either one or two relays and run battery power to those relays and have that spade connector just switch the relay. That way those things still get 12v accessory power but they're drawing power directly from the battery. I was planning on just using one relay, but if I do that I'd want to run a 4ga wire from the battery to the relay and I'm not sure it would be good for the relay OR that I'd find a solderless spade connector that would accommodate such a large wire. So if I do two relays I'll just use 10ga wire from the battery to each relay and from each relay to the buss bar, then smaller wire from the joint box spade connector to each relay since it's just used for switching.
This sounds like a solid plan. I was going to suggest what you already did, bypass everything and go right to the starter with some jumper cables. Since that fixed the issue (sort of) that definitely points to something funky in the electrical wiring. If you had all of that coming off of that one 12v accessory power, that could be the problem area. I'd have to dig into the wiring schematics of how the starter actually gets its power though to determine if that 12v ACC spot that you're tapping would have any affect on the starter. Regardless, with all the stuff you have hooked up to that, it would probably be smart to make a completely new ACC feed for those components to isolate them from whatever else that current ACC line is used for.
I wonder how hard it would be to just re-wire the starter circuit. I'll bust out the manual and take a look.
Dumb question: If it is somehow NOT an electrical issue... Are you confident that the starter is mounted correctly? If it isn't aligned just right, I could see how the shaft of the starter is binding a bit from being too tight where the driver gear meets the flywheel causing the starter to not crank right. I'm not sure that is even possible on our cars. If I remember correctly there isn't really a way that could NOT be aligned. (Seeing how when you ran power directly to the starter though and it turned the motor over fast, I doubt this is the issue.)
-
speedjunkie
- Senior Member
- Posts: 5365
- Joined: Wed Jan 02, 2008 9:14
- Location: Colorado Springs
- Contact:
Re: Build thread
Yeah that's why I did it, I figured if it worked at the starter that would tell me the problem lies somewhere before that, and considering how much I already have running on that circuit and how much I just added, that would be the prime suspect. I might need to look into rewiring the whole starter circuit like you said. That would certainly help.
Yeah the starter is pretty much impossible to misalign. It centers into the hole using the front housing of the starter and doesn't really have any play.
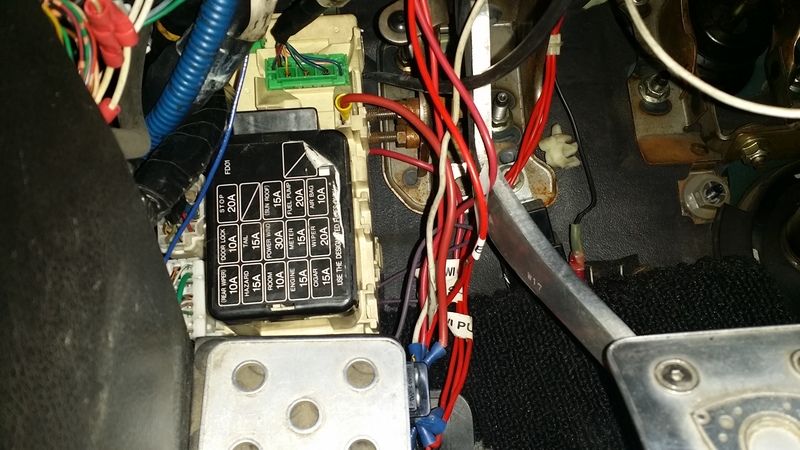
I pulled the two extra relays on the fuel pump wiring, along with all the wiring that's no longer needed. I think I'm just going to use these two for that 12v ACC circuit, although these are larger than most relays so I'm going to have a hard time finding a place to mount them.
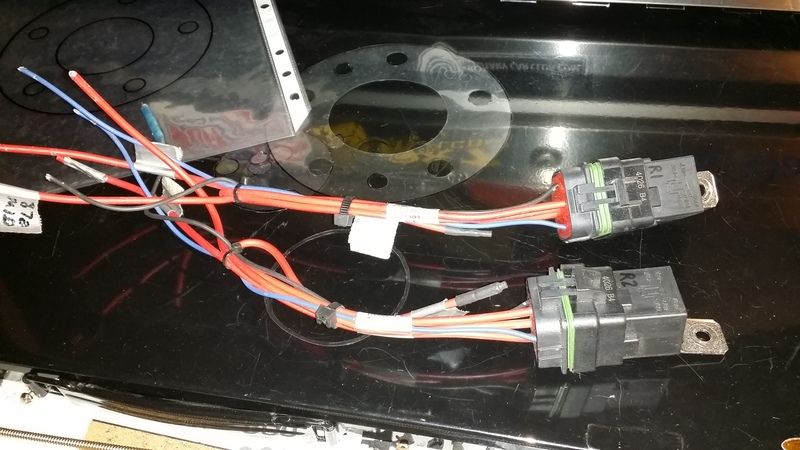
I got a couple page protectors to use for the barrier between the hub and rotor and I cut one out tonight. I got all the holes cut and it fit pretty well. And then I realized with the temps my brakes will see these will probably melt lol. So I don't think I'm going to use these things now.
I bought a dual USB charging port on Amazon earlier today. I'm going to put this in the airbag hole with everything else so I can have a port right there to keep the iPad plugged in and also charge my phone and keep it out of the way. I like this port because it stops charging when the battery is full.
http://www.amazon.com/Mictuning-Univers ... ailpages00
When I first removed that airbag I thought there was no way I'd ever fill up the empty space, but so many of those cables in there were taking a lot of space, so I bound those up and pushed the excess back into the dash, so now just the ends of the cables are showing. That cleared up a lot of space.
I don't remember if I posted about this before but on the front lower control arms, the steel sleeves for the bushings are a little short. This is one of the bushings and sleeves, it's pressed in almost all the way, and as you can see there is some extra space on the other side.
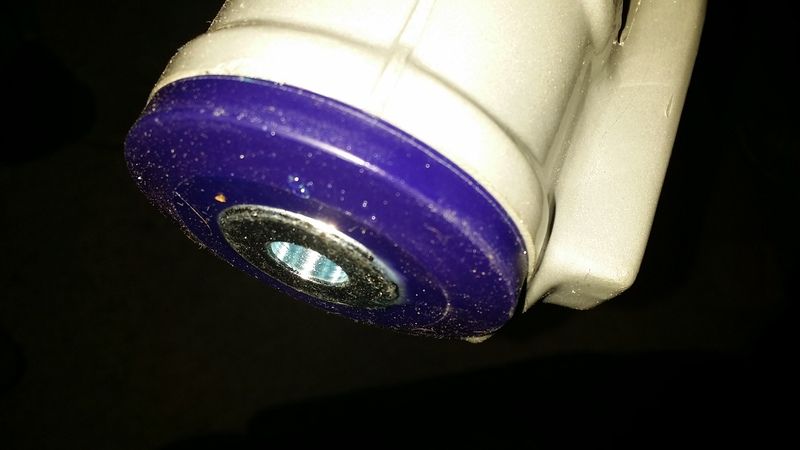

And this is the other bushing and sleeve in the same arm. This one isn't pressed in as far and there is more room left over.
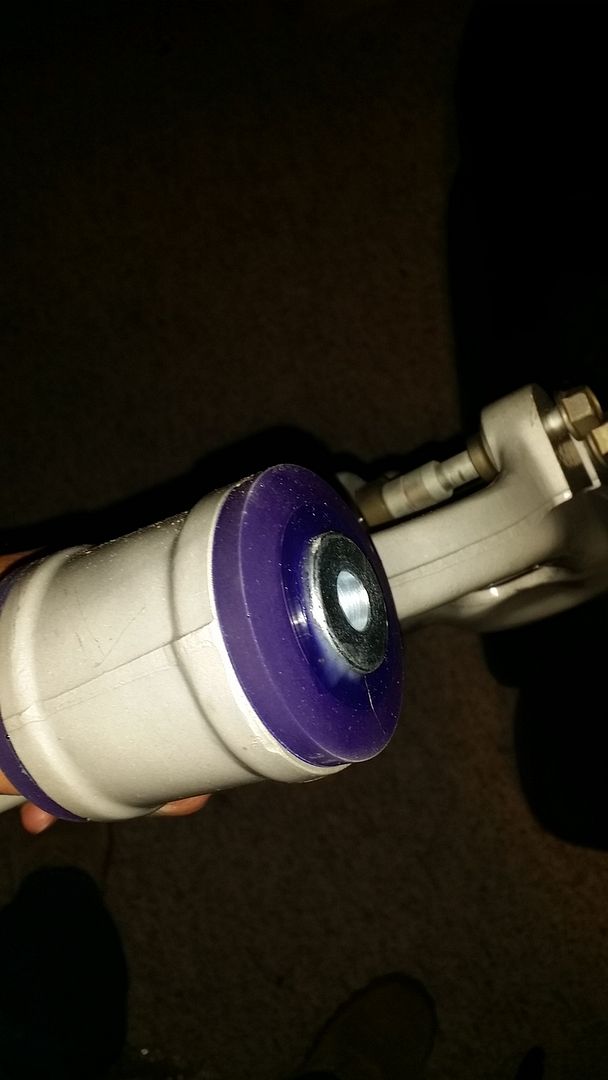
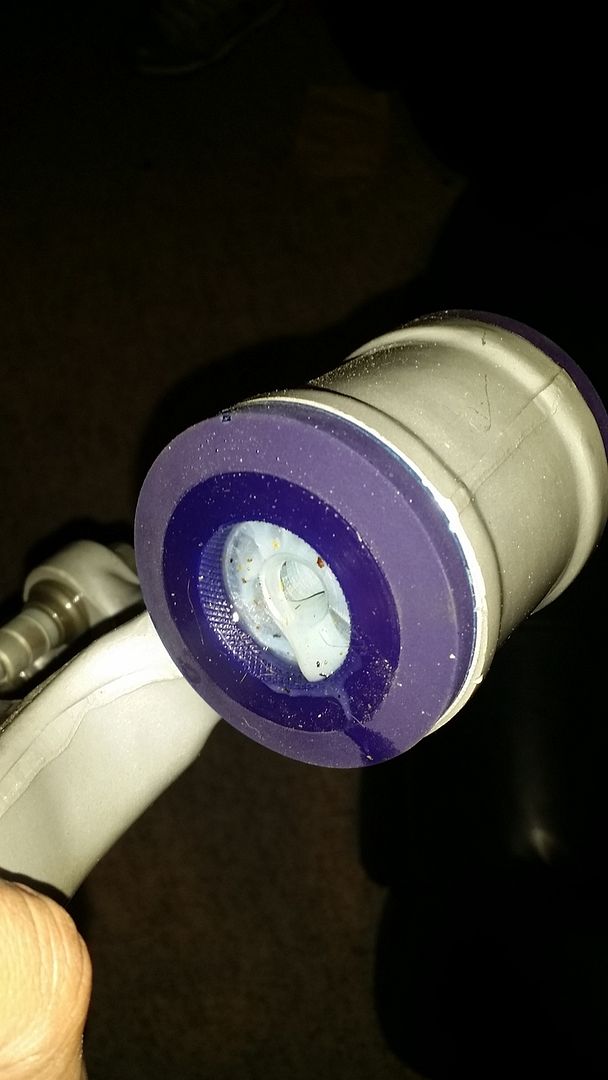
Either way, neither extends all the way to the edge on either side of the bushing and I think the old ones did. If I have to I'll reuse the old sleeves, but I'd rather not. I emailed Juan of J-Auto where I got the bushings, and I also messaged him on 7club and facebook. I have yet to hear back.
I think the mica is coming in tomorrow, and hopefully the cargo cover hinges also. I'm going to call Basic Machine tomorrow and see if he has looked at it yet. And I'm going to get some brake rotor screws and probably start working on the accessory circuit.
Yeah the starter is pretty much impossible to misalign. It centers into the hole using the front housing of the starter and doesn't really have any play.
I pulled the two extra relays on the fuel pump wiring, along with all the wiring that's no longer needed. I think I'm just going to use these two for that 12v ACC circuit, although these are larger than most relays so I'm going to have a hard time finding a place to mount them.

I got a couple page protectors to use for the barrier between the hub and rotor and I cut one out tonight. I got all the holes cut and it fit pretty well. And then I realized with the temps my brakes will see these will probably melt lol. So I don't think I'm going to use these things now.

I bought a dual USB charging port on Amazon earlier today. I'm going to put this in the airbag hole with everything else so I can have a port right there to keep the iPad plugged in and also charge my phone and keep it out of the way. I like this port because it stops charging when the battery is full.
http://www.amazon.com/Mictuning-Univers ... ailpages00
When I first removed that airbag I thought there was no way I'd ever fill up the empty space, but so many of those cables in there were taking a lot of space, so I bound those up and pushed the excess back into the dash, so now just the ends of the cables are showing. That cleared up a lot of space.
I don't remember if I posted about this before but on the front lower control arms, the steel sleeves for the bushings are a little short. This is one of the bushings and sleeves, it's pressed in almost all the way, and as you can see there is some extra space on the other side.


And this is the other bushing and sleeve in the same arm. This one isn't pressed in as far and there is more room left over.


Either way, neither extends all the way to the edge on either side of the bushing and I think the old ones did. If I have to I'll reuse the old sleeves, but I'd rather not. I emailed Juan of J-Auto where I got the bushings, and I also messaged him on 7club and facebook. I have yet to hear back.
I think the mica is coming in tomorrow, and hopefully the cargo cover hinges also. I'm going to call Basic Machine tomorrow and see if he has looked at it yet. And I'm going to get some brake rotor screws and probably start working on the accessory circuit.
-
RX-7 Chris
- Posts: 7800
- Joined: Tue Oct 02, 2007 9:14
- Location: Colorado Springs
- Contact:
Re: Build thread
I can stop by Friday after work and help with the starting problem. I get off work at 11:30.
1984 RX-7 GSL-SE [size=84]My restomod project[/SIZE]
1964 Ford Galaxie 500XL flat black w/ white interior, 2 dr fastback, 390 thunderbird, C6 auto, 2500 rpm high stall converter, shift kit, AC, Holley 750 cfm
[size=100]RIP 1983 RX-7[/SIZE]
My Car Blog
-
speedjunkie
- Senior Member
- Posts: 5365
- Joined: Wed Jan 02, 2008 9:14
- Location: Colorado Springs
- Contact:
Re: Build thread
Ok thanks! I'll keep posting progress or lack of progress through the week lol. I have an open house at a local company on Friday that I need to be at but it's all day so I'll just go in the morning.
-
speedjunkie
- Senior Member
- Posts: 5365
- Joined: Wed Jan 02, 2008 9:14
- Location: Colorado Springs
- Contact:
Re: Build thread
I got the mica sheets and the cargo cover hinges today. First off, the 1/8" mica sheet is a bit overkill lol. It's super thick, I can definitely see using it if my dump tubes were pointed directly at the LIM lol. The other piece isn't quite as flexible as I thought, and I thought both of these pieces had adhesive on one side but now I'm not so sure. I might do some testing with the heat gun to see just how much difference there is between the two regarding effectiveness.
I talked to Gary at Basic Machine today and he said he couldn't make the cargo cover hinges. But he did refer me to Integrity Manufacturing and they have a 5 axis machine. WOOHOO! So I stopped there and he said he'd give me price quotes for different quantities. I also mentioned the wheel faces and told him I'd email him the file for those. So with any luck I might still be able to do these 3pc wheels.
I installed the hinges and cargo cover, and I've been noticing that my hatch moves toward the passenger side when it meets the latch so I tried to adjust it but it turns out there isn't much adjusting to it, if any at all. Then I ended up installing the relay and wiring for the 12v accessories issue. It worked and the car usually tries to crank normally. I still get the clicking and slow crank occasionally though.

I talked to Brad today and he mentioned the starter relay too. Mine had been bypassed already, as seen in the pic below. But I plugged it back in and got the same results. So I'm not sure when it was bypassed, who did it, or why. I think I'm really looking at a full starting system rewire.
One thing I hadn't thought of before was that I removed an old viper alarm that came on the car when I bought it. Some of the associated wiring was rough after I removed it. Maybe that has something to do with my issues.
I talked to Gary at Basic Machine today and he said he couldn't make the cargo cover hinges. But he did refer me to Integrity Manufacturing and they have a 5 axis machine. WOOHOO! So I stopped there and he said he'd give me price quotes for different quantities. I also mentioned the wheel faces and told him I'd email him the file for those. So with any luck I might still be able to do these 3pc wheels.
I installed the hinges and cargo cover, and I've been noticing that my hatch moves toward the passenger side when it meets the latch so I tried to adjust it but it turns out there isn't much adjusting to it, if any at all. Then I ended up installing the relay and wiring for the 12v accessories issue. It worked and the car usually tries to crank normally. I still get the clicking and slow crank occasionally though.

I talked to Brad today and he mentioned the starter relay too. Mine had been bypassed already, as seen in the pic below. But I plugged it back in and got the same results. So I'm not sure when it was bypassed, who did it, or why. I think I'm really looking at a full starting system rewire.

One thing I hadn't thought of before was that I removed an old viper alarm that came on the car when I bought it. Some of the associated wiring was rough after I removed it. Maybe that has something to do with my issues.
-
speedjunkie
- Senior Member
- Posts: 5365
- Joined: Wed Jan 02, 2008 9:14
- Location: Colorado Springs
- Contact:
Re: Build thread
I went back out and worked on the car last night lol. I swapped the spark plugs for 9s so I'd be ready to attempt starting it again today. If it doesn't start I think I'm going to either get some fuel additive our new fuel.
For some reason one of the studs for the intake elbow kept giving me problems ever since I started using this TB. It would always mess up the threads on the nut even though I kept using the tap and die to clean up the threads. After closer inspection last night I realized the threads were pretty much gone and rethreading didn't leave enough material each time to keep them from messing up again. So I swapped it out for an extra stud I had. It's funny how fixing something so insignificant can feel so good lol.
For some reason one of the studs for the intake elbow kept giving me problems ever since I started using this TB. It would always mess up the threads on the nut even though I kept using the tap and die to clean up the threads. After closer inspection last night I realized the threads were pretty much gone and rethreading didn't leave enough material each time to keep them from messing up again. So I swapped it out for an extra stud I had. It's funny how fixing something so insignificant can feel so good lol.
-
speedjunkie
- Senior Member
- Posts: 5365
- Joined: Wed Jan 02, 2008 9:14
- Location: Colorado Springs
- Contact:
Re: Build thread
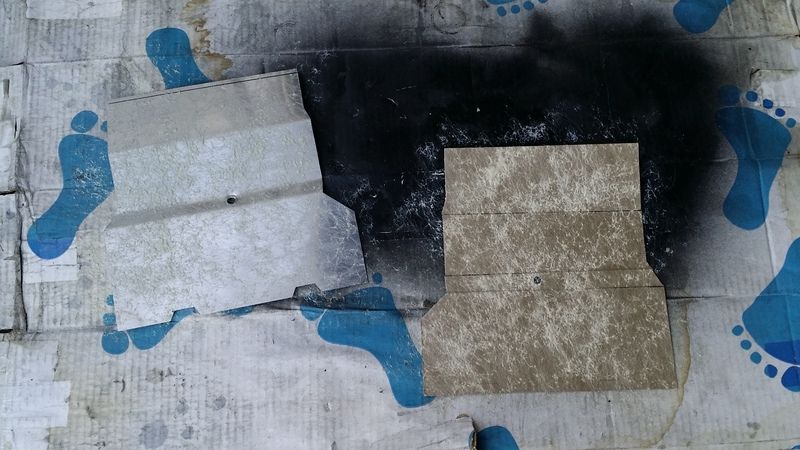
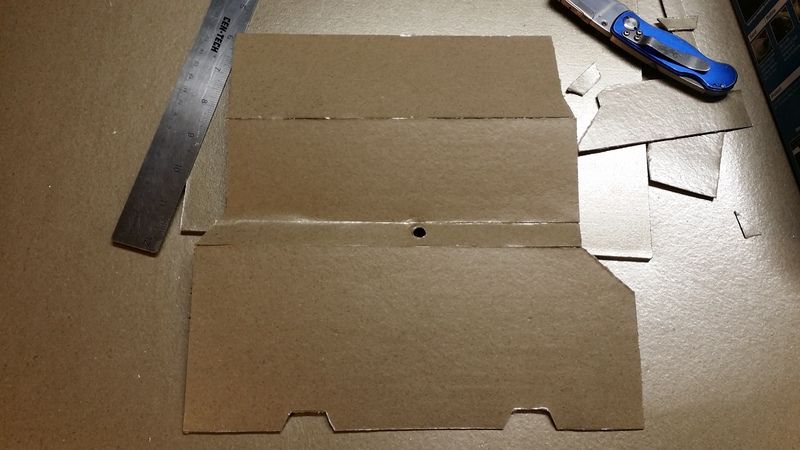
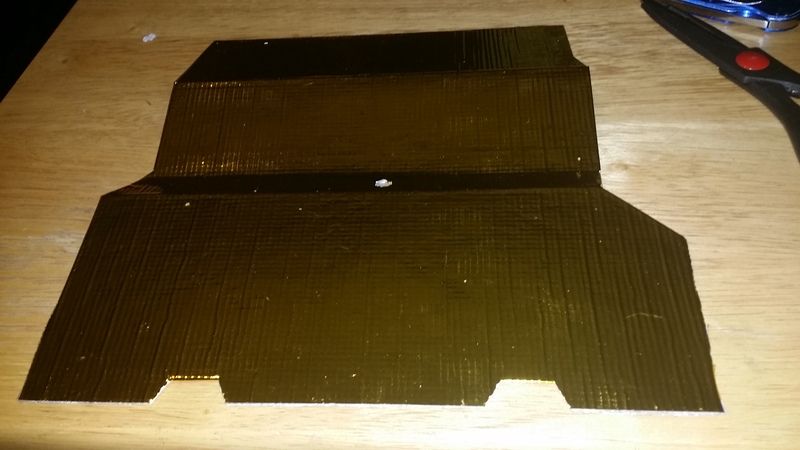
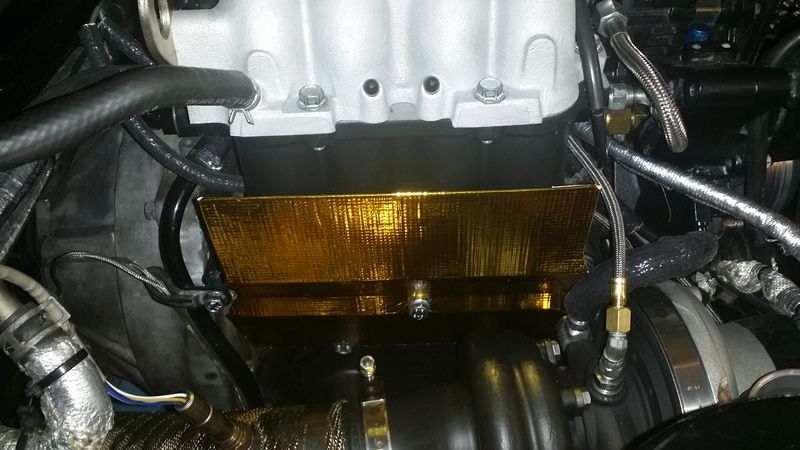
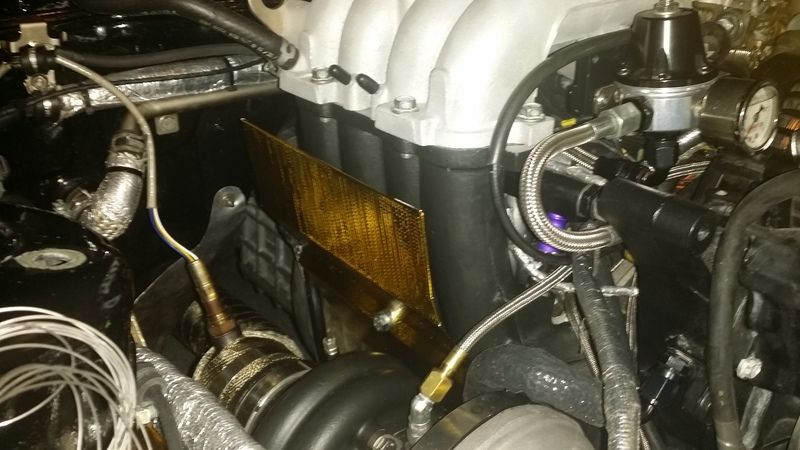
I finished the heat shield tonight. I used the thinner mica sheet and it didn't have adhesive backing like I thought so I used 3M Adhesive 90. Because it wasn't great looking and because I wasn't sure how the adhesive would hold when hot, and also for additional heat resistance, I covered the mica with gold reflective barrier. It looks really good now.
After some deliberation I decided to put the OMP tank in a different place. I was going to put it just above the turbo which would be good for gravity feeding the pump and I wouldn't need to use a baffle inside, but there isn't really enough room for the drain out the bottom since it's practically sitting on the turbo.
So I'm thinking about putting it sideways on the crossmember. I prefer it out of the way like this and there's plenty of room, but with this location gravity feed isn't as good (although I'm not sure it'll be a problem since my old tank was in about the same place) and I'll need to use a baffle or two.
I tried to start the car again today and still no luck. So I'm going to try additive tomorrow and possibly new fuel. Then a tow start I suppose once the car is back on the ground.


After some deliberation I decided to put the OMP tank in a different place. I was going to put it just above the turbo which would be good for gravity feeding the pump and I wouldn't need to use a baffle inside, but there isn't really enough room for the drain out the bottom since it's practically sitting on the turbo.

So I'm thinking about putting it sideways on the crossmember. I prefer it out of the way like this and there's plenty of room, but with this location gravity feed isn't as good (although I'm not sure it'll be a problem since my old tank was in about the same place) and I'll need to use a baffle or two.

I tried to start the car again today and still no luck. So I'm going to try additive tomorrow and possibly new fuel. Then a tow start I suppose once the car is back on the ground.
-
Saul_Good

- Senior Member
- Posts: 480
- Joined: Sun Jul 22, 2012 9:14
- Location: Cerritos, CA (DW says i can't play here anymore...)
- Contact:
Re: Build thread
Need to have people over to perform the rotary dance. THEN it will start.
When can i get a custom speedjunkie heat mitigation panel?!
When can i get a custom speedjunkie heat mitigation panel?!
Who is online
Users browsing this forum: No registered users and 150 guests