My new car!
-
SecondGenPAt

- Posts: 308
- Joined: Sun Apr 17, 2011 9:14
- Location: Jincheon, South Korea
I was referring to the black intake.manifold that sits next to the turbo, but the ic will heat soak as well. Anything in a rotary engine compartment is going to heat soak. You may not like the look, but building a heat shield for the intake and ic and wrapping it in reflective tape would not be a bad idea. I take it that it's just the angle of the picture and that the front upper crossbeam is straight? If so, are all the brackets from the ic kit bent as they should be?
Hakuna Matata
-
chickenwafer
- Posts: 2515
- Joined: Wed Mar 11, 2009 9:14
- Location: Greeley
Anything in just about ANY engine compartment will heat soak haha. Not much I can do about the LIM or UIM haha, just Mazda's design. It works, the heat soak shouldn't be much of a big deal. I originally planned on wrapping the LIM in that reflective gold stuff but I decided against it as I believe the gains would be negligible. There are some heat barriers I can get, and I plan on looking into them eventually.
Yes, the upper cross beam appears pretty straight. Not sure if everything in the kit is bent as it's supposed to be, I've never seen the kit before. But, in the pictures they have on-line, everything look kosher. I'm slightly worried because the previous owner did mention the car was in a slight accident a long time ago, but I was told in the passenger side rear of the car or somewhere in that area...gasp, maybe he wasn't honest...ugh.
So I tried to assemble some -10AN hose for the first time tonight. I've done -4AN and -6AN before plenty of times with no issues. But this -10AN hose kicked my ### haha!!
After struggling for 45 minutes or so I finally found out the trick, use no tape on the hose. I've previously used a small ring of duct or electrical tape around the hose to prevent the braid from fraying, but with -10AN apparently, the trick is not to use any tape because the hose end barb is so aggressive. It would just push the hose out of the socket every time until I stopped using tape.
To make sure everything was legit I used the JEGS AN hose pressure testing kit- comes with -3AN thru -16AN caps with one end drilled and tapped with a valve stem. Simply put a plug in one end and the valve stem cap in the other and use a tire chuck to fill it with air. I pressure tested the hose to 100psi without issue so I think I'm good to go!

-
speedjunkie

- Senior Member
- Posts: 5337
- Joined: Wed Jan 02, 2008 9:14
- Location: Colorado Springs
- Contact:
chickenwafer wrote:Yeah, hard to tell if my car is messed up or the parts aren't done right.
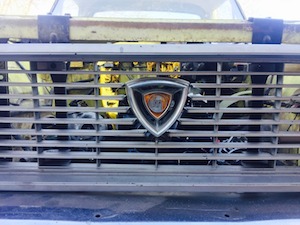
Yeah, it's a Godspeed IC haha. I'm going to fab a piece of sheet metal to cover the name and call it a duct haha. But really, it's a cheap v-mount kit so I don't expect a Garrett or HKS core or anything. I don't think it makes a huge difference, people make over 500rwhp on those knock-off GReddy FMIC's all the time.
I was messing with you lol. We were joking about them being Godspeed ICs when we were up there haha.
I doubt there is anything structurally wrong with your car. It's probably just a defect with the kit itself.
I also might run a "splitter" made of aluminum in-between the radiator and intercooler to prevent heat from radiating up to the intercooler. I'll see how my IAT's are first.
I doubt you'll need that splitter. There isn't much radiant heat having an effect on the IC. The day we went for the long drive a couple weeks ago, my water temps were in the 150s and my IATs were around 9*C, and my oil temps were around 120s/130s. All those temps are ridiculously low haha. Granted it's winter time, but that was one of the warmer days.
Also, those splitters are more used for directing air to either the IC or the radiator, if they're adjustable anyway, which is what I'm planning on doing. Well, I don't really NEED ducting, but it's cool LOL.
SecondGenPAt wrote:I was referring to the black intake.manifold that sits next to the turbo, but the ic will heat soak as well. Anything in a rotary engine compartment is going to heat soak. You may not like the look, but building a heat shield for the intake and ic and wrapping it in reflective tape would not be a bad idea. I take it that it's just the angle of the picture and that the front upper crossbeam is straight? If so, are all the brackets from the ic kit bent as they should be?
The LIM is always being heatsoaked. There aren't many things we can do to help that. There are blankets to put on the LIM but they are insane expensive and sometimes can't even be found. Also, after hearing about more turbine housings cracking these days, I wouldn't want to run a blanket on there either. I'm going to do the gold reflective stuff on mine actually. Mine is currently black as well, but it's ceramic coated to try to help as much as possible.
VMIC on our car aren't heat soaked all that bad. Most of our heat is right there at the turbo and doesn't seem to do much to the IC. What kind of heat shield are you talking about for the IC anyway?
Also, his front crossmember looks fine.

-
chickenwafer
- Posts: 2515
- Joined: Wed Mar 11, 2009 9:14
- Location: Greeley
So I ordered my RE-Speed aluminum oil filler neck on February 20th and it still hasn't shown up yet, so I fired off an email to RE-Speed to see what's up. Luckily they replied quickly, but they informed me the tubing was back ordered but has since shipped so it should be arriving any day and they will fab my oil neck and ship it out ASAP. That's nice, but I would have loved a heads up from them after I ordered the neck.
I also got a new belt since the belt Pineapple shipped me was too short, it was 43.5" 5 rib. So I picked up a 42" belt and it fit great, a little tight but not bad. So got that installed and tensioned up, then spun the engine a few times and it still sounds good, squooshing out the exhaust ports haha. Also picked up a K&N oil filter.
I also attempted to remove the OEM fuel filter. I was really dreading this one, but I was kind of trying to reverse-physiology myself into thinking it would be worse than it really is....nope, it was even worse! I CAN'T believe Mazda put a filter that needs regular servicing in that location (above the differential). I can't get to the two 10mm bolts that hold the filter in place, but I was able to get one of the two hose clamps off, like a boss!! Haha, hopefully Eric can help with that when he's up here on Sunday (pretty pretty please?? haha).
Finally, I modified the stock undertray to fit the Defined v-mount. It took a lot of work but now it fits alright. It's not perfect, I think I would need a custom aluminum undertray to make it fit perfectly. I plan on getting one made eventually.
A guy on the national 7club forums also posted something that has me really worried. He used the Pineapple Racing medium street porting templates (same I used) on an engine he ported and built. It ran fine to 100 miles or whatever but then it just died.
Upon tear down the side seals had been broken, trashing the side irons in the process. Apparently, his diagnosis is the larger port extended into the side seal track, causing it to be too unsupported as it scissors over the port, so it falls in and breaks or gets clipped. Another person reported they had the same issue in the thread. Apparently an engine builder from Lucky7 Racing (a rotary shop) confirmed the issue.
This has me worried, but, I also know a bunch of Pineapple porting templates have been sold, and ran, in many, many engines. I'm not sure if he ported the irons incorrectly, how much safety margin there is in the template, or what. I guess we will see if this is an issue with my engine.
I would be really, really, surprised if Pineapple sells this porting template that just doesn't work. They've been selling it for a while now, so I'm rather confident it would have come to light there are issues with the template by now. Plus, I know of engines that run this porting template. Hopefully everything works out for me though, haha.

-
speedjunkie
- Senior Member
- Posts: 5337
- Joined: Wed Jan 02, 2008 9:14
- Location: Colorado Springs
- Contact:
-
speedjunkie
- Senior Member
- Posts: 5337
- Joined: Wed Jan 02, 2008 9:14
- Location: Colorado Springs
- Contact:
LOL actually I never removed my original fuel filter, it's still up there. All I did was remove the lines and route them down to where I put the new filter. I'd love to modify my subframe so I can hard mount the filter there though. Right now I just have a bicycle innertube that I split down the middle wrapped around the filter and then held to the subframe by two hose clamps.
You didn't pay for fast shipping for that filler neck, did you? I ordered some stuff like that for my old car one time. Paid for fast shipping, two weeks later still didn't have it. I called them and they said "oh it's on back order, do you want us to just ship it when we get it?" Um, how about GET BENT! CALL someone when that happens jackass.
Only time will tell on the engine. You might be alright though. Maybe it was a bad batch they sent out and you got a good one. We'll know soon enough.
-
chickenwafer
- Posts: 2515
- Joined: Wed Mar 11, 2009 9:14
- Location: Greeley
VRx8 wrote:I think I got lucky with my fuel filter, because I got mine out in less than 15min.
Damn, I should have had you do it for me when you were up here! haha
speedjunkie wrote:Son of a...
ROFL!!
speedjunkie wrote:LOL actually I never removed my original fuel filter, it's still up there. All I did was remove the lines and route them down to where I put the new filter. I'd love to modify my subframe so I can hard mount the filter there though. Right now I just have a bicycle innertube that I split down the middle wrapped around the filter and then held to the subframe by two hose clamps.
You didn't pay for fast shipping for that filler neck, did you? I ordered some stuff like that for my old car one time. Paid for fast shipping, two weeks later still didn't have it. I called them and they said "oh it's on back order, do you want us to just ship it when we get it?" Um, how about GET BENT! CALL someone when that happens jackass.
Only time will tell on the engine. You might be alright though. Maybe it was a bad batch they sent out and you got a good one. We'll know soon enough.
Haha, I actually found something you haven't done yet??!! Amazing. I'll buy you lunch, haha, I just can't get my fat arm (errr, muscular I meant) up there. Technically, the filter doesn't have to come out, I just need to bypass it. I'm running a Russel -6AN fuel filter that's placed up in the engine bay. Although it would be better if the filter comes out.
Also ordered my secondary injectors. I decided to try out some 2000cc Bosch EV14 NGI-2 injectors from Five0Motorsports. The pair is dynamically matched, like ID injectors, but cost about $180 less per pair ($150 per injector vs ID2000's at $240 per injector). They are a saturated, high impedance injector so no resistors required. They can also deliver 2200cc @ 3.0bar so they are right on pair with ID injectors. I'll give em a try, if they don't fit I'll return them and order the ID's haha.
-
speedjunkie
- Senior Member
- Posts: 5337
- Joined: Wed Jan 02, 2008 9:14
- Location: Colorado Springs
- Contact:
Well, technically I never removed the old filter, but I did relocate where it will be lol. And I can't promise we'll get yours out of there either LOL. Are you trying to leave it there or relocate it?
I didn't know there were other kinds of injectors like the IDs. Glad I know this now that I could have saved a bunch of money lol (all while staying with State Farm mind you).
I didn't know there were other kinds of injectors like the IDs. Glad I know this now that I could have saved a bunch of money lol (all while staying with State Farm mind you).
-
chickenwafer
- Posts: 2515
- Joined: Wed Mar 11, 2009 9:14
- Location: Greeley
speedjunkie wrote:Well, technically I never removed the old filter, but I did relocate where it will be lol. And I can't promise we'll get yours out of there either LOL. Are you trying to leave it there or relocate it?
I didn't know there were other kinds of injectors like the IDs. Glad I know this now that I could have saved a bunch of money lol (all while staying with State Farm mind you).
I'm deleting the OEM fuel filter altogether. I have a Russel 6AN aluminum filter that's up in the engine bay I'm running instead, so the OEM fuel filter is gone. So like I said, the OEM filter doesn't have to be removed, just the hoses need to be "looped" or bypassed around it, removing the filter from the fuel stream.
Yeah, I think I posted up some info on the injectors a while back...maybe in your thread or Eduardo's, definitely in mine at some point. I just found out about them less than a year ago. Essentially ID's are re-badged Bosch EV14's that are dynamically flow-matched in sets and then sold with their special adapters/extenders to fit different platforms.
-
speedjunkie
- Senior Member
- Posts: 5337
- Joined: Wed Jan 02, 2008 9:14
- Location: Colorado Springs
- Contact:
-
chickenwafer
- Posts: 2515
- Joined: Wed Mar 11, 2009 9:14
- Location: Greeley
Thanks to Eric!!! He got the fuel filter out and the lines looped so the OEM filter is out of the system!!
I also got some other stuff done on the car, put anti-seize on the plugs and got them installed, spark plug wires, removed some studs for the bracket to hold the A/C and power steering since they're not going in, etc.
I also made a nifty little bracket to hold the oil catch can. It was a task because it seemed like ANY location I found had a problem with something; either the intake piping would hit, a hose end fitting wouldn't clear, or it looked bad. So I finally found a good location down by where I mounted my thermostat and made an aluminum bracket that bolts to the front cover. Now I just need my oil filler neck so I can finish the system.
I also made the fuel feed line to the filter and the return hose for the FPR. So the fuel system is bascially done, except for one issue haha. The LIM spacers I got from KG fit like shit, they didn't bottom out in the LIM so the o-ring on the secondary injector would get past the spacer and then get trapped in the gap between the spacer and the landing in the LIM.
I tried to tap the spacers down more, but they were just too tight and I didn't want to risk damage to the LIM. So I got a blind hole puller and pulled them...except I DID manage to mess up the LIM in the process and it broke a piece of the injector land off. It's just a small piece and with new spacers in there I think it will still provide a positive seal.
Did you tried Eric's manifold? Also I know I ran on to this problem when I was tring to find a place to mount my FRP. Have you check if the FPR clears the secondary fuel rail? I was trying to install mine where you have yours and it didn't clear the secondary rail thats why I had to get the CJ Motorsport FPR bracket.
-
chickenwafer
- Posts: 2515
- Joined: Wed Mar 11, 2009 9:14
- Location: Greeley
Yeah I tried Eric's manifold, it should fit with my turbo, but just barely. It's very tight. I would have to re-clock the turbine housing, but no big deal. I think I'll get him to do a manifold and downpipe for me eventually. I know I'm going to swap turbos down the road here sometime, so I'll probably hold off until then.
Yeah, the FRP clears the secondary rail. It's close, but not bad. I had to shift it over to the driver side slightly to get the return hose on.
I just ordered the CJ Motorsports o-ringed injector sleeves/bosses/spacers whatever you call them. $30 bucks for the pair and $18 to SHIP them??!! That's stupid, they literally can't weigh more than 2oz WITH packing material. Stupid. Ugg
-
speedjunkie
- Senior Member
- Posts: 5337
- Joined: Wed Jan 02, 2008 9:14
- Location: Colorado Springs
- Contact:
Who is online
Users browsing this forum: No registered users and 54 guests