(Hopefully Eduardo doesn't mind me answering this) he has the FFE CAS bracket BUT when he installed it, the car wouldn't idle and sounded like it was running on one rotor or missing bad. I tried changing the map on the PFC but it was running fine before. Eduardo troubleshooted it and swapped in the stock CAS bracket and boom, problem fixed.
So I hope the FFE bracket wasn't the cause, maybe it was a fluke? Who knows. I bought the same bracket so I'm hoping mine works haha.
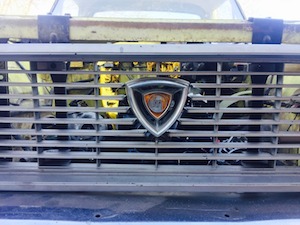
New FD in Town!
-
speedjunkie

- Senior Member
- Posts: 5359
- Joined: Wed Jan 02, 2008 9:14
- Location: Colorado Springs
- Contact:
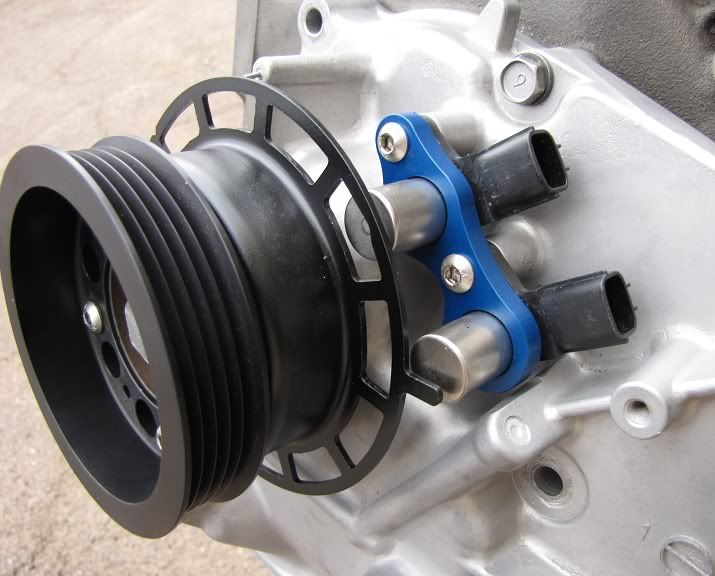
I can't see why the bracket would be a problem. Maybe it changes the distance between the sensors and the wheel or something. That's about all I can think of. The type of material shouldn't matter, I wouldn't think anyway. Maybe there was a problem with the wiring or something when he hooked it up with that bracket, and it was right again with the stock bracket? Were the connectors on the right sensors? Etc. I wonder if anyone else has had this problem. It looks good but my stock one works just fine so I'll avoid this haha.

-
chickenwafer
- Posts: 2515
- Joined: Wed Mar 11, 2009 9:14
- Location: Greeley

Yeah that CAS bracket almost gave me a heart attack, the idle was very rough, lots of white smoke coming out, fouling plugs like crazy. At one point I thought I had a bad coolant seal. The installation is pretty straight forward you don't even need to disconnect the sensors. By the way the hardware provided with the bracket are too short.
The 6 1/2 are awesome they are Pioneers. As of right know I only have front speakers nothing on the rear. On the future im planning on installing some 6x9 on the back, not a priority right now tough.
The 6 1/2 are awesome they are Pioneers. As of right know I only have front speakers nothing on the rear. On the future im planning on installing some 6x9 on the back, not a priority right now tough.
-
chickenwafer
- Posts: 2515
- Joined: Wed Mar 11, 2009 9:14
- Location: Greeley
-
speedjunkie
- Senior Member
- Posts: 5359
- Joined: Wed Jan 02, 2008 9:14
- Location: Colorado Springs
- Contact:
He had it flipped so it was showing the other side, which would put the sensors too far out from the edge of the pulley/wheel, basically putting the bottom sensor pretty much out of range of the tab. The holes the sensors go through are offset on the bracket, they aren't centered with the bolt holes, if that makes sense. One edge of the bracket is almost flat with just two small bumps, while the other edge has large bumps...that should be clear enough lol. It's hard to explain over the internet LOL, and it's hard to tell when the tab isn't sticking out over the bottom censor like in the first photo, whereas it is in the photo above. The stock bracket is made so you can't bolt it backwards like that IIRC.
As to what you were saying earlier Dave, the stock bracket is made of metal as well, so the only way I could see the material affecting operation is that this bracket is thicker, and maybe it could have been too close to the end of the sensor? But I'm pretty sure that's not the case after comparing the two photos LOL. I didn't even notice it in the first pic that it was installed incorrectly. Good eye Eduardo!
As for the speakers, that's awesome. I was thinking about putting a small sub in the hatch that would be easily removable and not weight much. I'm still thinking about it. But I definitely want to get those speakers and housings. That's cool. You got them off ebay right? Frank gave me the info one time but I don't have it anymore.
-
chickenwafer
- Posts: 2515
- Joined: Wed Mar 11, 2009 9:14
- Location: Greeley
I get it now. I was never saw how he had it installed so I was wondering if there was a picture haha.
Here ya go for the speakers, Eric: http://car-speaker-adapters.com/items.php?id=SAK068
I plan on overhauling my interior and sound system summer of 2012 as well. I'm waiting until I get my car running first tho haha. Check out what "theorie" is doing in his build thread on 7club. He's using a 7" Android tablet as the headunit for his stereo so it can play movies, listen to music, etc. I think I could use it as a remote monitor for my tuning laptop, too. Pretty cool.

chickenwafer wrote:Here ya go for the speakers, Eric: http://car-speaker-adapters.com/items.php?id=SAK068
Those are the ones I have.
-
speedjunkie
- Senior Member
- Posts: 5359
- Joined: Wed Jan 02, 2008 9:14
- Location: Colorado Springs
- Contact:
chickenwafer wrote:I get it now. I was never saw how he had it installed so I was wondering if there was a picture haha.
Here ya go for the speakers, Eric: http://car-speaker-adapters.com/items.php?id=SAK068
I plan on overhauling my interior and sound system summer of 2012 as well. I'm waiting until I get my car running first tho haha. Check out what "theorie" is doing in his build thread on 7club. He's using a 7" Android tablet as the headunit for his stereo so it can play movies, listen to music, etc. I think I could use it as a remote monitor for my tuning laptop, too. Pretty cool.
Cool, thanks! Yeah I think I might get these and do something with that too when I get back, I just hate taking off my door panels so much haha.
He's using an Android tablet? That's awesome. I'll see if I can find the thread next time my computer lets me access 7club, which is only a portion of the day for some reason haha.
PXRdriFT wrote:Those are the ones I have.
Yeah I knew you gave me the link at some point but I forgot what I did with it haha.
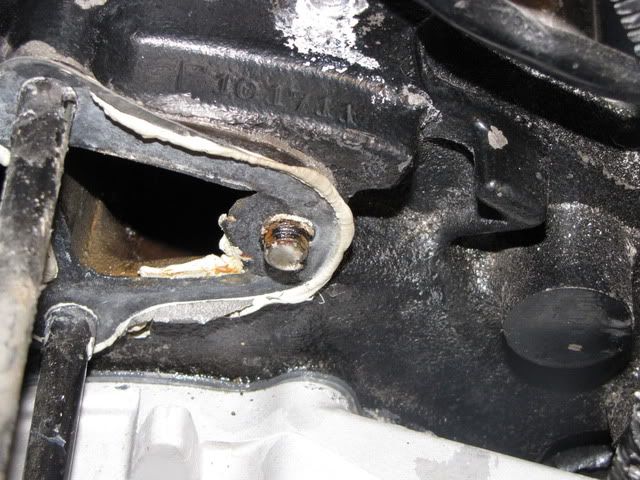
VRx8 wrote:I have the same speaker modules. Here is a picture of the broken bolt...
Fuuuuuuuuuuuuuuuuu....are you going to be able to get that out?
-
speedjunkie
- Senior Member
- Posts: 5359
- Joined: Wed Jan 02, 2008 9:14
- Location: Colorado Springs
- Contact:
Oh sorry. What I meant to say was "dude, that's gonna be cake!" LOL!!!
Seriously though, the only way I've ever done stuff like that is the two-nut method...lol. Putting two nuts on there, tightening them very tight together, and then turning on the one on the inside. But there is clearly not enough room for that. And that's in the plate too. Sheiza.
I've never heard of the Micro GraBit, but it sounds like you're pretty confident so I trust that haha.
-
chickenwafer
- Posts: 2515
- Joined: Wed Mar 11, 2009 9:14
- Location: Greeley
Not to make you feel bad, Eduardo, but those water housing studs were a PITA for me to get out of my front iron. I had to double nut them (like Eric mentioned) and use a good amount of force to get them out. Then they would "pop" out in dramatic fashion, almost like one broke each time haha.
If you can thread two nuts on try that first before damaging anything. Otherwise maybe try a pair of Vise Grips on the stud really good and use a hammer to tap the Vise Grips and rotate it out. Although it sucks, you're lucky it didn't flush.
If you can thread two nuts on try that first before damaging anything. Otherwise maybe try a pair of Vise Grips on the stud really good and use a hammer to tap the Vise Grips and rotate it out. Although it sucks, you're lucky it didn't flush.
Who is online
Users browsing this forum: No registered users and 93 guests