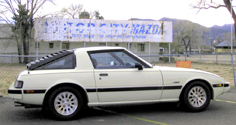
My new car!
-
chickenwafer
- Posts: 2515
- Joined: Wed Mar 11, 2009 9:14
- Location: Greeley
-
7th Heaven

- Member
- Posts: 87
- Joined: Sun Jul 19, 2009 9:14
- Location: Loveland
")
-
chickenwafer
- Posts: 2515
- Joined: Wed Mar 11, 2009 9:14
- Location: Greeley
7th Heaven wrote:Throw in a jz engine and no more rotary problems will exist
JZ rx7 you say? He should just buy yours. (Traitor!)
http://denver.craigslist.org/cto/2503338430.html

[color="Blue"]2008 Subaru Legacy 2.5i PZEV - Current Ride, 100% stock[/color]
[color="Gray"]2005 Mazda 6i Pebble Ash Metallic - Dead[/color]
-
chickenwafer
- Posts: 2515
- Joined: Wed Mar 11, 2009 9:14
- Location: Greeley
So, FINALLY took some time to post these pictures...
Engine bay after the engine was yanked (pre cleaning)

And now, post cleaning (sorry, it's blurry, but you get the idea):

Even got the A/C compressor all new looking:

Then I started tearing down the longblock:

UIM Off (this is why they call it the "rats nest")


Rats nest out:


Engine harness out:


Turbos off:


Brick manifold off:

And the exhaust ports (and also why I'm rebuilding the motor; bad oil control rings, you can see oil sitting on the apex seal in this picture)

I also discovered something funny; apparently this was a professional shops idea of "plugging a hole" You can also see it wasn't very effective.

LIM off (also found a graveyard of misc/dropped nuts, bolts, washers, dirt, etc)

Fully stripped with the clutch off, flywheel lock in, water pump and neck off, and basically ready to be torn down. Only pieces to be removed now are the motor mounts, oil pan, and front hub.

Amazing an engine that small can make 600+rwhp. Awesome.

Final shot; as best as I could capture with the camera of the rotor housings, they appear to be in amazing shape. The flash on the camera doesn't capture them in the best setting but they look great:

Breaking down the motor tomorrow with the help of Matt as possibly Jimmy, so hopefully no bad news to report! And I will post pictures as well.
Engine bay after the engine was yanked (pre cleaning)
And now, post cleaning (sorry, it's blurry, but you get the idea):
Even got the A/C compressor all new looking:
Then I started tearing down the longblock:
UIM Off (this is why they call it the "rats nest")
Rats nest out:
Engine harness out:
Turbos off:
Brick manifold off:
And the exhaust ports (and also why I'm rebuilding the motor; bad oil control rings, you can see oil sitting on the apex seal in this picture)
I also discovered something funny; apparently this was a professional shops idea of "plugging a hole"
You can also see it wasn't very effective.
LIM off (also found a graveyard of misc/dropped nuts, bolts, washers, dirt, etc)
Fully stripped with the clutch off, flywheel lock in, water pump and neck off, and basically ready to be torn down. Only pieces to be removed now are the motor mounts, oil pan, and front hub.
Amazing an engine that small can make 600+rwhp. Awesome.
Final shot; as best as I could capture with the camera of the rotor housings, they appear to be in amazing shape. The flash on the camera doesn't capture them in the best setting but they look great:
Breaking down the motor tomorrow with the help of Matt as possibly Jimmy, so hopefully no bad news to report! And I will post pictures as well.


-
speedjunkie

- Senior Member
- Posts: 5337
- Joined: Wed Jan 02, 2008 9:14
- Location: Colorado Springs
- Contact:
iani1.1 wrote:thats how i plug holes, that or a spark plug LOL.
Ah yes, the spark PLUG...lol.
Actually Dave, that's how a lot of guys cap their coolant nipples, and apparently oil nipples too haha, because the ones you buy from the store will eventually crack. This method is more reliable in the long run. It doesn't look as good, but it will last longer than a vacuum cap.

-
RX-7 Chris
- Posts: 7800
- Joined: Tue Oct 02, 2007 9:14
- Location: Colorado Springs
- Contact:
isn't that the crankcase vent?
1984 RX-7 GSL-SE [size=84]My restomod project[/SIZE]
1964 Ford Galaxie 500XL flat black w/ white interior, 2 dr fastback, 390 thunderbird, C6 auto, 2500 rpm high stall converter, shift kit, AC, Holley 750 cfm
[size=100]RIP 1983 RX-7[/SIZE]
My Car Blog
-
chickenwafer
- Posts: 2515
- Joined: Wed Mar 11, 2009 9:14
- Location: Greeley
speedjunkie wrote:Ah yes, the spark PLUG...lol.
Actually Dave, that's how a lot of guys cap their coolant nipples, and apparently oil nipples too haha, because the ones you buy from the store will eventually crack. This method is more reliable in the long run. It doesn't look as good, but it will last longer than a vacuum cap.
Yeah I've seen vacuum nipples crack, but I still hate that method because it looks ghetto, and as you can see, it leaked oil.
My preferred method, when possible, is heat up the nipple and pull it out (most are just pressed in) and then run a tap in the metal for 1/8" NTP and then smear some JB Weld on a same thread allen cap screw. This creates a permanent, long lasting, leak proof, and clean fix. This is what I'm doing for deleting the AST and the throttle body coolant circuit- removing all nipples and threading in flush allen caps.
If it isn't possible to remove the nipple or it's running into a surface that can't easily be tapped, I would use a Viton vacuum cap and pump it with some JB weld. Again, much cleaner.
But yeah, I've seen that method before, I just think it looks half assed.
RX-7 Chris wrote:isn't that the crankcase vent?
Yes, I believe it is.
-
RX-7 Chris
- Posts: 7800
- Joined: Tue Oct 02, 2007 9:14
- Location: Colorado Springs
- Contact:
Why would someone block the crankcase vent? Usually not a good thing.
1984 RX-7 GSL-SE [size=84]My restomod project[/SIZE]
1964 Ford Galaxie 500XL flat black w/ white interior, 2 dr fastback, 390 thunderbird, C6 auto, 2500 rpm high stall converter, shift kit, AC, Holley 750 cfm
[size=100]RIP 1983 RX-7[/SIZE]
My Car Blog
-
chickenwafer
- Posts: 2515
- Joined: Wed Mar 11, 2009 9:14
- Location: Greeley
Matt (Alpha) came over today and gave me a hand breaking the motor down.
I was dreading removing the 2 1/8" flywheel nut, but it actually wasn't bad. Air compressor up to 130psi on the regulator, impact gun on the socket, and about 10 seconds later the nut came flying off. Sweet, no problem.
Then I had to remove the front hub bolt. On the FD the torque spec is 200ft-lbs. Felt more like 500ft-lbs. With a 4ft breaker bar and all my weight (285lbs) with Matt holding the motor, it wouldn't bust loose. Heated up the hub with MAP gas and froze the bolt with ice. Nothing. Unleashed the impact on it for minutes on end. No dice.
Matt finally broke it loose with a 6ft breaker bar and all his weight. I was soooo relieved.
Anyway, onto pictures!
Flipped the motor over and removed the motor mounts and brackets. Also, oil and coolant leaked from every single possible orifice spilling on my garage floor. I went through about 15 rags cleaning everything up.

You can see how much silicone sealant was caked around the pan. That's good, but too bad the company that rebuilt the motor previously used a gasket...the OEM gasket is too stiff and doesn't flex, so it will leak.
Anyways, thanks to all the silicone, I had to use a putty knife to break the seal:

Oil pan off:

Then I used a razor blade and a cooper brush to clean the mating surface of the oil pan:

Flipped motor around, front cover off:

Matt and I then removed all the front drive accessories including the bearings, oil pump and oil pump drive, etc. I forgot to take any pictures of this.
Motor flipped once again to the rear to begin removing tension bolts:

All tension bolts out:

Rear plate off:

Everything looks pretty damn good!

Rear housing off. Rotor is pretty carboned, but nothing some cleaning won't fix:

Rear housing, looks damn good!


Rear rotor off, leaving all it's seals in place:

Rear rotor:

I was dreading removing the 2 1/8" flywheel nut, but it actually wasn't bad. Air compressor up to 130psi on the regulator, impact gun on the socket, and about 10 seconds later the nut came flying off. Sweet, no problem.
Then I had to remove the front hub bolt. On the FD the torque spec is 200ft-lbs. Felt more like 500ft-lbs. With a 4ft breaker bar and all my weight (285lbs) with Matt holding the motor, it wouldn't bust loose. Heated up the hub with MAP gas and froze the bolt with ice. Nothing. Unleashed the impact on it for minutes on end. No dice.
Matt finally broke it loose with a 6ft breaker bar and all his weight. I was soooo relieved.
Anyway, onto pictures!
Flipped the motor over and removed the motor mounts and brackets. Also, oil and coolant leaked from every single possible orifice spilling on my garage floor. I went through about 15 rags cleaning everything up.
You can see how much silicone sealant was caked around the pan. That's good, but too bad the company that rebuilt the motor previously used a gasket...the OEM gasket is too stiff and doesn't flex, so it will leak.
Anyways, thanks to all the silicone, I had to use a putty knife to break the seal:
Oil pan off:
Then I used a razor blade and a cooper brush to clean the mating surface of the oil pan:
Flipped motor around, front cover off:
Matt and I then removed all the front drive accessories including the bearings, oil pump and oil pump drive, etc. I forgot to take any pictures of this.
Motor flipped once again to the rear to begin removing tension bolts:
All tension bolts out:
Rear plate off:
Everything looks pretty damn good!
Rear housing off. Rotor is pretty carboned, but nothing some cleaning won't fix:
Rear housing, looks damn good!
Rear rotor off, leaving all it's seals in place:
Rear rotor:
-
chickenwafer
- Posts: 2515
- Joined: Wed Mar 11, 2009 9:14
- Location: Greeley
Center plate and e-shaft out, showing the front rotor:


E-Shaft, looks good but will be spec'ed:


Front housing off:


And the front rotor:

All the seals out:

Close up the factory 3-piece apex seals:

Apex seals (and actually ALL seals) are in GREAT shape:


Anyways, that's all the pictures for now. Overall, I'm VERY happy with how everything looks. I didn't find a concrete answer on why the motor was burning oil; the oil control rings all looked good and still very pliable.
The motor teardown isn't for not, however, as we did find at least one cooked inner coolant o-ring that was leaking slightly. But the housings, plates, rotors, bearings, e-shaft, and everything I planned on re-using look great (pending measurements) so I do think this will be a reasonable rebuild.
E-Shaft, looks good but will be spec'ed:
Front housing off:
And the front rotor:
All the seals out:
Close up the factory 3-piece apex seals:
Apex seals (and actually ALL seals) are in GREAT shape:
Anyways, that's all the pictures for now. Overall, I'm VERY happy with how everything looks. I didn't find a concrete answer on why the motor was burning oil; the oil control rings all looked good and still very pliable.
The motor teardown isn't for not, however, as we did find at least one cooked inner coolant o-ring that was leaking slightly. But the housings, plates, rotors, bearings, e-shaft, and everything I planned on re-using look great (pending measurements) so I do think this will be a reasonable rebuild.

-
chickenwafer
- Posts: 2515
- Joined: Wed Mar 11, 2009 9:14
- Location: Greeley
^It's really that easy? I was all worried I was going to have to grab a copper wheel for my bench grinder and spend 5 days cleaning them. Thanks for the tip!
Eduardo, did you change your phone number? I sent you a text the other day and never heard back, just wanted to make sure i had the right number.
Eduardo, did you change your phone number? I sent you a text the other day and never heard back, just wanted to make sure i had the right number.
Who is online
Users browsing this forum: Google [Bot] and 54 guests