Build thread
Re: Build thread
My recommendation is to run 0 gauge directly from the negative battery post to the engine block. On my large displacement, high compression motor, zero gauge made a world of a difference.
-
RX-7 Chris
- Posts: 7800
- Joined: Tue Oct 02, 2007 9:14
- Location: Colorado Springs
- Contact:
Re: Build thread
FDEEZ wrote:My recommendation is to run 0 gauge directly from the negative battery post to the engine block. On my large displacement, high compression motor, zero gauge made a world of a difference.
Than one from the motor to the body. Also make sure all the other ones in the wire loom are grounded well (under the dash, etc.)
Also make sure the starter has a good clean mounting between the starter and the motor. It actually grounds through the body of the starter. That is usually why a lot of cars have the ground cable bolted to the starter bolt.
1984 RX-7 GSL-SE [size=84]My restomod project[/SIZE]
1964 Ford Galaxie 500XL flat black w/ white interior, 2 dr fastback, 390 thunderbird, C6 auto, 2500 rpm high stall converter, shift kit, AC, Holley 750 cfm
[size=100]RIP 1983 RX-7[/SIZE]
My Car Blog
-
speedjunkie

- Senior Member
- Posts: 5357
- Joined: Wed Jan 02, 2008 9:14
- Location: Colorado Springs
- Contact:
Re: Build thread
Shadowden wrote:What size cable did you run from the battery to the starter? Just thinking that if you have a longer run than stock, then you will lose more power if you didn't upsize the cable. That whole V/r=i thing.
I always figured a quality ground was a quality ground. Definately curious as to what resolves the cranking issue for you.
I used 4ga welding cable, and I picked up 10ft again today to make more grounds. I am running much longer cable than stock, and I never thought about that being an issue. However, when I first did the relocation I ran it from the hatch to where the battery is mounted stock, which is easily twice as long as it is now, and I didn't have any issues then. And I think I used 4ga back then too.
FDs are notoriously bad when it comes to grounds. I haven't had any issues before though, so we'll see. Honestly, this doesn't seem to be much of an issue anymore, but I'd still like to get it figured out so that it NEVER happens again.
RX-7 Chris wrote:I don't see why you would need all that grounding. It isn't really going to need that much more cranking power than my car and it is running 4 ga cables. A single set of 2 ga cables should be enough. Where the problem usually happens is the grounding connections. Clean the connections really well and use dielectric grease.
I did sand down the connections that I'll be using behind the quarter panel. I didn't sand down in the engine bay, but I did run a tap through the threads on the grounding points in the bay and figured that would be enough since it will ground through the threads. Maybe that's an issue though. Eh, either way I'll give it a shot and see if it works.
FDEEZ wrote:My recommendation is to run 0 gauge directly from the negative battery post to the engine block. On my large displacement, high compression motor, zero gauge made a world of a difference.
If these extra grounds don't work, I might look into that. I'm not crazy about trying to put that gauge wire in haha. I already installed one ground from the battery to the transmission, just because I didn't have enough to run to the engine block and I didn't want to get too crazy with it at the time.
RX-7 Chris wrote:Than one from the motor to the body. Also make sure all the other ones in the wire loom are grounded well (under the dash, etc.)
Also make sure the starter has a good clean mounting between the starter and the motor. It actually grounds through the body of the starter. That is usually why a lot of cars have the ground cable bolted to the starter bolt.
I guess the ones in the dash loom are grounded well, although you can start the car without the dash even installed, so I doubt it's anything in that harness. I'll take a look at the starter.
-
speedjunkie
- Senior Member
- Posts: 5357
- Joined: Wed Jan 02, 2008 9:14
- Location: Colorado Springs
- Contact:
Re: Build thread
I've made some good progress in the last couple days but I was finishing working on the car around 1 or later so I was going to bed instead of posting. I'll see if I can remember everything.
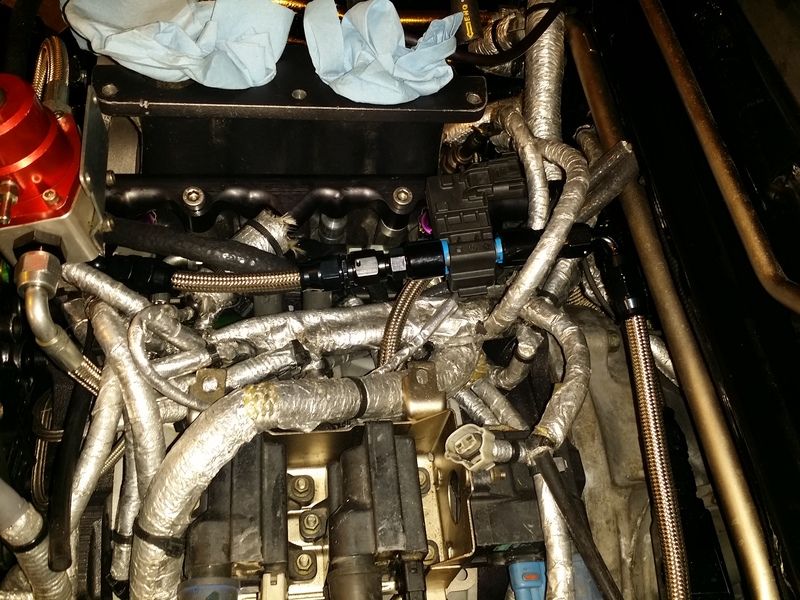
I got the fittings in the mail and remade the return fuel line so I could add the flex fuel sensor.
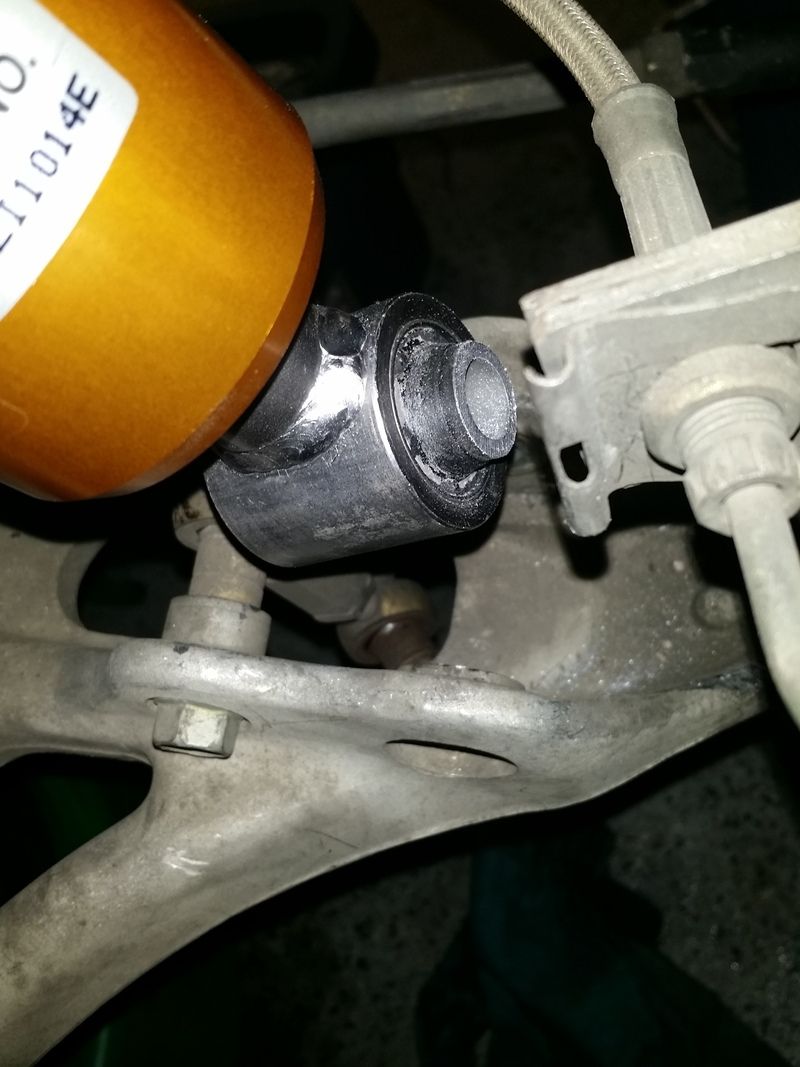
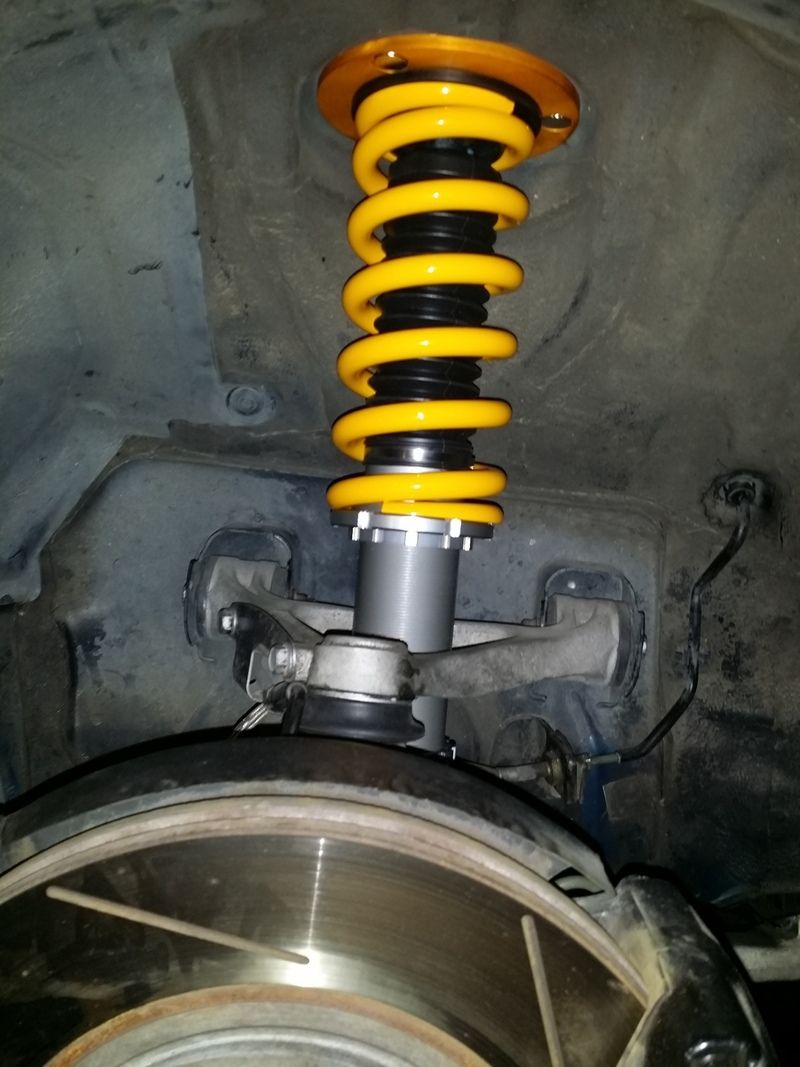
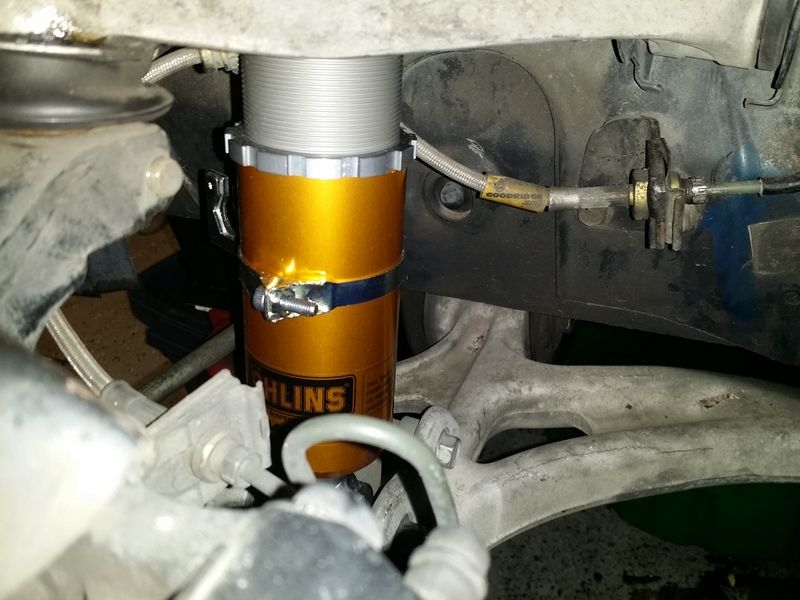
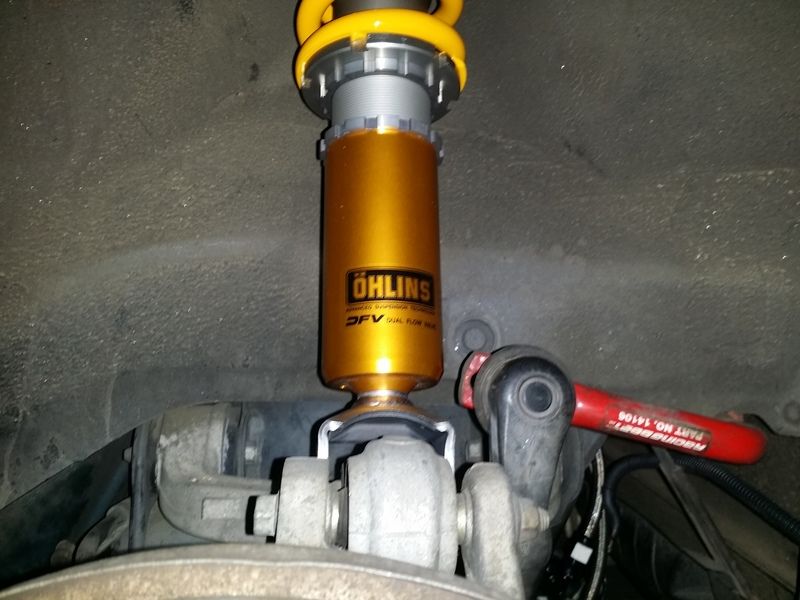
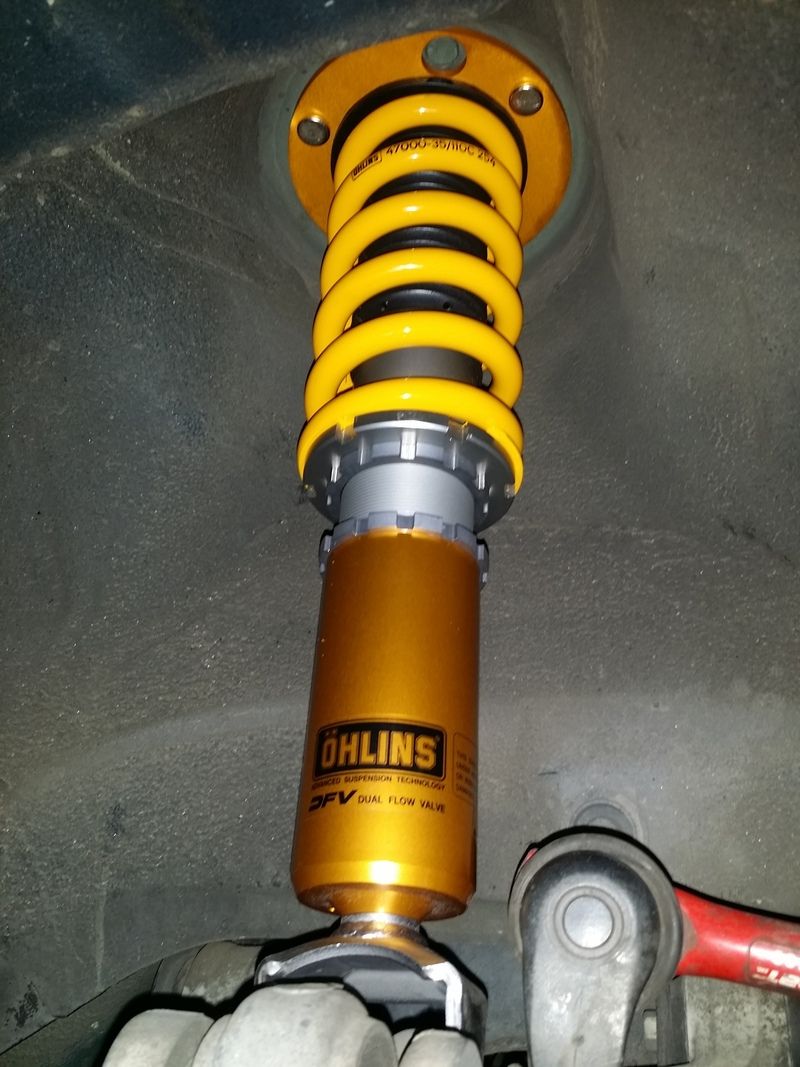
I installed the Ohlins the other night, and Jesse already installed the Stances on his car lol. I had to file down the bottom part of the front coilovers so they would fit in the lower control arms. I also had to flip the brake lines around so I could lock them into the brackets on the coilovers. And I also had the front hats on the rear coils and vice versa, so I had to swap those also before I could install the coilovers.
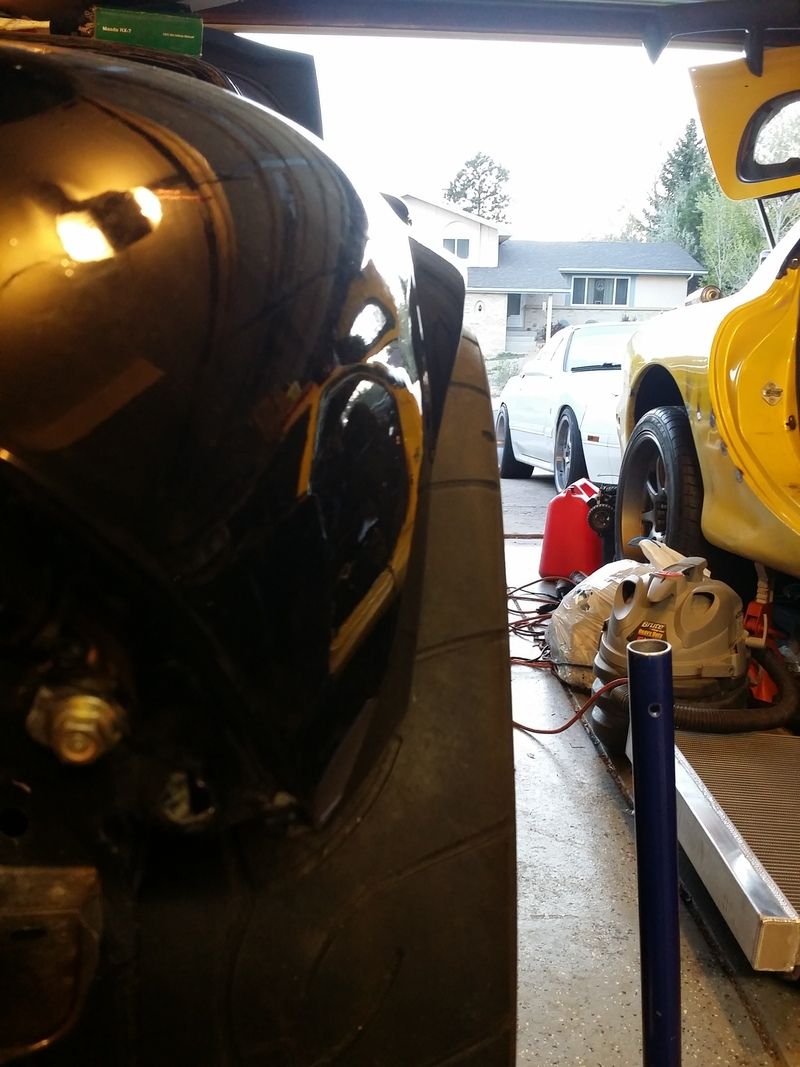
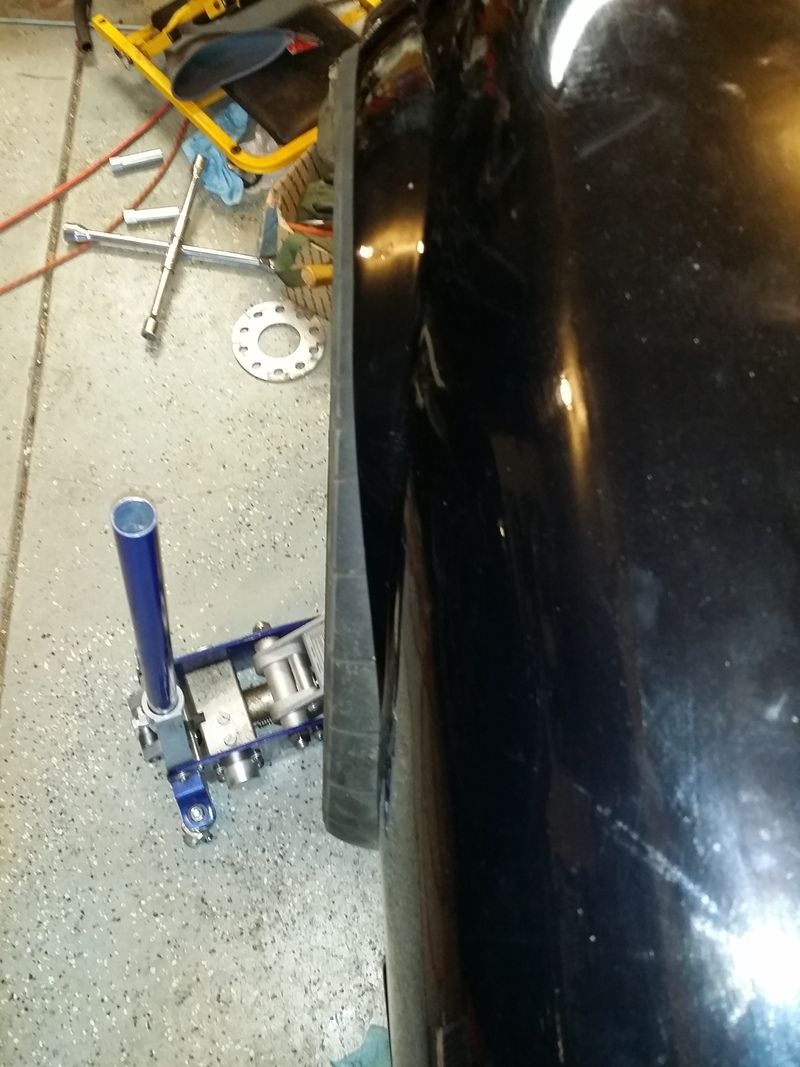
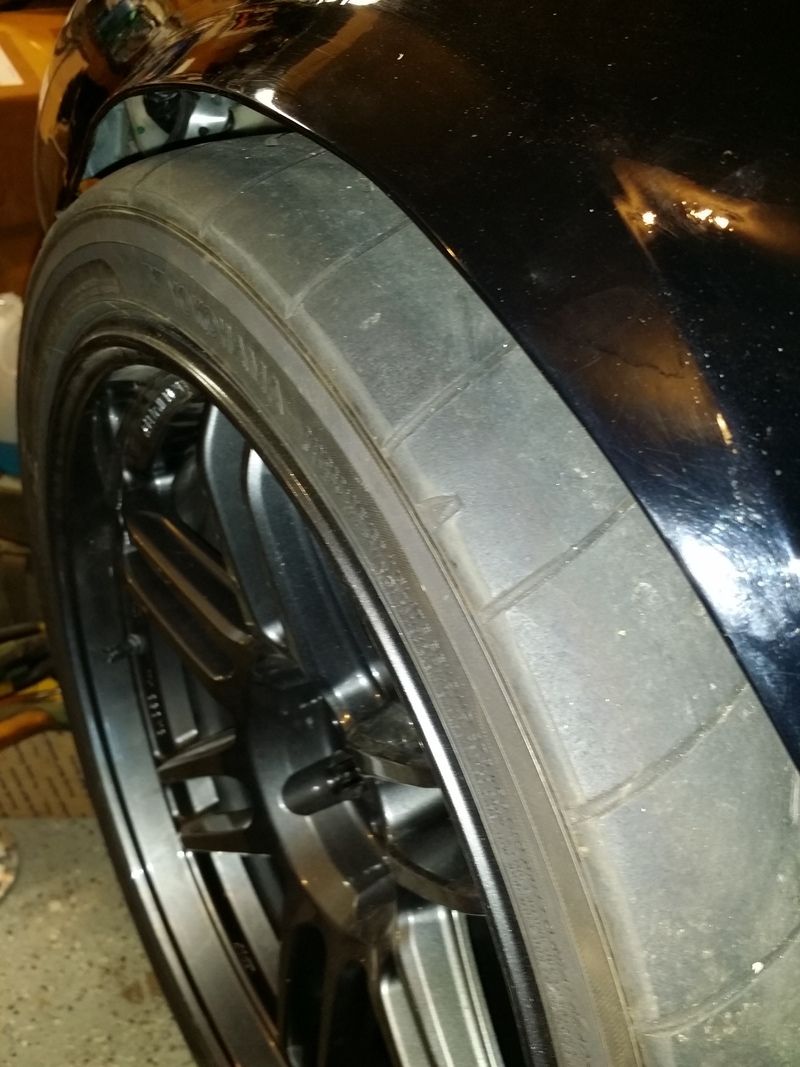
Then I test fit the rear wheels on the front to see if that size and offset would work. It will not lol. It sticks out a little past the fender, but with a slimmer tire it would maybe work. But it still wouldn't work because it hits the frame when I turn the wheel full lock.
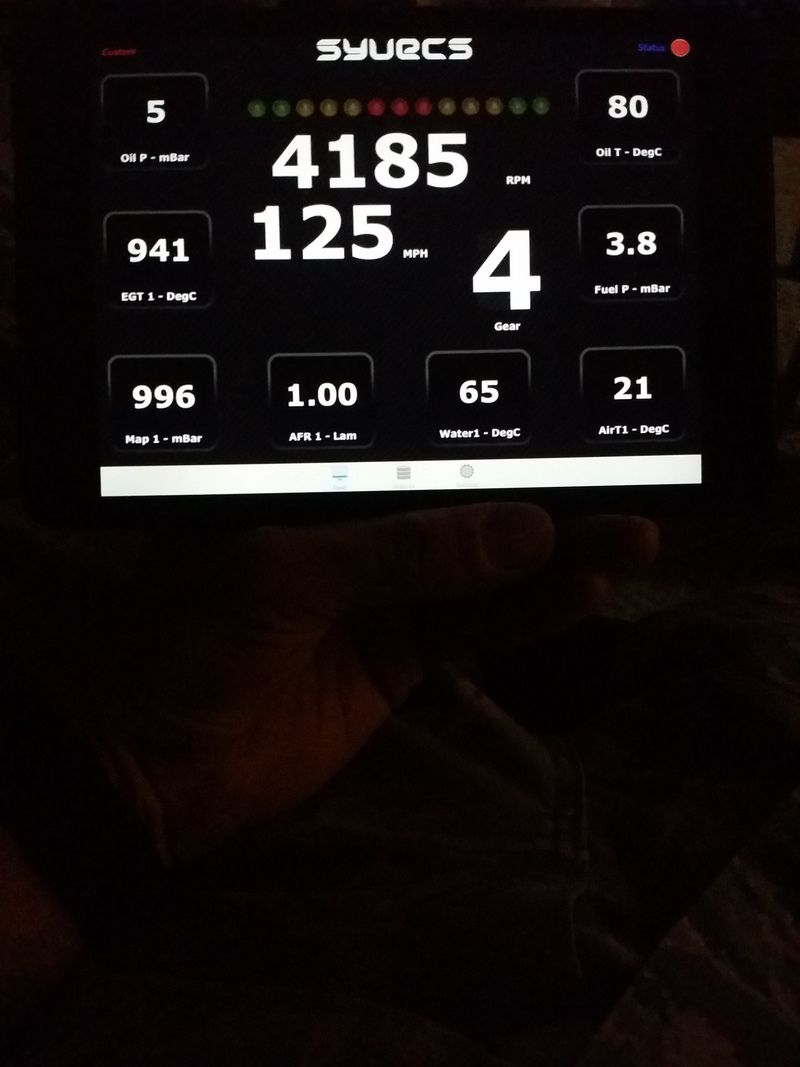
I picked up an iPad mini 2 from someone in town and downloaded the Syvecs app. Although now I'm not sure if I'm going to mount this thing in the dash permanently. Only because I'm not sure how I'd run the headphone cable and power cable to it.
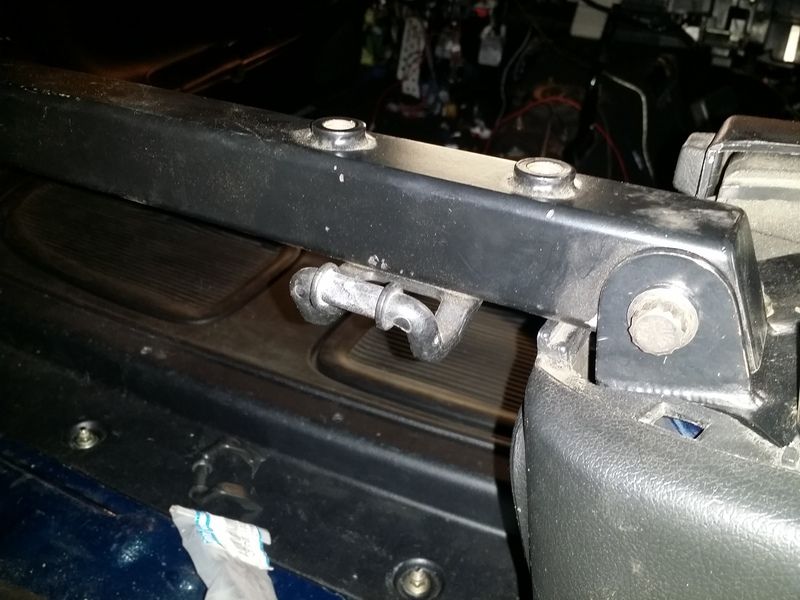
I broke one of these hinges for the rear cargo cover when I was installing the rear strut bar with the new ends (to use with the roll bar), so Jonathan Bruce of Gorilla RE is sending me one.
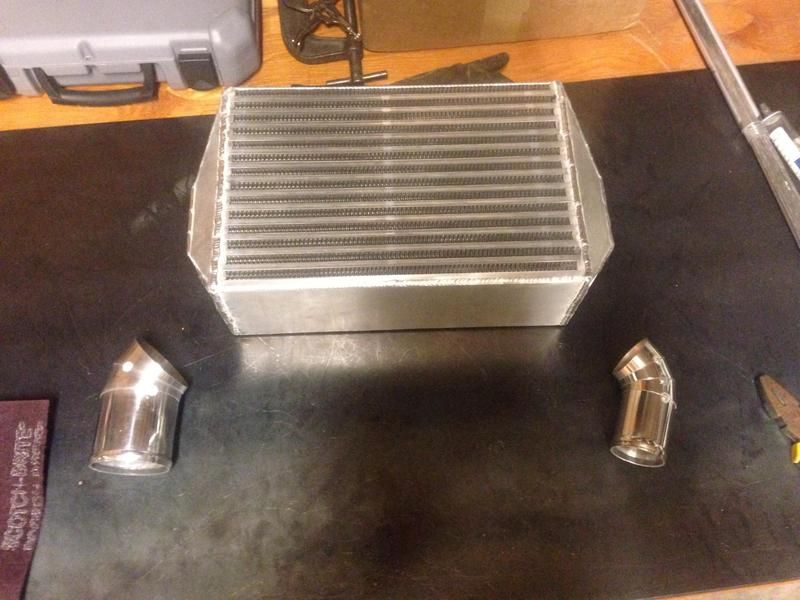
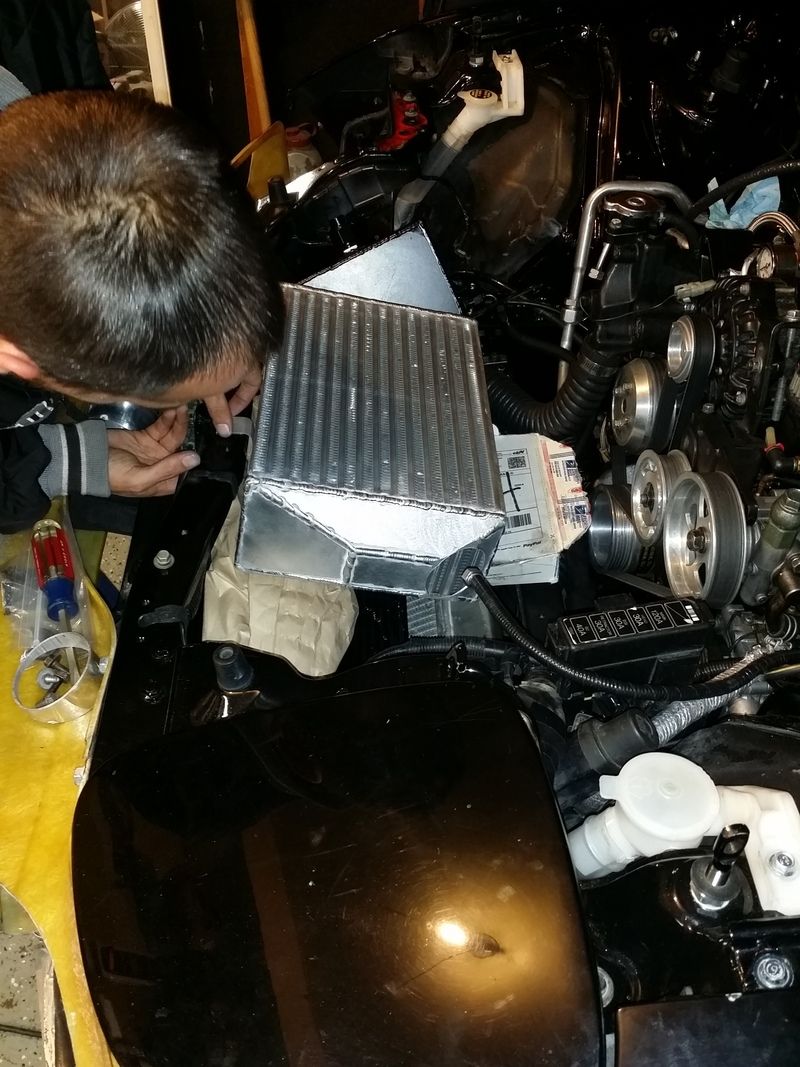
Mitch sent me this pic, then came over tonight to test fit it. He's going to finish welding it up tomorrow after work and bring it by again.

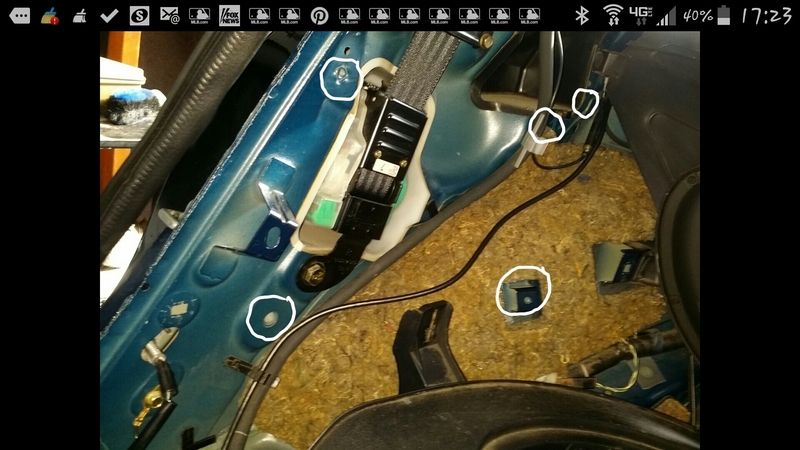
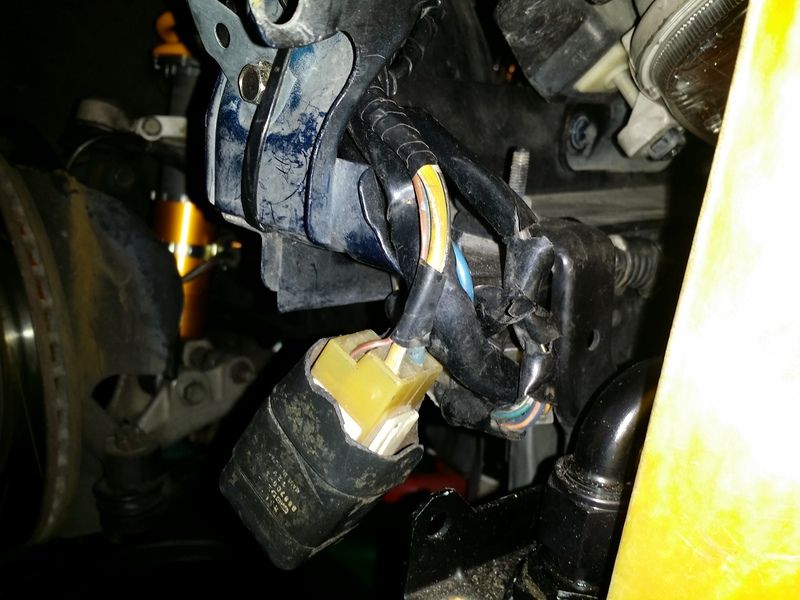
Here are some of the places I'm going to ground the battery. I'm going to use the bottom two circled, along with one that I didn't circle that's in the lower left corner of the pic.
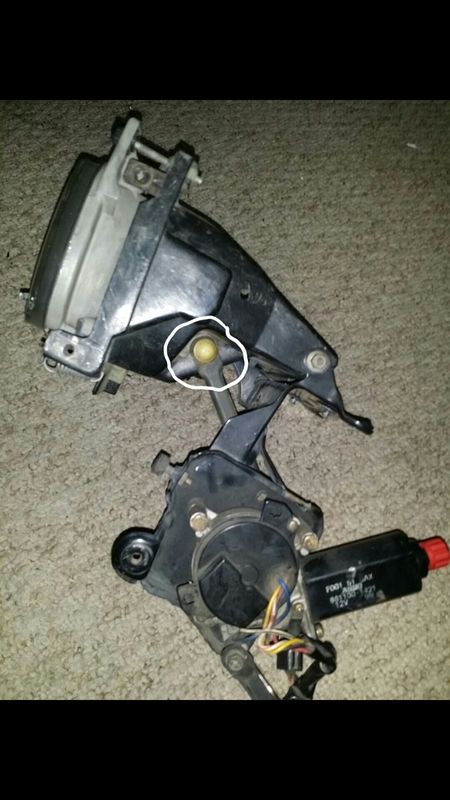
My passenger side headlight wiggles when it's up, and when I was trying to install the cover I noticed it again so I pulled the light and figured out the problem. The white plastic piece is broken, so now I'm on the hunt for another.
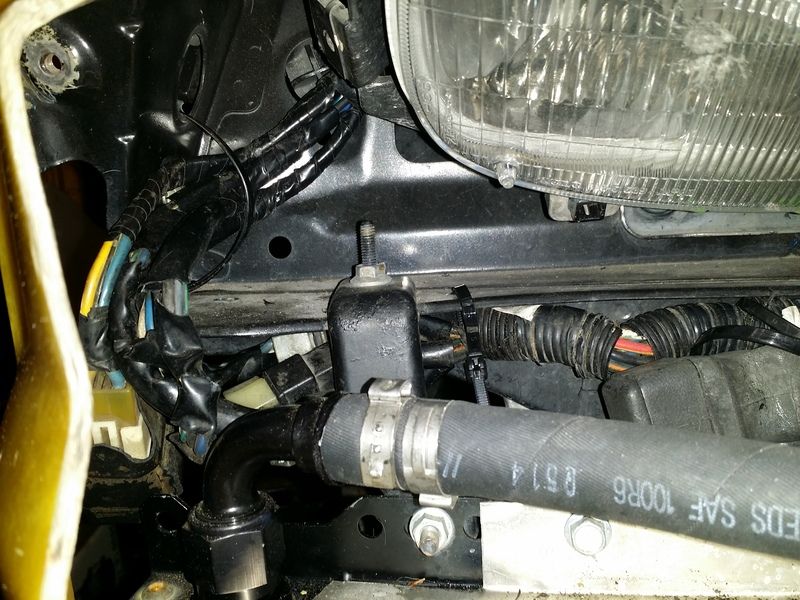
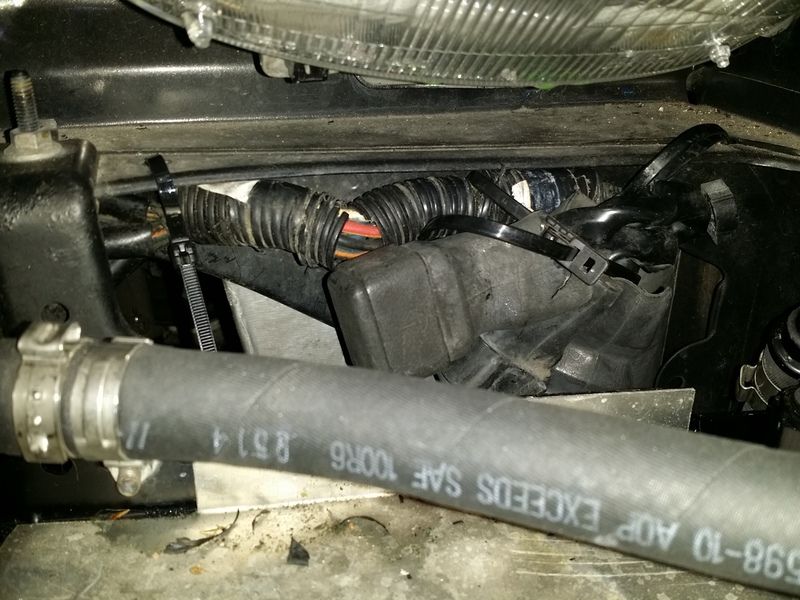
I had to move the fan relays again so I could install the fender, I'm just hoping they won't get too warm being this close to the oil cooler.

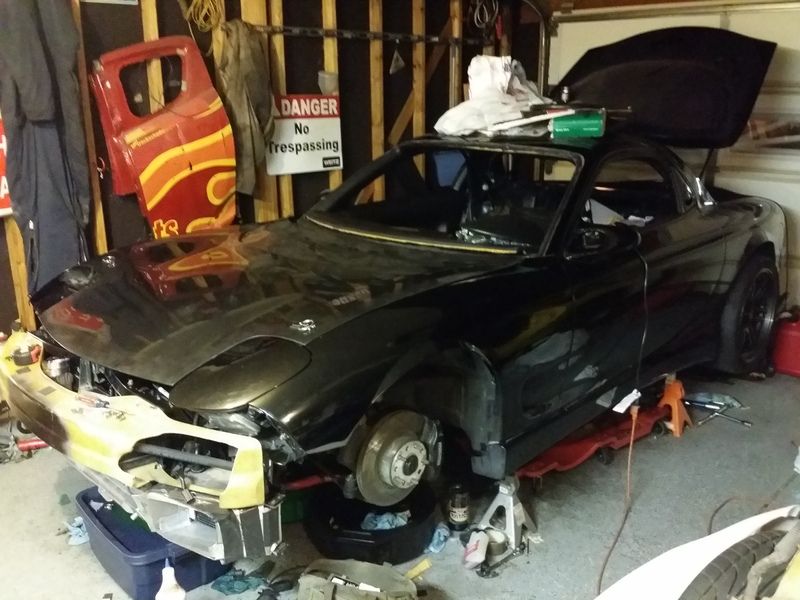
I installed the fenders and one headlight cover last night. Tonight, Jesse came over and we installed the dash and the hood. Here is the progress. It should be back on the ground either tomorrow night or Saturday. I'm going to change the oil before I drop it, then I'll put the front wheels on and away we go.
I got the fittings in the mail and remade the return fuel line so I could add the flex fuel sensor.

I installed the Ohlins the other night, and Jesse already installed the Stances on his car lol. I had to file down the bottom part of the front coilovers so they would fit in the lower control arms. I also had to flip the brake lines around so I could lock them into the brackets on the coilovers. And I also had the front hats on the rear coils and vice versa, so I had to swap those also before I could install the coilovers.


Then I test fit the rear wheels on the front to see if that size and offset would work. It will not lol. It sticks out a little past the fender, but with a slimmer tire it would maybe work. But it still wouldn't work because it hits the frame when I turn the wheel full lock.


I picked up an iPad mini 2 from someone in town and downloaded the Syvecs app. Although now I'm not sure if I'm going to mount this thing in the dash permanently. Only because I'm not sure how I'd run the headphone cable and power cable to it.

I broke one of these hinges for the rear cargo cover when I was installing the rear strut bar with the new ends (to use with the roll bar), so Jonathan Bruce of Gorilla RE is sending me one.

Mitch sent me this pic, then came over tonight to test fit it. He's going to finish welding it up tomorrow after work and bring it by again.


Here are some of the places I'm going to ground the battery. I'm going to use the bottom two circled, along with one that I didn't circle that's in the lower left corner of the pic.

My passenger side headlight wiggles when it's up, and when I was trying to install the cover I noticed it again so I pulled the light and figured out the problem. The white plastic piece is broken, so now I'm on the hunt for another.

I had to move the fan relays again so I could install the fender, I'm just hoping they won't get too warm being this close to the oil cooler.


I installed the fenders and one headlight cover last night. Tonight, Jesse came over and we installed the dash and the hood. Here is the progress. It should be back on the ground either tomorrow night or Saturday. I'm going to change the oil before I drop it, then I'll put the front wheels on and away we go.

Last edited by speedjunkie on Sat Nov 21, 2015 9:14, edited 1 time in total.
-
$crillaTor

- Senior Member
- Posts: 153
- Joined: Sat Jun 15, 2013 9:14
- Location: Colorado Springs
Re: Build thread
I'm pretty sure I saw you at ACE Hardware yesterday sitting in your Pathfinder with the dog talking on your phone. I waved, you looked right at me and decided you have no idea who I was. LOL
-
speedjunkie
- Senior Member
- Posts: 5357
- Joined: Wed Jan 02, 2008 9:14
- Location: Colorado Springs
- Contact:
Re: Build thread
$crillaTor wrote:I'm pretty sure I saw you at ACE Hardware yesterday sitting in your Pathfinder with the dog talking on your phone. I waved, you looked right at me and decided you have no idea who I was. LOL
That was me, and I don't doubt that you saw me and waved, but I don't remember seeing anyone I recognized that waved lol. Sorry. I was probably deep in thought at the time. I was talking to my dad.
I was talking to Andy about you the other day. When are you gonna be back on the road? We gotta roll deep this summer lol.
Re: Build thread
Try not to mount your relay(s) upside down like this. If water collects in there, it can ruin your day...especially if those are your fan relays. You risk overheating the car if the fans don't kick on. Don't ask how I know of this theoretical scenario.
-
speedjunkie
- Senior Member
- Posts: 5357
- Joined: Wed Jan 02, 2008 9:14
- Location: Colorado Springs
- Contact:
Re: Build thread
FDEEZ wrote:
Try not to mount your relay(s) upside down like this. If water collects in there, it can ruin your day...especially if those are your fan relays. You risk overheating the car if the fans don't kick on. Don't ask how I know of this theoretical scenario.
Yeah I'm not a fan of it being mounted like that for that exact reason. I'll put some RTV in there lol. No I'll fix it now or next time I have the fender off.
-
speedjunkie
- Senior Member
- Posts: 5357
- Joined: Wed Jan 02, 2008 9:14
- Location: Colorado Springs
- Contact:
Re: Build thread
Just fixed it lol.
-
$crillaTor
- Senior Member
- Posts: 153
- Joined: Sat Jun 15, 2013 9:14
- Location: Colorado Springs
Re: Build thread
Haha no worries. You looked very busy. Just giving you $h!t.
I've been driving my car with the huge exhaust leak. I just haven't had time to do anything on it. I need to take the exhaust manifold off again and de-warp it, get new gaskets again..., and replace the oil return line on the turbo. This week I've been getting a lot of blue smoke and I'm pretty sure I kinked the oil return from the turbo last time I put it on. Then I just need to do the pillow balls and I'm good to go. Oh yea, and a re-tune after the exhaust leak is fixed.
However, I'm about to be out of pocket until mid-June... BLAH!
-
speedjunkie
- Senior Member
- Posts: 5357
- Joined: Wed Jan 02, 2008 9:14
- Location: Colorado Springs
- Contact:
Re: Build thread
$crillaTor wrote:Haha no worries. You looked very busy. Just giving you $h!t.
I've been driving my car with the huge exhaust leak. I just haven't had time to do anything on it. I need to take the exhaust manifold off again and de-warp it, get new gaskets again..., and replace the oil return line on the turbo. This week I've been getting a lot of blue smoke and I'm pretty sure I kinked the oil return from the turbo last time I put it on. Then I just need to do the pillow balls and I'm good to go. Oh yea, and a re-tune after the exhaust leak is fixed.
However, I'm about to be out of pocket until mid-June... BLAH!
Also, that amount of work sucks when the car is otherwise drivable and you hate to put it down lol.
Out of pocket? Leaving the country, or just the area? For work?
I made the extra ground cables (and broke my vise in the process lol) and installed them, then installed the rear quarter and a couple other interior pieces. The only reason I haven't fully installed the interior is because of the issue with the iPad. The rest of the interior is kinda hinging on that. I installed the front wheels and took care of a few smaller things and then put the car back on the ground. It seems like it's so low now lol.
Here is the vise. I guess I'll go get another one tomorrow.

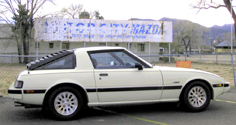
And the car. BWAHAHAHAHA

Rick is coming by to put in the new windshield tomorrow, and Mitch is coming over to finish up the IC. I'm really hurting for an oil reservoir too, but I'm trying to make the current one work because he's going to run out of time while doing the piping.
-
speedjunkie
- Senior Member
- Posts: 5357
- Joined: Wed Jan 02, 2008 9:14
- Location: Colorado Springs
- Contact:
Re: Build thread
I dropped off the car with Chris Ludwig today. He said he doesn't have the ECU because I guess Life Racing had an issue, so therefore Syvecs did too. He said he's going to take this week to install the injectors, crank trigger, and whatever else. He's hoping to get the ECU by the end of this week and do the wiring next weekend.
The other day I decided to just install the iPad later, or just work on getting a CarPC or something put together and use the iPad in the mean time. I rented a trailer from UHaul for $700 (a bunch of BS) on Wednesday and Jesse came over and he and I and Zico loaded the car that night, then I took it over to Mitch's house so he could finish up the IC piping, I was there until 130am and then got home and installed them and got to bed around 345 Thursday morning, so I ended up sticking around and leaving for home Friday morning instead. I think I'm going to see if Mom or someone can drive one of the cars back to CO with me and I'll just get them a plane ticket. Unless one of you wants to come here and drive back with me lol. I'll buy your plane ticket. I'd much rather that than pay freakin $700 for a trailer again. And I don't believe the brakes on that trailer were working. I had to pump them about 3 or 4 times to get it to stop, so needless the say the drive home was a bit stressful lol.
The other day I decided to just install the iPad later, or just work on getting a CarPC or something put together and use the iPad in the mean time. I rented a trailer from UHaul for $700 (a bunch of BS) on Wednesday and Jesse came over and he and I and Zico loaded the car that night, then I took it over to Mitch's house so he could finish up the IC piping, I was there until 130am and then got home and installed them and got to bed around 345 Thursday morning, so I ended up sticking around and leaving for home Friday morning instead. I think I'm going to see if Mom or someone can drive one of the cars back to CO with me and I'll just get them a plane ticket. Unless one of you wants to come here and drive back with me lol. I'll buy your plane ticket. I'd much rather that than pay freakin $700 for a trailer again. And I don't believe the brakes on that trailer were working. I had to pump them about 3 or 4 times to get it to stop, so needless the say the drive home was a bit stressful lol.
-
speedjunkie
- Senior Member
- Posts: 5357
- Joined: Wed Jan 02, 2008 9:14
- Location: Colorado Springs
- Contact:
Re: Build thread
Chris has been keeping me up to date on progress with the car. I believe he has everything installed and waiting for the ECU, aside from the two pressure sensors in the fuel lines in the back, but I'll go into that in a minute.
Syvecs hasn't gotten the ECU from Life Racing yet, I guess they're having issues in Australia, so Chris said he probably won't be able to have the car done until after I'm gone and I'll have to fly back and get it. That will save me from having to find someone to drive back with me haha.
As for the two sensors...right now I have those two pressure switches in the lines but they're made of brass and won't be compatible with E85 according to Chris, so I was looking for stainless steel switches and I couldn't find any. We had decided to put sensors in there instead and run them to the ECU to use as a failsafe and put the car into limp mode if one of the sensors reads lower than it's supposed to. He emailed and called the other day and asked again if I wanted to save some money and just splice off the sensor in the fuel rail that feeds my SPA gauge. He already spliced into the oil pressure sensor for the SPA gauge to route into the ECU. He said I could keep them the way they are and use the lights still, which is fine IF I can find stainless steel switches to use instead. If not, I might as well remove the check valves and adapter fittings from the lines. So I'm on the fence about what to do.
1. I plan to use these as a troubleshooting aid, but if he'll splice them together before going into the ECU and it won't be able to tell me which fuel pump is going bad or which filter is clogged, it's defeating some of the purpose.
2. Staying with the switches would save me about $280 for the sensors, and there would be less wiring for him to run from the ECU.
3. As I said, if I can't find stainless steel switches, I won't be able to use the indicator lights anyway and I'll regret not having him put the sensors in.
4. He says it will serve the same purpose if it's spliced into the sensor on the fuel rail, but I would think that little bit of extra notice by being mounted at the rear of the car would make a difference, as small as it might be.
I need to ask him if the sensors would be spliced together before going into the ECU. If not, I think I'll still have him install the sensors. If they will be, I'll continue looking for stainless steel switches and hope to find something. And in the mean time probably just run pump gas to be safe.

Re: Build thread
What's happening with your car? You back in CO and running?
-
RX-7 Chris
- Posts: 7800
- Joined: Tue Oct 02, 2007 9:14
- Location: Colorado Springs
- Contact:
Re: Build thread
+1
1984 RX-7 GSL-SE [size=84]My restomod project[/SIZE]
1964 Ford Galaxie 500XL flat black w/ white interior, 2 dr fastback, 390 thunderbird, C6 auto, 2500 rpm high stall converter, shift kit, AC, Holley 750 cfm
[size=100]RIP 1983 RX-7[/SIZE]
My Car Blog
Who is online
Users browsing this forum: No registered users and 83 guests