Making of a gauge pod

Tint, Paint, Lighting, Comfort
User avatar
GR-8
Posts: 5335
Joined: Thu Oct 11, 2007 9:14
Location: Denver/ Lakewood
Contact:

Making of a gauge pod

Postby GR-8 » Wed Jun 30, 2010 9:14

I thought I lost these pictures when my SD card in my phone decided to wipe clean after inserting the card in a USB thumb drive. I found some from before I did the fiberglass work, that were on my camera. Here is how I made my gauge pod.

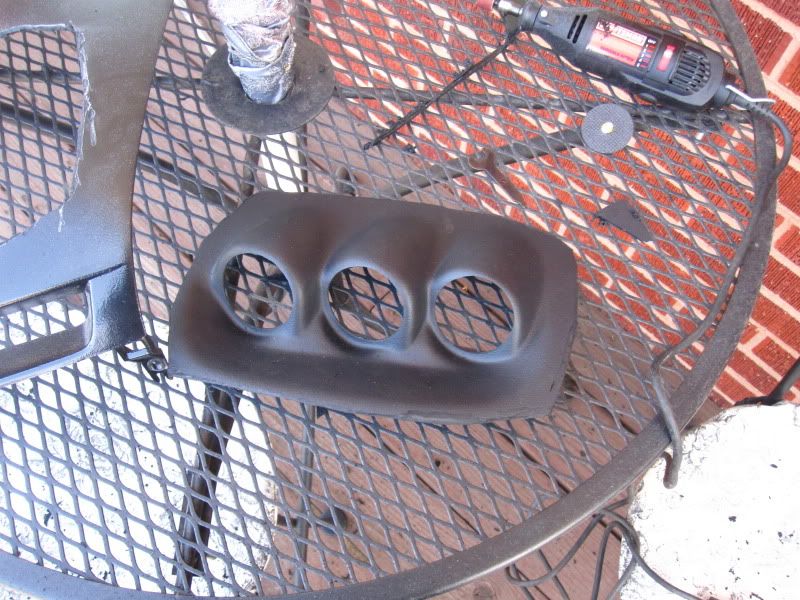
These first 2 pics are of the Lotek gauge pod and how they wanted me to cut the stock panel and mount them. Note how in the second it overlaps my speaker grill for the dash.
Image
Image

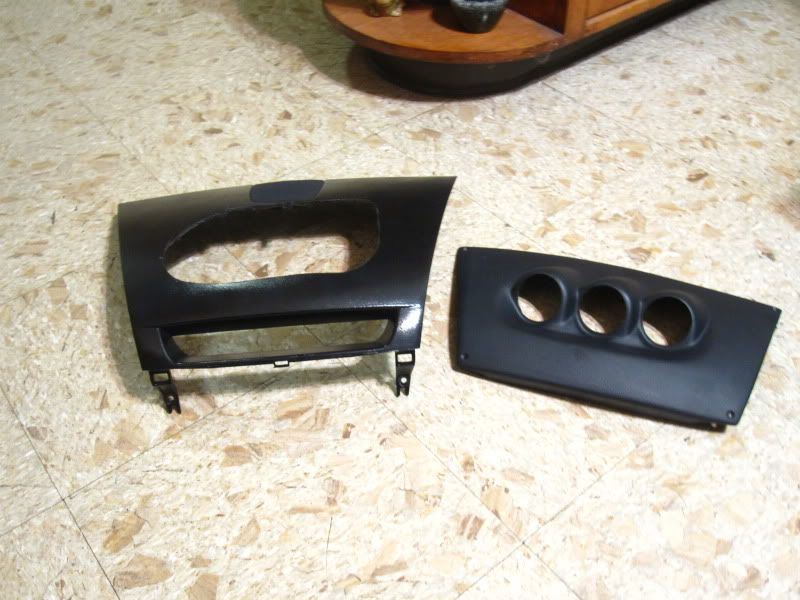
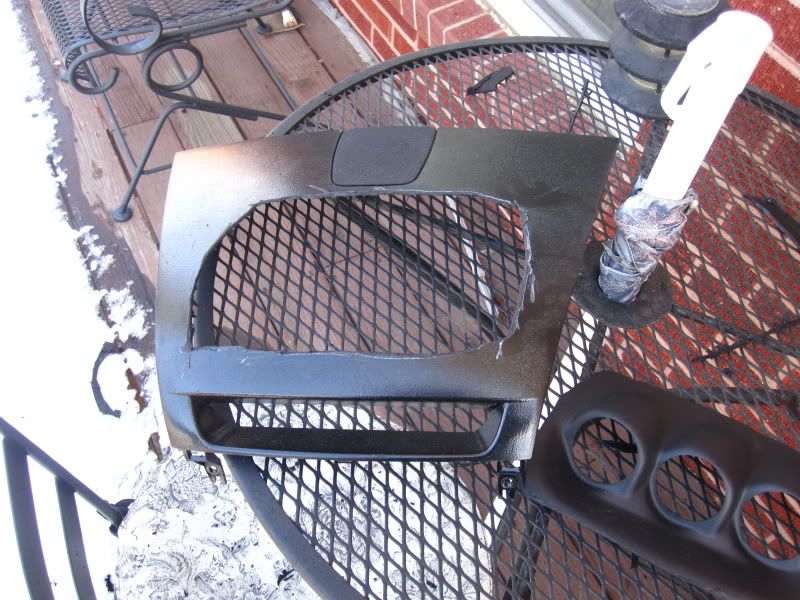
Well I took things into my own hads and cut the lotek pod and the dash peice a little more. Please forgive the sloppy job.
Image
Image

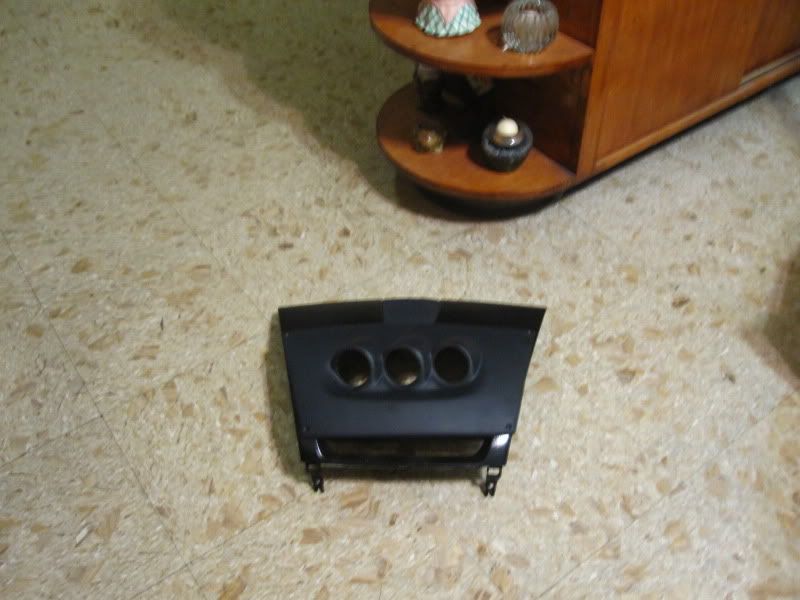
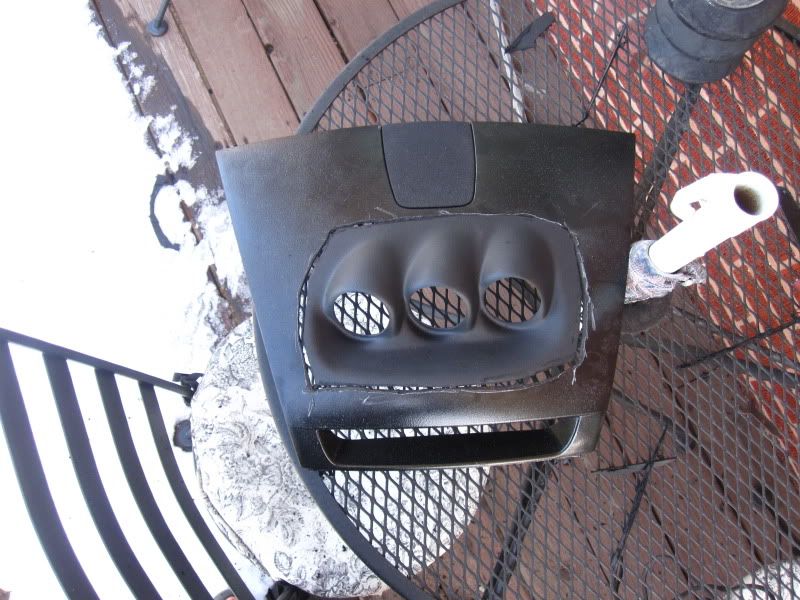
Here is where I monted the pod into the dash panel. At this point it is being held with some hot glue.
Image
Image
Image

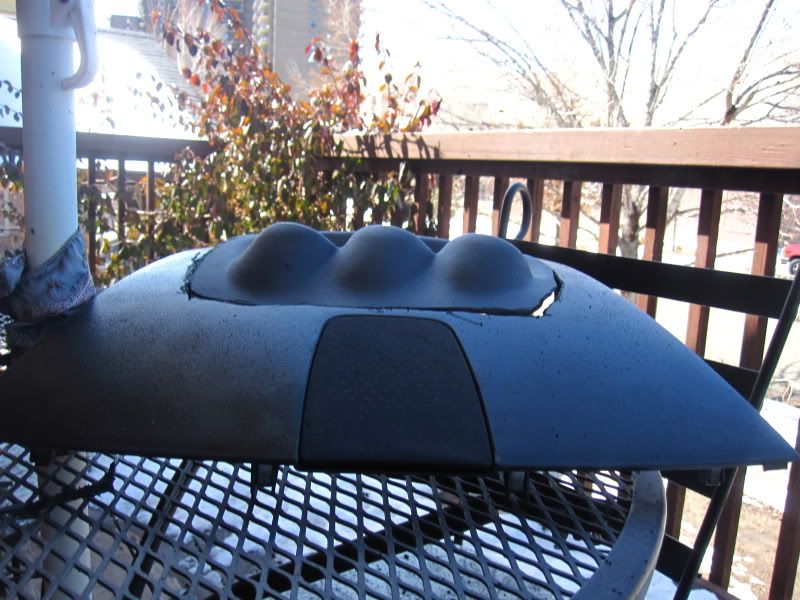
Some time later I got to actually fiberglassing the thing. Took some patience because of dry time. I filled in any gaps I had between the two peices with 5min plastic weld. After that was done I fiberglassed the enitre thing. I did 3 layers of fiberglass on the outside and inside of the dash peice. I then waited for a day for it to cure and began smoothing the outside as best I could. I used some Trunk Spatter Paint purchased from Checkerds/O'riely to get the texture. I did this 2 different times to get the texture I wanted. I than sprayed the peice with some OEM Plastic black purchased from the same place.

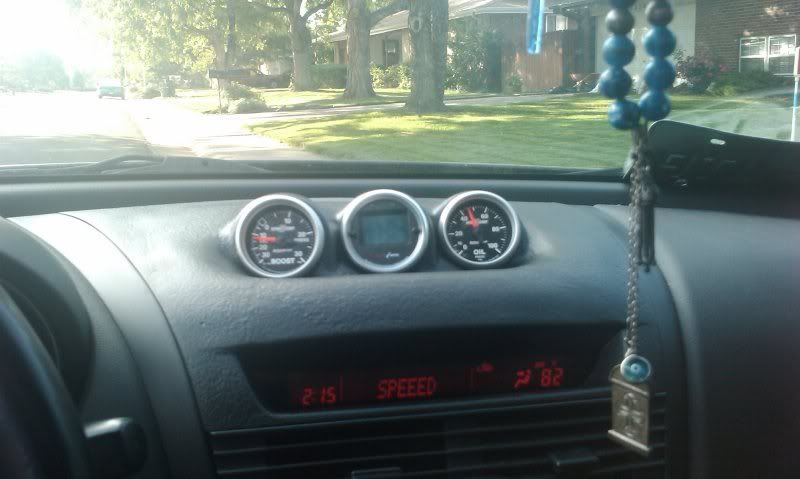
The result is the 2 pics below.
Image
Image

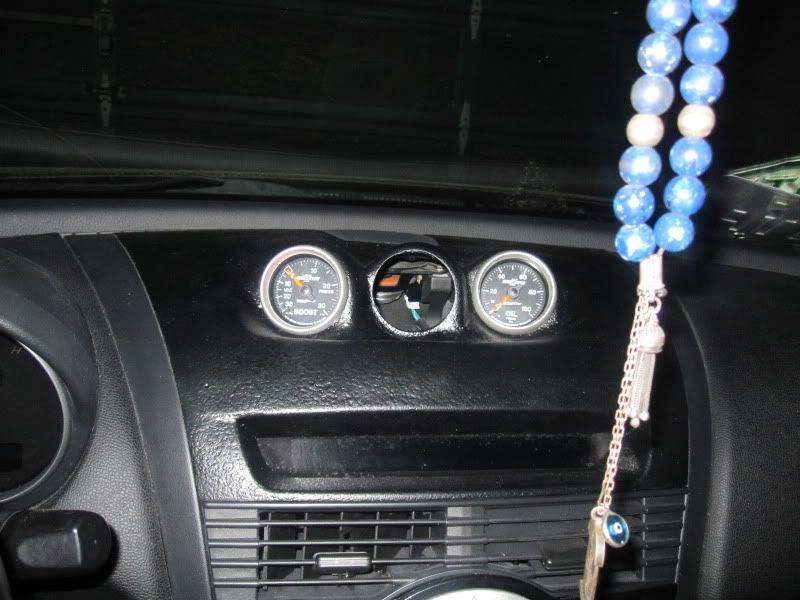
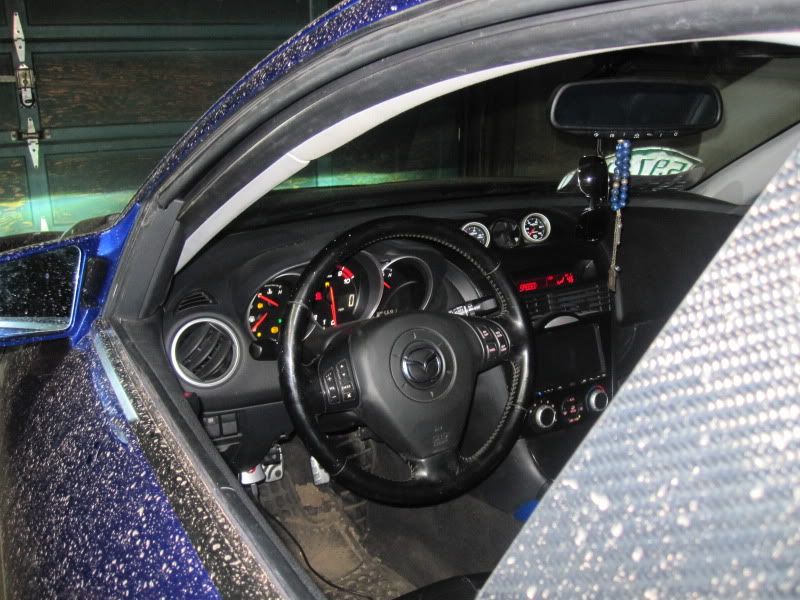
I could not stand the blakc. It was too glossy and didn't match the stock black at all. So I went back and bought a duplicolor flat black. This turned out well and is what you see below. The final product.
Image
Image
Image

ImageImage

User avatar
iani1.1
Posts: 1942
Joined: Sun Oct 19, 2008 9:14
Location: ATX
Contact:

Postby iani1.1 » Wed Jun 30, 2010 9:14

thats a really nice pod. very nice work.

i made one for the fc but didnt take pics of it.
Image

User avatar
speedjunkie
Senior Member
Posts: 5293
Joined: Wed Jan 02, 2008 9:14
Location: Colorado Springs
Contact:

need help

Postby speedjunkie » Thu Jul 01, 2010 9:14

I can't see pics right now but I'm going to look later when I get on my home computer. I do remember I really like the look of this pod though.

I don't really care for the ones the guy on RX7club makes, the 3 and 4 pod sets for the FD speaker grill (3rd pic). It just doesn't look right to me. I'd much rather have each pod individually mounted next to each other in a line on the dash, or get the speaker grill replacement piece that only fits two gauges since it still looks kinda stock.

I did find something from ATI though (the first two pics), which fits in the speaker grill location, and I like this a lot more. I can also get these pods individually for about $20 each. So I'm planning on getting the center piece with two pods, and I need to figure out a way to mount two more off of the center piece, you guys have any ideas on how to do that in a clean way? I also plan on using these single pods and my stock a-pillar to mount 3 pods on there in the same fashion. I plan on drilling into the a-pillar to attach the pods there, but I don't want to drill into the dash to attach those other two.
Attachments
CIMG3728.jpg
ati-epod-mazda-rx-7-52mm-60mm-gauge.jpg
!BwdiYiQBmk~$(KGrHqMOKiMEwQj3pf92BMJBOzEFyg~~_12.jpg
Image

User avatar
speedjunkie
Senior Member
Posts: 5293
Joined: Wed Jan 02, 2008 9:14
Location: Colorado Springs
Contact:

Postby speedjunkie » Thu Jul 01, 2010 9:14

Yep, now that I can see the pics I can confirm, yes, I really like those gauges. Good work Jimmy! "That's thinkin' with yer dipstick Jimmy!" LOL. Not sure why that just popped into my head.
Image

User avatar
geo2maz
Posts: 1250
Joined: Sun Jun 21, 2009 9:14
Location: Denver
Contact:

Postby geo2maz » Thu Jul 01, 2010 9:14

Dayum B, you've got some skills!


Return to “Interior Modifications”

Who is online

Users browsing this forum: No registered users and 2 guests