Yeah I think the Midget would be next in the evolutionary chain of smaller and smaller project cars lol.
Man those bowls were nasty! You might want to replace the fuel lines too, unless you've done that already, I can't remember. I wonder why it's being such a pain. That's a sweet radio delete piece too.
My 1974 REPU Project
-
speedjunkie

- Senior Member
- Posts: 5290
- Joined: Wed Jan 02, 2008 9:14
- Location: Colorado Springs
- Contact:
-
RX-7 Chris
- Posts: 7800
- Joined: Tue Oct 02, 2007 9:14
- Location: Colorado Springs
- Contact:
Re: My 1974 REPU Project
chickenwafer wrote:I had to pull all the jets and soak them in carb cleaner and push welding wire through them to clean them out again. Confident I got it clean and fixed my problem, I reassembled the carb and fired it up with the fuel pump pulling fresh, clean fuel from the spare 5gal jug. Still wouldn't fire and I'm not sure what's wrong the the carb at this point but I feel like it has to be the problem. It will run if I dump fuel down the throat of the carb but only for a few seconds until that fuel is burned out.
The only other thing I can think of is I replaced the dead OE fuel pump with a "high performance" Weber Redline low pressure fuel pump. Should I put a fuel pressure regulator on this? As it is, the pump goes straight into the carb. This thing moves some fuel but says it's around 6psi which is what I've gathered the carb should be at anyways.
The existing fuel pump is good if you are getting 6psi, no reason to upgrade. If the fuel pump was weak, it would only effect you are high RPM but idle should be fine.
How are your fuel lines? are they clean? I would recommend installing an clear 5/16 inline fuel filter right by the carb so you can see what is going.
Are the fuel bowls actually filling up? There is a glass inspection window on each of the fuel bowls. If you don't have fuel it is most likely the the needle is stuck in the seat. Try tapping the carb bowls with a screw driver.
If the bowls are full but no fuel getting to the jets, the problem is in the idle circuit. First check the to see the the idle mixture screw is turned out about three turns (good starting point). Next thing to do is pull the jets and flush out the passages.
http://www.oocities.org/mazdarx05/carby1.htm
1984 RX-7 GSL-SE [size=84]My restomod project[/SIZE]
1964 Ford Galaxie 500XL flat black w/ white interior, 2 dr fastback, 390 thunderbird, C6 auto, 2500 rpm high stall converter, shift kit, AC, Holley 750 cfm
[size=100]RIP 1983 RX-7[/SIZE]
My Car Blog
-
chickenwafer
- Posts: 2515
- Joined: Wed Mar 11, 2009 9:14
- Location: Greeley
Re: My 1974 REPU Project
RX-7 Chris wrote:The existing fuel pump is good if you are getting 6psi, no reason to upgrade. If the fuel pump was weak, it would only effect you are high RPM but idle should be fine.
How are your fuel lines? are they clean? I would recommend installing an clear 5/16 inline fuel filter right by the carb so you can see what is going.
Are the fuel bowls actually filling up? There is a glass inspection window on each of the fuel bowls. If you don't have fuel it is most likely the the needle is stuck in the seat. Try tapping the carb bowls with a screw driver.
If the bowls are full but no fuel getting to the jets, the problem is in the idle circuit. First check the to see the the idle mixture screw is turned out about three turns (good starting point). Next thing to do is pull the jets and flush out the passages.
http://www.oocities.org/mazdarx05/carby1.htm
Thanka for the info! This carb is driving me nuts. Sometimes the bowls fill, sometimes they don't. Sometimes fuel comes shooting out the vents tubes. I think the problem is the needle being stuck. I've tried tapping on the top of the carb with a screwdriver a lot lol. The glass i soection bowls are fogged up pretty bad and difficult to view, even after cleaning. The rear one faces the firewall and is incredibly difficult to get the angle to see into.
I replaced the OE fuel pump because it was dead, so that was the reason for the "upgrade".
I have a Fram G12 inbetween the fuel tank and pump that is clear so I can check it. The fuel going to the carb is clean because it is currently being drawn from a seperate temp jug. All rubber hoses are new and fuel coming out of the hose i the engine bay is clean.
The funny thing is the engine actually ran for about 60 seconds once but the carb leaked horribly out the acclerator pump plunger. Lucky I didn't start a fire lol the floor was covered in gas. I also had to hold the RPM around 2-2500 because it didn't want to idle.
speedjunkie wrote:Yeah I think the Midget would be next in the evolutionary chain of smaller and smaller project cars lol.
Man those bowls were nasty! You might want to replace the fuel lines too, unless you've done that already, I can't remember. I wonder why it's being such a pain. That's a sweet radio delete piece too.
Thanks man. Ready to just buy a set of Webers and be done with it lol.
Nothing major to update. I've been wanting to get some pictures of it but can't roll it in and out of my garage by myself and with my wife 33 weeks pregnant she ain't helping lol. I'm itching to get some stuff done and have brainstormed some solid plans for the build. I also ripped off the FMIC off my Jetta and put it up for sale to fund the REPU.
I'm researching and tracking down parts I'll need for a manual transmission swap. Hardest part is a REPU clutch pedal assembly as they are incredibly rare. If anyone has a first gen RX7 Or NA FC manual gearbox laying around, let me know!
-
RX-7 Chris
- Posts: 7800
- Joined: Tue Oct 02, 2007 9:14
- Location: Colorado Springs
- Contact:
Re: My 1974 REPU Project
Do you want me to do a full rebuild of the carb for you?
1984 RX-7 GSL-SE [size=84]My restomod project[/SIZE]
1964 Ford Galaxie 500XL flat black w/ white interior, 2 dr fastback, 390 thunderbird, C6 auto, 2500 rpm high stall converter, shift kit, AC, Holley 750 cfm
[size=100]RIP 1983 RX-7[/SIZE]
My Car Blog
-
chickenwafer
- Posts: 2515
- Joined: Wed Mar 11, 2009 9:14
- Location: Greeley
Re: My 1974 REPU Project
I appreciate the offer, Chris, really do!
I did, however, just order a new carb and intake manifold so I won't need to mess with the stock carb any longer. Next up is exhaust work and fixing some of the rust.
Was really hoping to roll Bumblebee out in the driveway this weekend to get some good pictures, but weather rarely cooperates.
I did, however, just order a new carb and intake manifold so I won't need to mess with the stock carb any longer. Next up is exhaust work and fixing some of the rust.
Was really hoping to roll Bumblebee out in the driveway this weekend to get some good pictures, but weather rarely cooperates.
-
RX-7 Chris
- Posts: 7800
- Joined: Tue Oct 02, 2007 9:14
- Location: Colorado Springs
- Contact:
Re: My 1974 REPU Project
What carb setup did you go with?
1984 RX-7 GSL-SE [size=84]My restomod project[/SIZE]
1964 Ford Galaxie 500XL flat black w/ white interior, 2 dr fastback, 390 thunderbird, C6 auto, 2500 rpm high stall converter, shift kit, AC, Holley 750 cfm
[size=100]RIP 1983 RX-7[/SIZE]
My Car Blog
-
chickenwafer
- Posts: 2515
- Joined: Wed Mar 11, 2009 9:14
- Location: Greeley
Re: My 1974 REPU Project
An EMPI EPC-51 which is a 51mm version of a Weber IDA 48. The EMPI carbs have been run by air cooled VW guys forever with great results. Supposedly the EMPI carbs make even more power than the Weber's they're based on and are cast better. Interchangeable with Weber jets, emulsion tubes, chokes, etc.
I got a Weber IDA manifold from Australia which was significantly cheaper than the Racing Beat IDA manifold. It isn't tapped for ANY vacuum hoses/fittings so I'll have to drill/tap it with NTP hose barb fittings for the brake booster, etc.
I got anxious last night and started stripping off the old stuff:
Where it started:
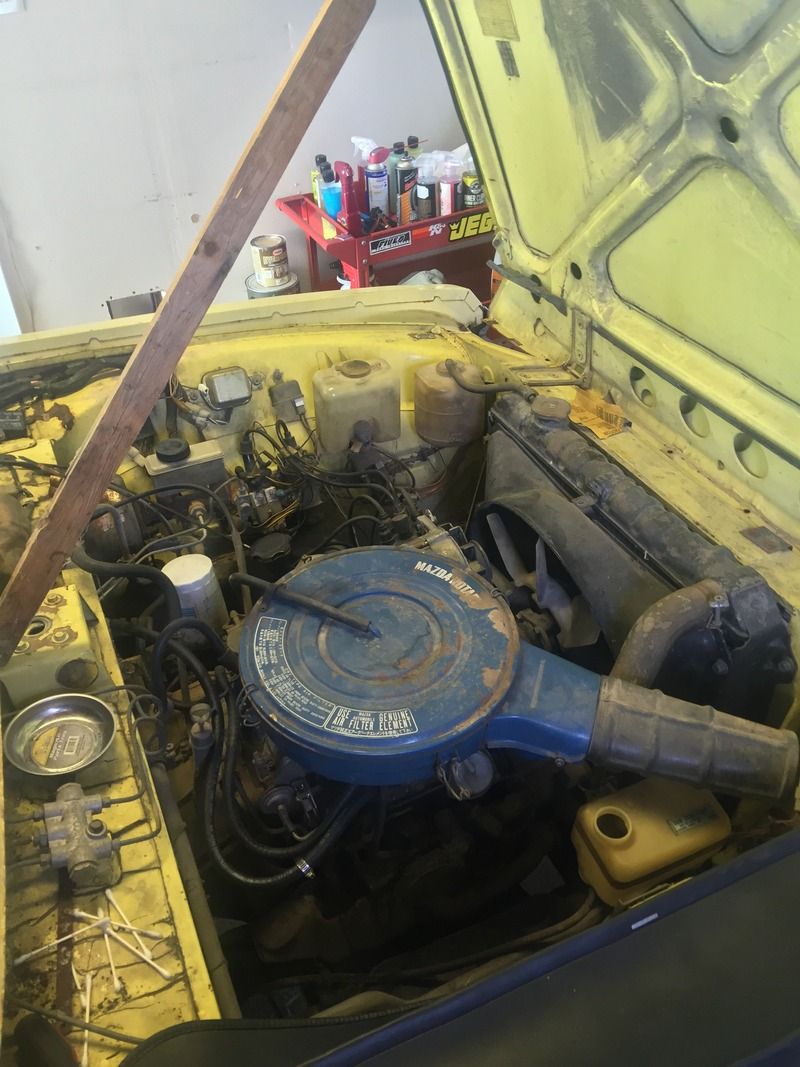
How I left it:
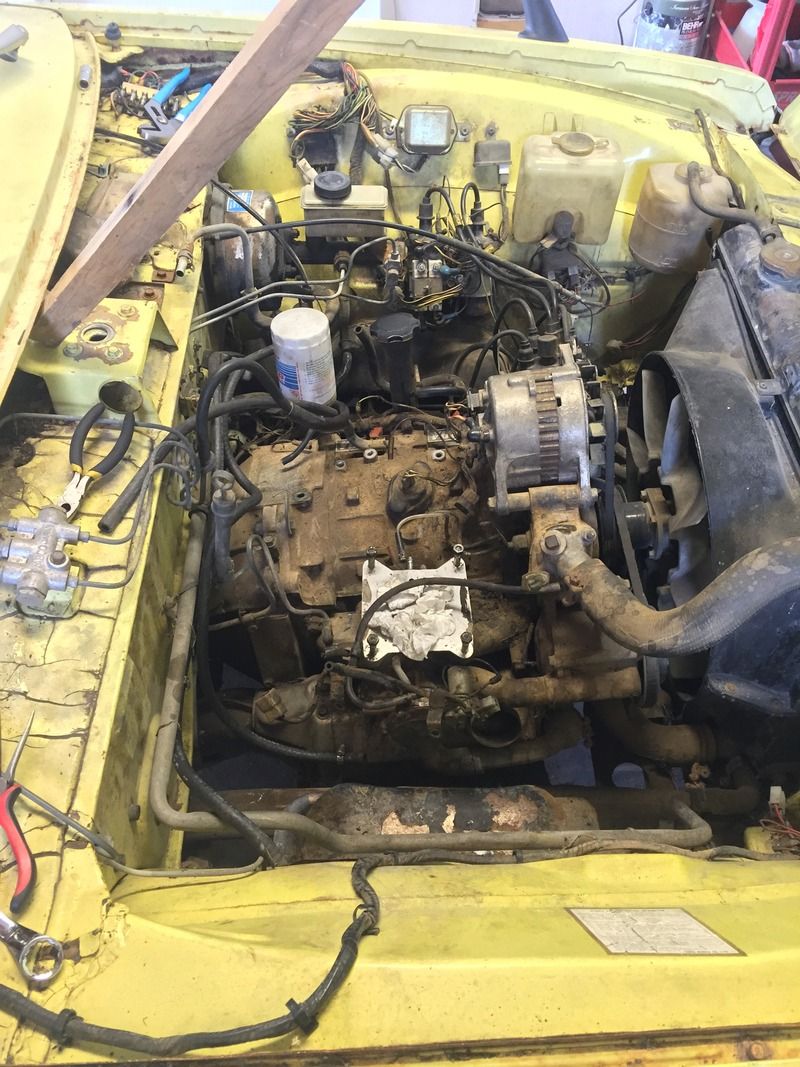
Removed the carb, backfire valve, all vacuum hoses and fittings, brake booster hose, etc. Essentially got it stripped down to a bare keg, which is how I plan on keeping it- no emissions. Just need to pull the intake manifold which I'll do today.
Also want to get the fuel tank pulled and started on the "super fun" process of getting all the old varnish gummed up fuel and rust removed. Aaron Cake has a great video on YouTube of how he restored the fuel tank to his RX-5 which I plan on following. Basically rinsing multiple times with Super Clean concentrate and hot water, then shaking chains inside the tank to break up the rust and rinsing again. Last step is the multi-step POR15 fuel tank sealer kit which has Marine Cleaner, Metal Etching solution, and then an epoxy sealer to finish. Cake had great results so I think I'll give it a go.
-
chickenwafer
- Posts: 2515
- Joined: Wed Mar 11, 2009 9:14
- Location: Greeley
Re: My 1974 REPU Project
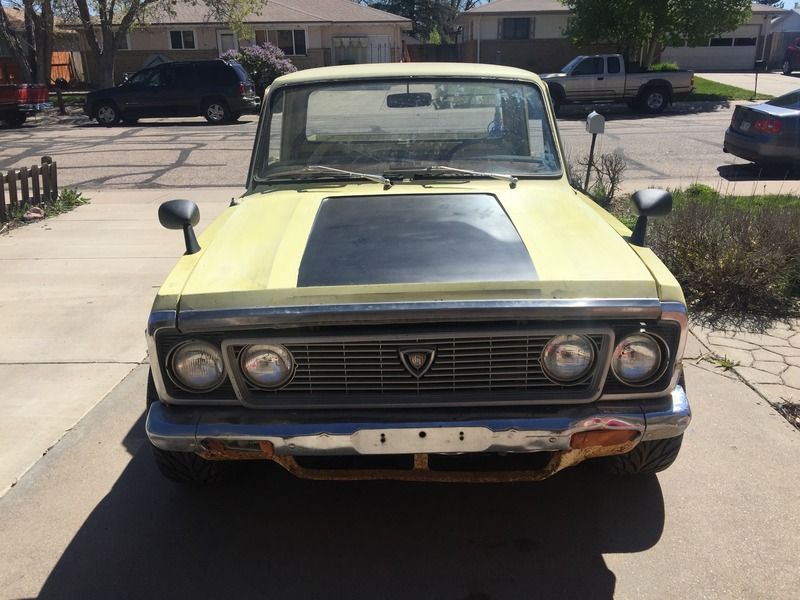
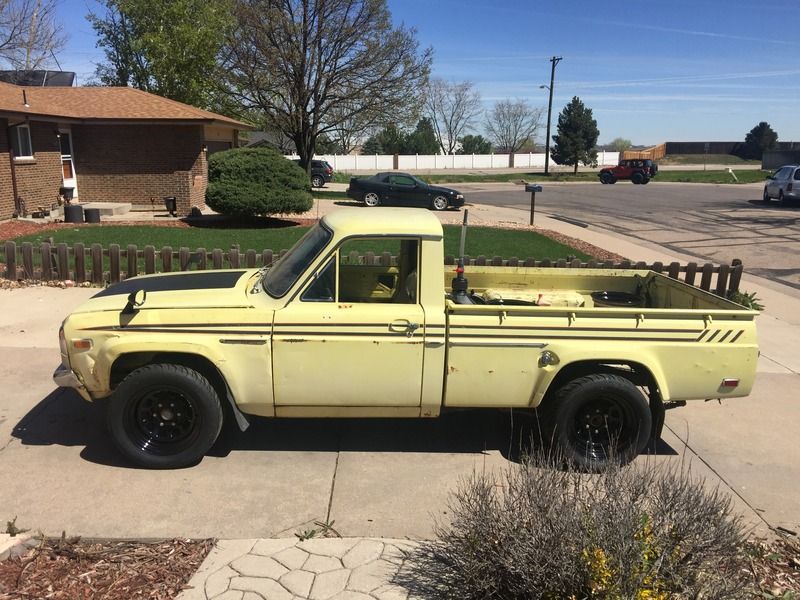
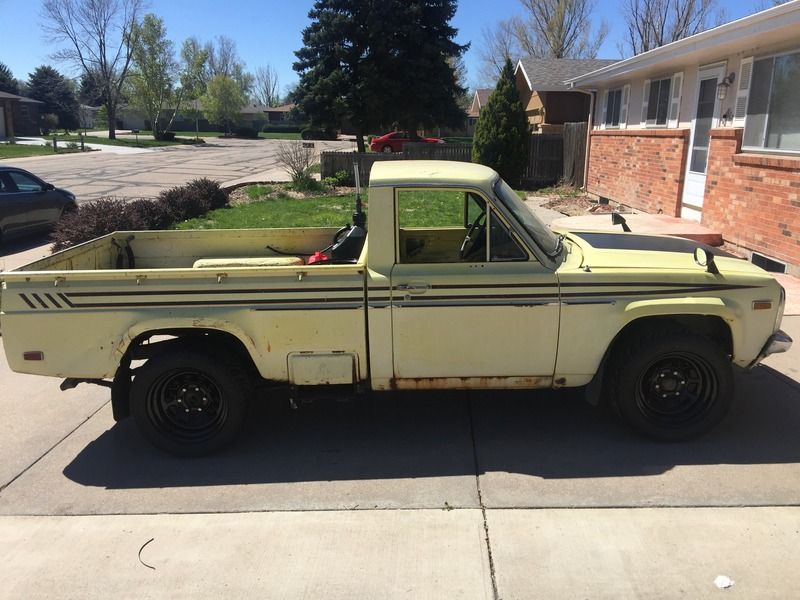
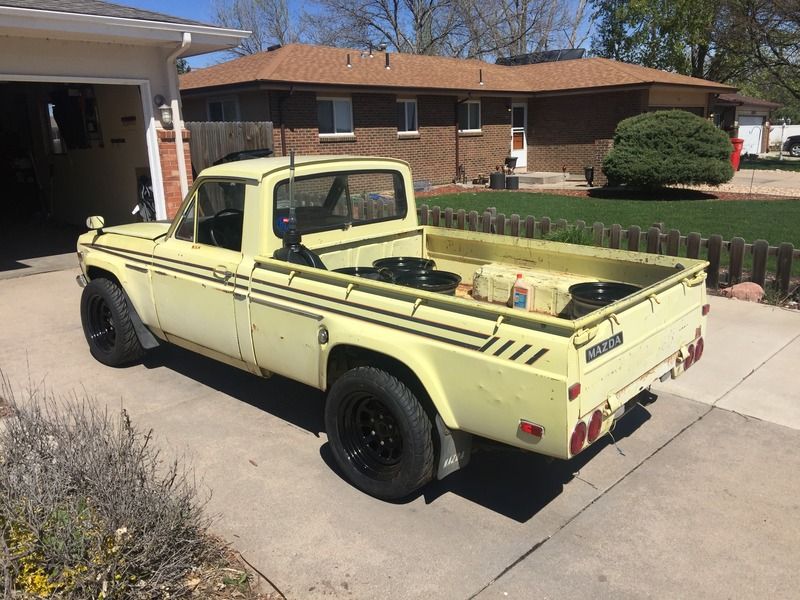
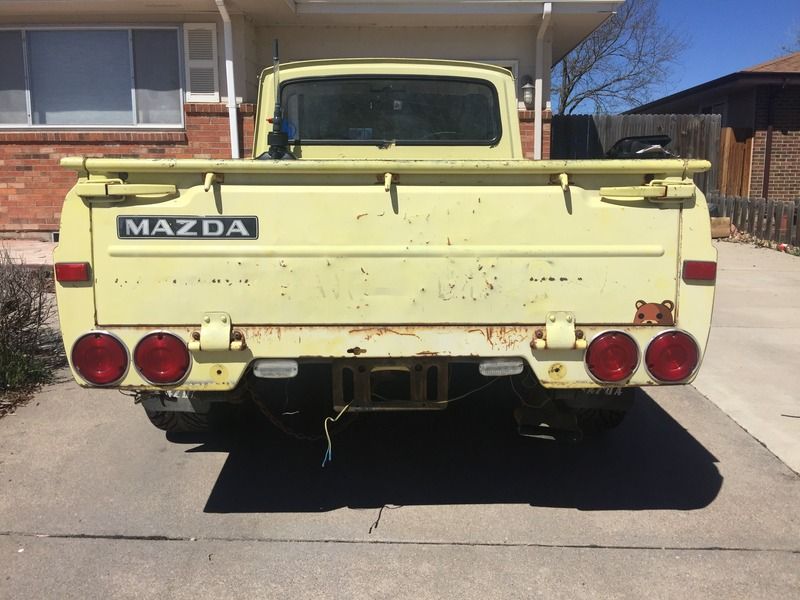
Second post: Rolled Bumblebee into the driveway for pictures with it finally being sunny today. It looks worse than I thought LOL, lots of visible surface rust mostly on the passenger door rocker, which will need to be addressed.
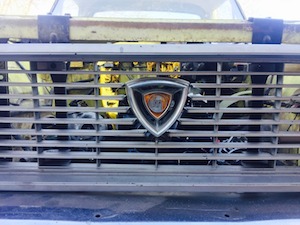
New wheels are Vision 16x8 12mm offset in flat black for a Jeep. Tires are Federal SS595 245/50-16 all around. Gives it a real meaty, purposeful stance and I love it. Don't really want to lower it but I might just a hair (inch or so). I also added the fender mirrors are some generic Japanese classic mirror. I LOVE the way the fender mirrors look. Lastly I painted the center section of the hood flat black with bumper paint. Other than fixing rust, only thing I need to complete the look I'm going for is to fix the front bumper grill and get the "ROTARY POWER" decal for the tailgate.
And lastly a pic of my of my nearly 3yr old daughter in the truck. This was moments before she took it out of gear and it rolled down into the street with her at the wheel! She wasn't even scared! Car girl in the making (hopefully).

New wheels are Vision 16x8 12mm offset in flat black for a Jeep. Tires are Federal SS595 245/50-16 all around. Gives it a real meaty, purposeful stance and I love it. Don't really want to lower it but I might just a hair (inch or so). I also added the fender mirrors are some generic Japanese classic mirror. I LOVE the way the fender mirrors look. Lastly I painted the center section of the hood flat black with bumper paint. Other than fixing rust, only thing I need to complete the look I'm going for is to fix the front bumper grill and get the "ROTARY POWER" decal for the tailgate.


And lastly a pic of my of my nearly 3yr old daughter in the truck. This was moments before she took it out of gear and it rolled down into the street with her at the wheel! She wasn't even scared! Car girl in the making (hopefully).

-
RX-7 Chris
- Posts: 7800
- Joined: Tue Oct 02, 2007 9:14
- Location: Colorado Springs
- Contact:
Re: My 1974 REPU Project
Just an FYI, you are going to spend a ton of time getting an aftermarket car tuned right. Don't expect it to work right out of the box.
1984 RX-7 GSL-SE [size=84]My restomod project[/SIZE]
1964 Ford Galaxie 500XL flat black w/ white interior, 2 dr fastback, 390 thunderbird, C6 auto, 2500 rpm high stall converter, shift kit, AC, Holley 750 cfm
[size=100]RIP 1983 RX-7[/SIZE]
My Car Blog
-
chickenwafer
- Posts: 2515
- Joined: Wed Mar 11, 2009 9:14
- Location: Greeley
Re: My 1974 REPU Project
RX-7 Chris wrote:Just an FYI, you are going to spend a ton of time getting an aftermarket car tuned right. Don't expect it to work right out of the box.
Haha yes, thanks Chris. This isn't my first rodeo (although I fully admit my carbed rotary experience is limited). The carb comes with a jet kit and I have some good jetting reference charts to test with. My main rational here is I can't get gaskets and misc parts for the OE carb anymore, I know OE carbs are good for daily drivers but this isn't one, and instead of sinking my time into a stock carb that has limited potential, might as well move on to the carb I want that will support the power I want in the future.
Anyway, with the emissions equipment removed, you could really see the top of the keg pretty good and man, was it dirty! It would be really visible with thew new carb setup, so I decided to GUNK it and had some great results. Also removed the intake manifold and totally forgot about the coolant circuit in it and immediately dumped coolant all over the garage floor. DOH! Good news is the coolant looked really clean.
How it started:
GUNK'ed:

Finsihed (for now):


I'm really impressed with how well the keg cleaned up. I used a multi-stage process that started with using my shop vac and a bristle brush to loosen up the big clumps for dirt and suck them out with the vac. Then I liberally sprayed down the keg with Gunk Foamy and let it soak for about 10 min. I then cam in with a wire brush and agitated/scrubbed the dirt with plenty of elbow grease. Lastly, I sprayed Original Gunk as more of a rinse and then wiped it down with paper towels, as shop rags were getting too wet and dirty to become effective. Worked really good and I'm pretty happy with how it turned out.
-
speedjunkie
- Senior Member
- Posts: 5290
- Joined: Wed Jan 02, 2008 9:14
- Location: Colorado Springs
- Contact:
Re: My 1974 REPU Project
Yeah I like how that keg cleaned up! I like those wheels and tires too, definitely looks like it's ready for business.
I'm already seeing the "well if I just do this" and "while I'm in there..." coming out. Lol. This is going to turn into a full detailed build. Mark my words. Lol
It's also hilarious about her rolling the truck down the driveway too lol. Glad everything turned out alright.
I'm already seeing the "well if I just do this" and "while I'm in there..." coming out. Lol. This is going to turn into a full detailed build. Mark my words. Lol
It's also hilarious about her rolling the truck down the driveway too lol. Glad everything turned out alright.
-
chickenwafer
- Posts: 2515
- Joined: Wed Mar 11, 2009 9:14
- Location: Greeley
Re: My 1974 REPU Project
speedjunkie wrote:Yeah I like how that keg cleaned up! I like those wheels and tires too, definitely looks like it's ready for business.
I'm already seeing the "well if I just do this" and "while I'm in there..." coming out. Lol. This is going to turn into a full detailed build. Mark my words. Lol
It's also hilarious about her rolling the truck down the driveway too lol. Glad everything turned out alright.
LOL the "while I'm in here" mentality is my entire life! Of course it would stranglehold this build!
Honestly I have some plans for this little truck but nothing insane. I took a huge bath on selling my FD, so I'm trying to rein cost in on the REPU. Initially I considered a built REW swap with FD trans, E85, BW S366fmw, yada yada but once I started pricing stuff out it goimg to cost similar my FD built (nearly the same lol). So i replanned and have a different route now.
-
chickenwafer
- Posts: 2515
- Joined: Wed Mar 11, 2009 9:14
- Location: Greeley
Re: My 1974 REPU Project
Got the IDA Carb, intake manifold, and gaskets in. I need to tap the intake manifold since it has zero vacuum fittings. I need to connect the brake booster, there's another hardline hose that appears to be coming off the automatic transmission which I'll need to cut the banjo fitting off of and add a vac hose to, as well vac advance from the distributor. I plan to just drill and tap the manifold in one spot and run an NTP to hose barb fitting to a 3 way T of sorts to feed these items. I also need crankcase/oil filler neck vent as well, overflow I'll just run into a catch can.
The carb said it came with a "jet kit" which means it came one additional pair of main jets and air correction jets- not really a kit, IMO. Luckily jets aren't expensive but I have to order them and the jets that it came with are too small. I think I could get it to idle but no way would it drive good.
I also grabbed some 20mm freeze plugs from NAPA to plug up the coolant ports on the rotor housings. I smeared some black RTV on the freeze plugs and tapped them home. While I was there I also removed the OMP hoses and actuator lever/arm. I haven't been able to find an OMP delete/block off plate for an early 13B yet so I plug plugged the OMP output nipples and wired the actuator arm down so it shouldn't try to pump much oil (hopefully).
Edit: found the 12A OMP is the same so I found a block off plate for $4 bucks from Mazdatrix. Sweet.
Lastly, I removed the old tatered carpet to investigate the rust on the passenger side more. It's bad, sure, but repairable. Not spread throughout the entire floorboard which was my main concern. The drivers side is nearly perfect so overall I feel OK about it, obviously it'd be great if it had no rust but oh well.
-
RX-7 Chris
- Posts: 7800
- Joined: Tue Oct 02, 2007 9:14
- Location: Colorado Springs
- Contact:
Re: My 1974 REPU Project
Check to see if you rust under the dash on the bottom side of the cowl. That Water had to come from somewhere.
1984 RX-7 GSL-SE [size=84]My restomod project[/SIZE]
1964 Ford Galaxie 500XL flat black w/ white interior, 2 dr fastback, 390 thunderbird, C6 auto, 2500 rpm high stall converter, shift kit, AC, Holley 750 cfm
[size=100]RIP 1983 RX-7[/SIZE]
My Car Blog
-
chickenwafer
- Posts: 2515
- Joined: Wed Mar 11, 2009 9:14
- Location: Greeley
Re: My 1974 REPU Project
RX-7 Chris wrote:Check to see if you rust under the dash on the bottom side of the cowl. That Water had to come from somewhere.
That's a good idea, Chris. The truck was outside for quite a while. The front cover of the engine, oil pan, etc is covered in mud. It's as if it was mod boggin lol.
Today, I got my POR15 fuel tank restore kit so I got to work on the annoying task of dropping the fuel tank. It actually wasn't nearly that bad to drop the tank as I had thought, just 4 12mm bolts and removing the associated hoses and filler neck. Just a crazy amount of dirt and rocks fell when I dropped it and, despite draininng it, it still had at least 3-4 gallons of crap in it.
Tank out

Difficult to get a picture inside the tank, but the best I could do,

Also Gunk'ed the surface of the tank,

Didn't make it look super great but did loosen the grim and dirt after a quick rinse.
I got a gallon of Super Clean but after dumping it in the tank and shaking it around vigorously then dumping all kinds of nasty oragne chunky rust water, it's clear I'll need a lot more Super Clean lol. I also need to find a chain to shake around inside the tank to remove and loosen rut scale, as well as a dollar store toilet brush for some scrubbing.
I also wanted to restore the fuel tank with the multistep POR15 fuel tank restore kit
http://www.por15.com/POR-15-Fuel-Tank-R ... _p_62.html
It's a good kit, but it's $86 plus shipping. Well, I was on Amazon on night and they have POR15 products eligible for Prime so free 2 day shipping. I got a gallon of Marine Clean, quart of Metal Prep, and Pint of fuel tank sealer. That's twice as much as cleaner as the kit, the same amount of Metal Prep, and half as much sealer, which I've read is enough sealer to coat a 25 gal tank, so I don't need that much anyways.
The best part is the stuff individually was $50 bucks with free 2 day shipping since I'm a Prime member, and I got more stuff overall. Score! But I need to get the tank pretty clean prior to starting the POR15 process. Aaron Cake has a great video on YouTube of how to use the stuff and clean the tank throughly
Lastly, I was going to get the new carb installed, but quickly realized I spaced some components for the installation, namely a bypass style fuel pressure regulator, hoses and fittings, and vacuum hoses and barbs. I ordered a Holley bypass style regulator, 6AN pushlock hose and fittings, pressure gauge, and vacuum manifold so I can tee all the vacuum sources off one clean hose barb on the IDA manifold.
Who is online
Users browsing this forum: No registered users and 62 guests