All I did tonight was reinstall the mount I use for the middle of the diffuser and clean up some brake caliper parts. David contacted me today asking if I washed the suspension parts after blasting them, so I'm assuming he's about to do those or did them today.
I stopped by Basic Machine today to see if he could recreate the cargo cover hinge out of aluminum, he said he'd look at it this weekend and get back to me. And I stopped by Whisler Bearing and got the 3AN hose and hose ends to make the vacuum lines for the boost valve and paid WAY too much for those. I believe I could have gotten them a lot cheaper online. I'm still waiting for the 3AN fitting from England, it's the last one I need. They said they shipped it on 11 April and that it sometimes takes a couple weeks for international shipments. I've gotten stuff from Japan within a week so I'm not sure if they sent it by horse or what.
Build thread
-
speedjunkie

- Senior Member
- Posts: 5290
- Joined: Wed Jan 02, 2008 9:14
- Location: Colorado Springs
- Contact:
-
speedjunkie
- Senior Member
- Posts: 5290
- Joined: Wed Jan 02, 2008 9:14
- Location: Colorado Springs
- Contact:
Re: Build thread
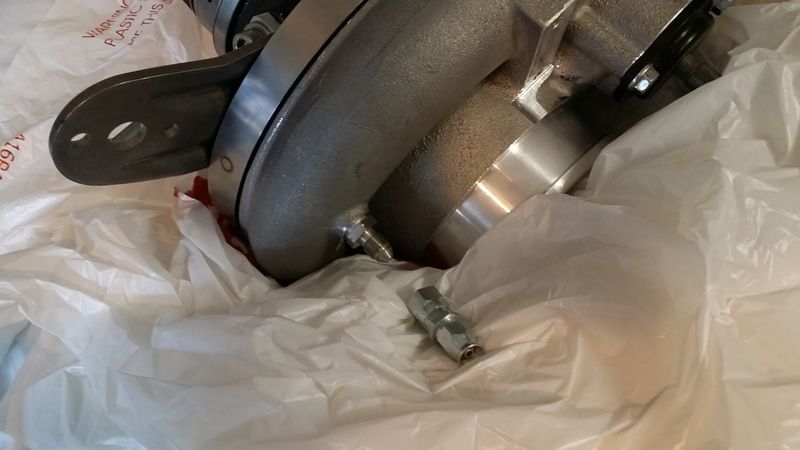
I got the 3AN fitting from England today. It had an AN type end on both sides so I used the dremel and cut off wheel on the side going into the turbo, and I didn't NEED to do it, but I like it better that way. I also drilled out the hole a little, especially on the same side because it was smaller diameter than the other side, so I just drilled it enough to match them in size. I might have an issue with the fittings I got from Whisler, at least a couple of them. If the turbo sits as close to the valve as I fear it will, the hose might not bend enough and I might need to see about a couple 45 degree fittings.
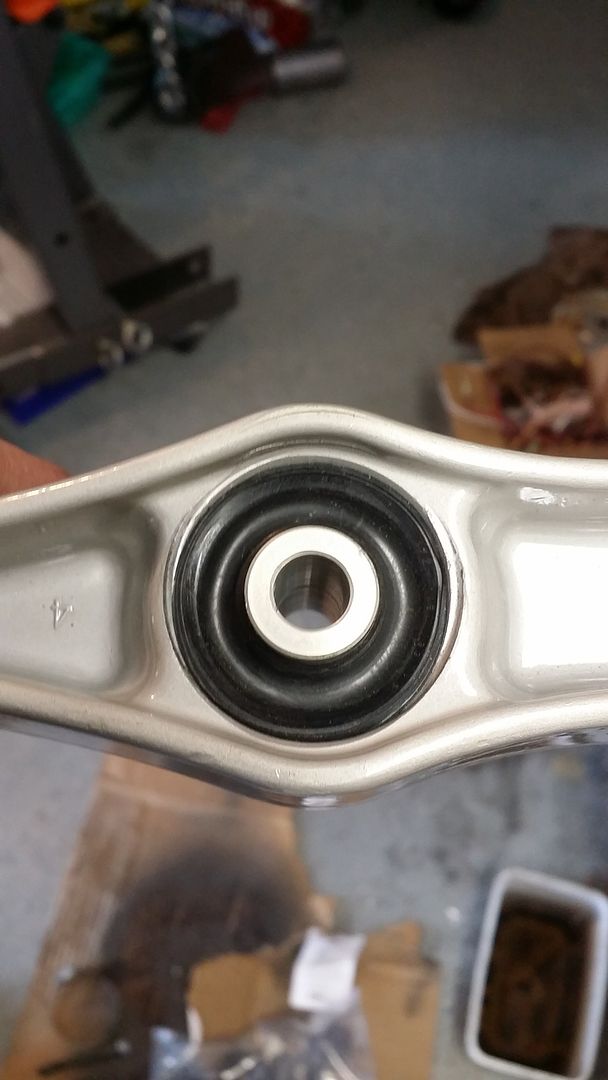
I picked up all but two suspension arms from David. They are beautiful! Although on one of the pieces I discovered tonight just how much green paint I missed. Oh well, it's not very noticeable, especially when it's installed on the car. The two pieces he didn't have finished are the front upper A arms because the grease in the ball joint kept melting and leaking out. He's working on ceramic coating the exhaust pieces now, then he's going to do the brake calipers. Tomorrow I'm going to press in the bushings and install whatever arms I can. I also need to clean out the grease mess from the ball joints and put more grease in (need to see what would be best) and replace the boots.
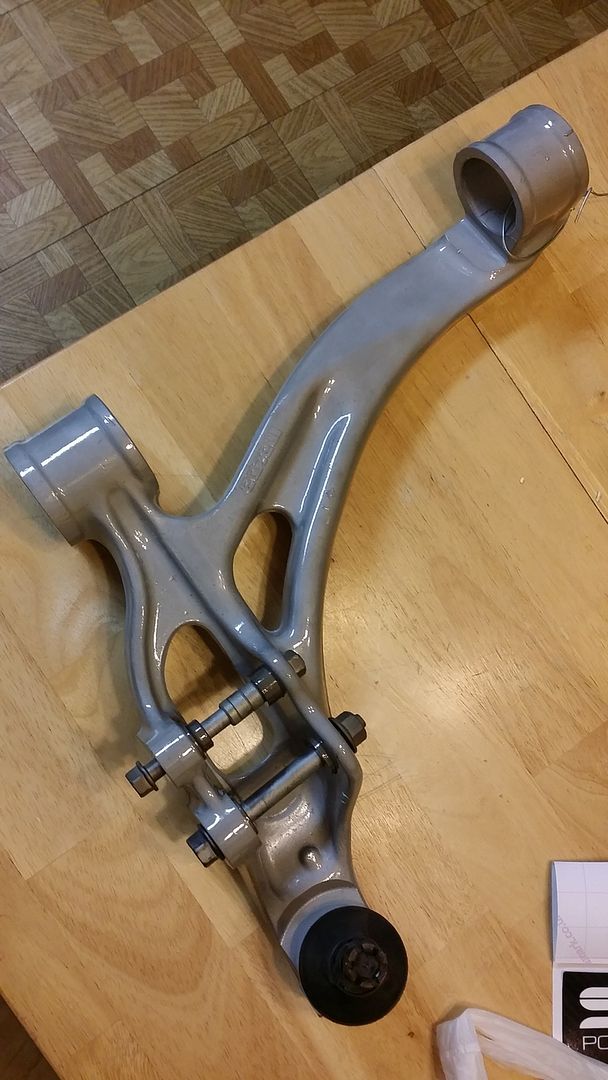
I cleaned the wheel wells for a bit before I decided it was a waste of time lol. I only cleaned the front two, but it really doesn't matter lol.

-
speedjunkie
- Senior Member
- Posts: 5290
- Joined: Wed Jan 02, 2008 9:14
- Location: Colorado Springs
- Contact:
Re: Build thread
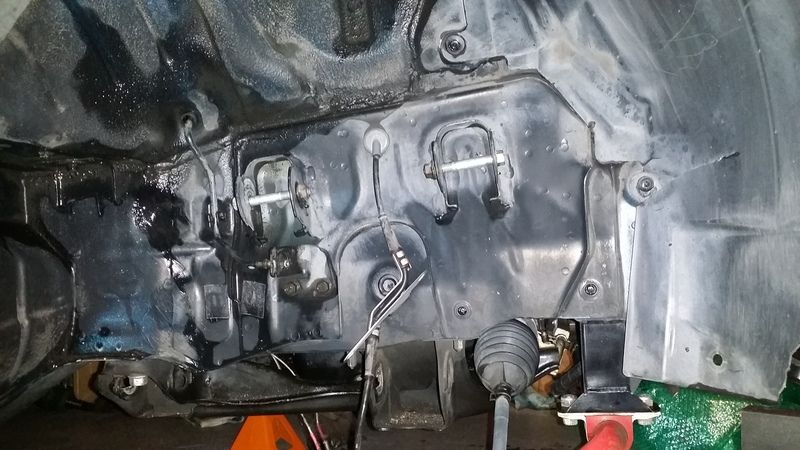
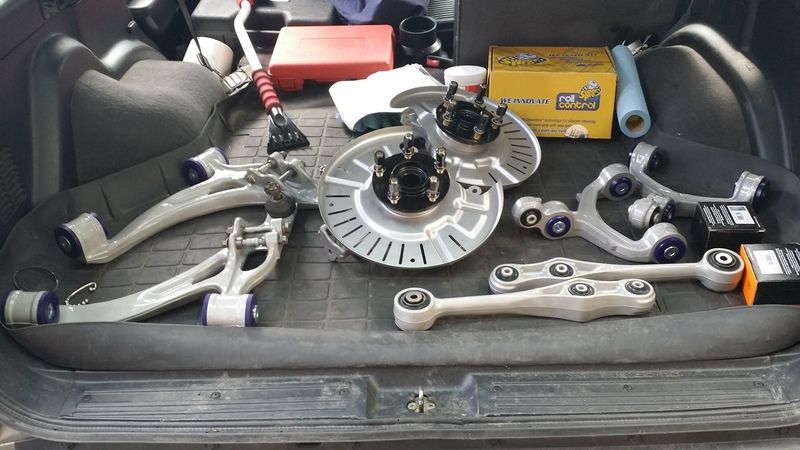
I went to Jesse's and we pressed in all the bushings we could and also got the rear hubs and knuckles together.
I goofed and messed up one of the rear lower control arms by using too big of a socket under the pillow bushing and it went crooked into the back of the arm, which caused the bushing to go in crooked. The bushing straightened out but the back side pressed in and the slot for the dust cover closed on one side. I was going to use the dremel cutting wheel and reopen it but I couldn't get the center of the bushing back out so I just mashed the dust cover in.
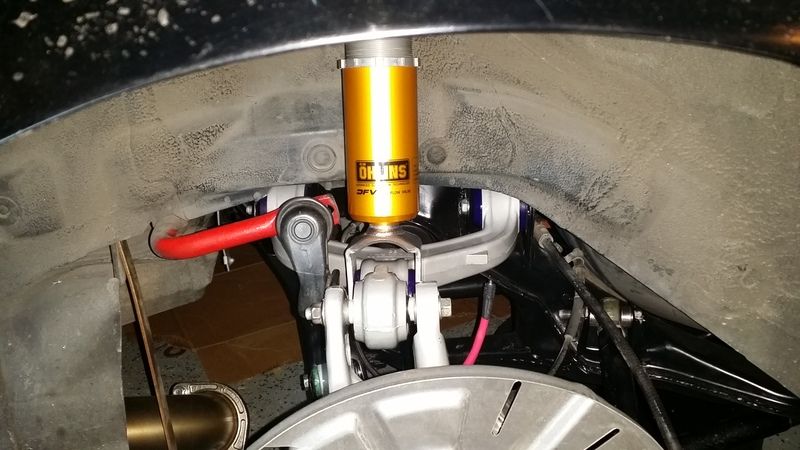
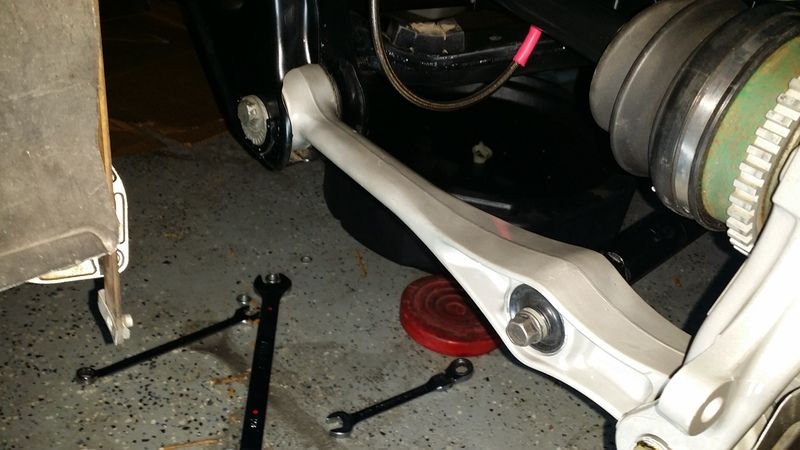
I got everything but the brakes installed in the rear tonight. I had some issues there too but not much to note.

I goofed and messed up one of the rear lower control arms by using too big of a socket under the pillow bushing and it went crooked into the back of the arm, which caused the bushing to go in crooked. The bushing straightened out but the back side pressed in and the slot for the dust cover closed on one side. I was going to use the dremel cutting wheel and reopen it but I couldn't get the center of the bushing back out so I just mashed the dust cover in.

I got everything but the brakes installed in the rear tonight. I had some issues there too but not much to note.


-
RX-7 Chris
- Posts: 7800
- Joined: Tue Oct 02, 2007 9:14
- Location: Colorado Springs
- Contact:
Re: Build thread
Looks like it is coming along. Do you think you can have it on the road by May 7th?
1984 RX-7 GSL-SE [size=84]My restomod project[/SIZE]
1964 Ford Galaxie 500XL flat black w/ white interior, 2 dr fastback, 390 thunderbird, C6 auto, 2500 rpm high stall converter, shift kit, AC, Holley 750 cfm
[size=100]RIP 1983 RX-7[/SIZE]
My Car Blog

Re: Build thread
Your car is really coming together. Nice work on the details.
-
speedjunkie
- Senior Member
- Posts: 5290
- Joined: Wed Jan 02, 2008 9:14
- Location: Colorado Springs
- Contact:
Re: Build thread
I'm not sure if it will be ready or not by the 7th. I'm sure I can get all my stuff done, but I still need to get Mitch over to do his thing. Then I need to get Chris to tune it, get the alignment done, and bed the brakes.
Thanks! I have my limits on details though lol.
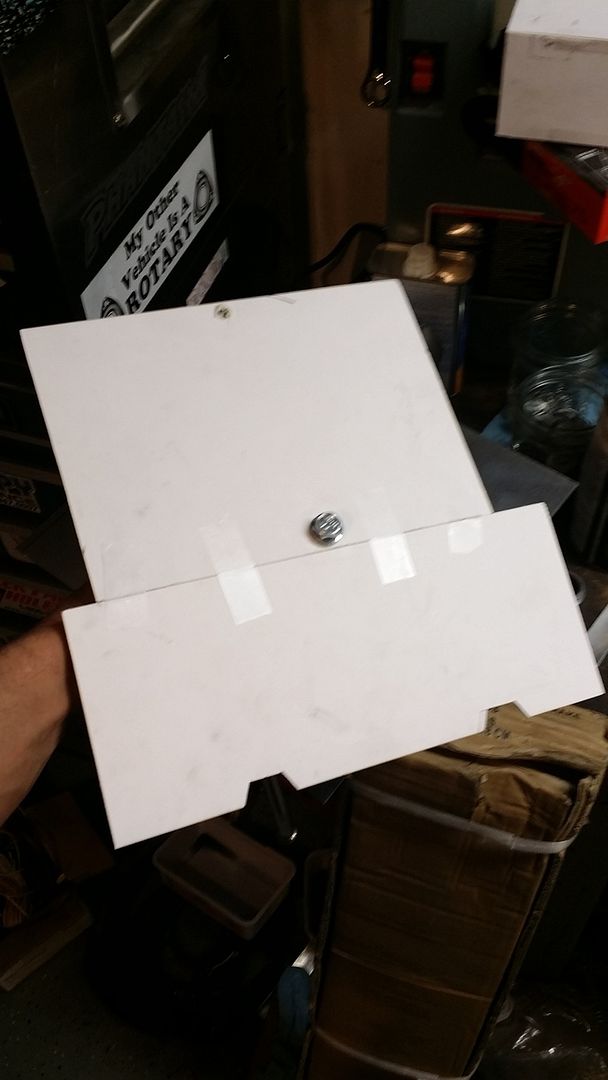
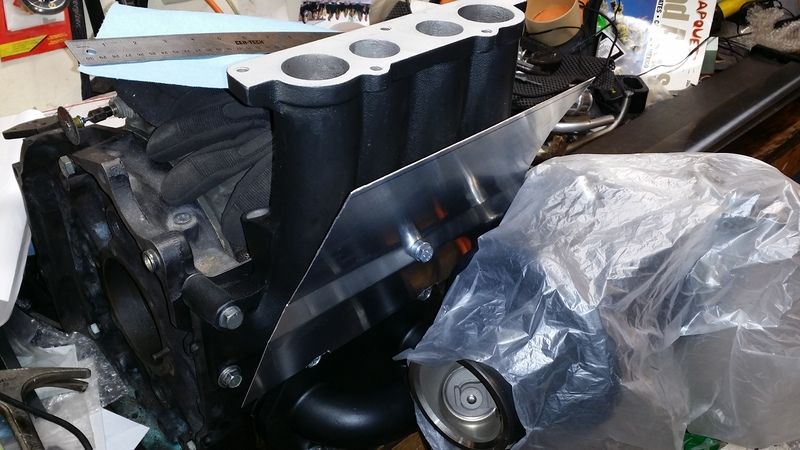
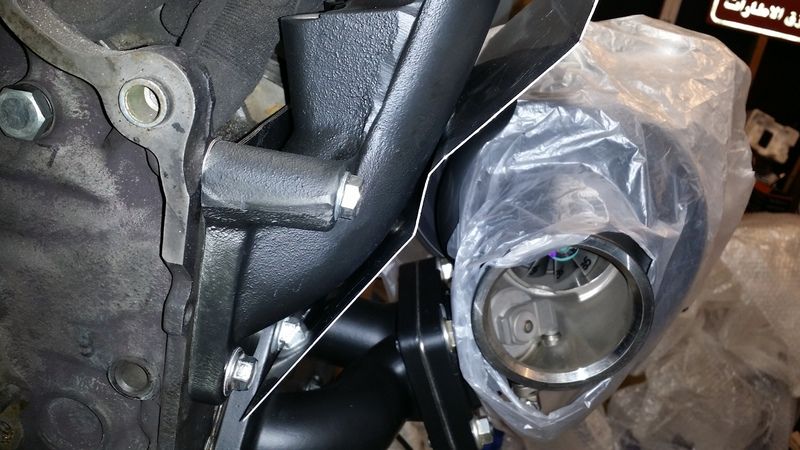
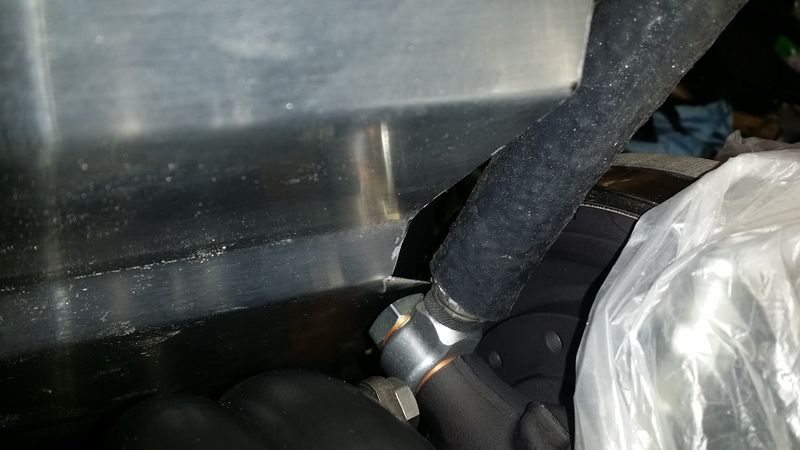
I half made the heat shield tonight. First I discovered that I should have ground down the LIM more because the turbo was pressing against it. I used a rubber mallet to push the LIM toward the rear and the turbo forward, and it still touched. So I used pliers and a hammer to flatten the part of the vband clamp that was touching and it just barely cleared. Then it was on to the heat shield. I used cardboard to get the shape and where to bend it, then cut out the aluminum piece. I just need to bend it now. Hopefully it works and I only have to do this once.
Thanks! I have my limits on details though lol.
I half made the heat shield tonight. First I discovered that I should have ground down the LIM more because the turbo was pressing against it. I used a rubber mallet to push the LIM toward the rear and the turbo forward, and it still touched. So I used pliers and a hammer to flatten the part of the vband clamp that was touching and it just barely cleared. Then it was on to the heat shield. I used cardboard to get the shape and where to bend it, then cut out the aluminum piece. I just need to bend it now. Hopefully it works and I only have to do this once.


Re: Build thread
What are you using the heat shield for (what is it blocking heat from getting to)? Are you going to cover it in something? Aluminum is a pretty good heat conductor. It may just end up passing heat straight through.
-
$crillaTor

- Senior Member
- Posts: 153
- Joined: Sat Jun 15, 2013 9:14
- Location: Colorado Springs
Re: Build thread
It is going between his LIM and the downpipe/turbo. I've heard of people using mica for this. I expect that he'll either coat it in that sticky gold heat blocker material or something. I think he should make me one while he's at it 
-
speedjunkie
- Senior Member
- Posts: 5290
- Joined: Wed Jan 02, 2008 9:14
- Location: Colorado Springs
- Contact:
Re: Build thread
Yep, Jeff is right. I'll be using it to block the LIM from any excess heat from the turbo, downpipe, or manifold. I'll be using mica like Andy suggested in Jason's thread. There shouldn't be a whole lot of heat since all the parts are ceramic coated, but I like to over build everything lol. And apparently Andy likes to even more because he's talking about using the super high temp mica lol. I was planning on even wrapping the downpipe but I might avoid that because David said if too much heat is trapped it will chip the ceramic coat.
-
speedjunkie
- Senior Member
- Posts: 5290
- Joined: Wed Jan 02, 2008 9:14
- Location: Colorado Springs
- Contact:
Re: Build thread
Oh, and Jeff, I don't give people fish anymore, I teach them how to fish. Lol Actually if you have an equal length LIM I'll give you the template I made, although I had to make several adjustments to it. If you have the stock LIM, I'd just copy Jason Turton's.
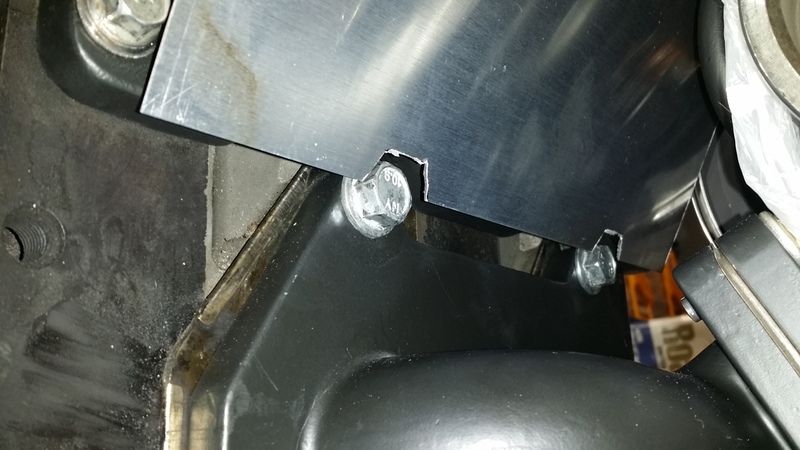
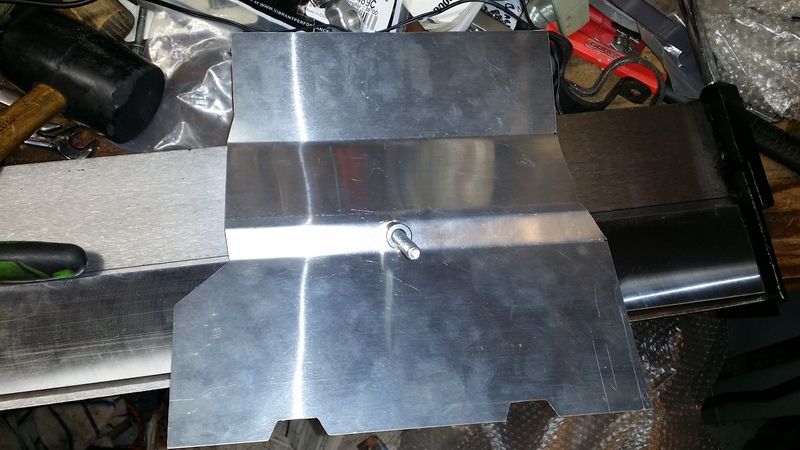
So like I said, I had to make several adjustments to the shield. I put a couple extra bends in it as needed, I had to redo a bend, and then I had to cut some extra because I didn't take the coolant hose routing into account.
Here it is with the first two bends.
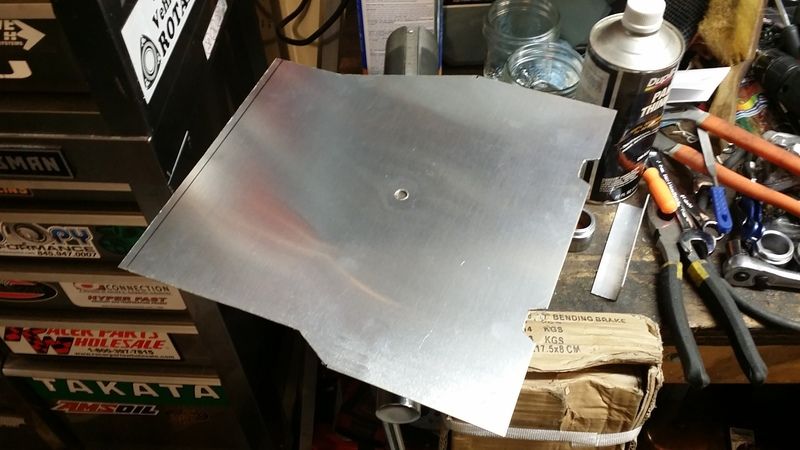
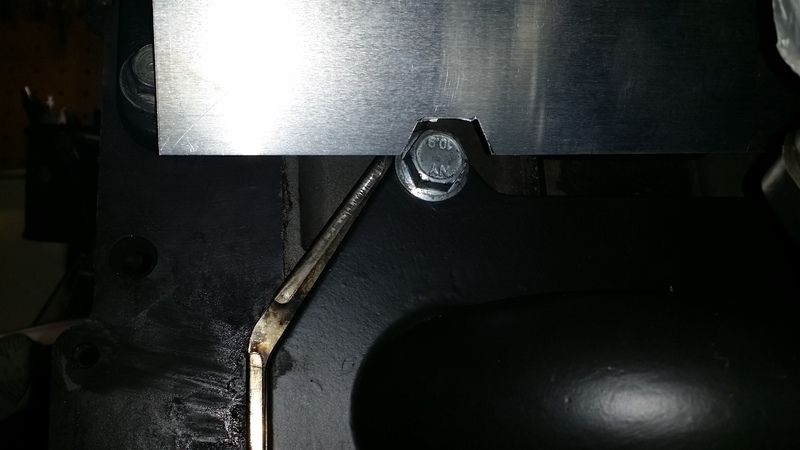
On the bending brake getting another bend to bring the top in. After the first bend I couldn't use the brake the way you're supposed to, so I improvised.
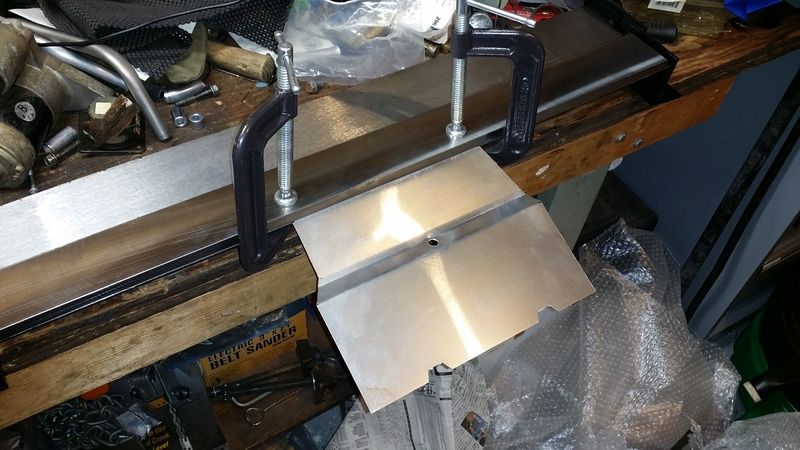
At this point I thought I was done with it aside from widening these holes around the top manifold bolts.
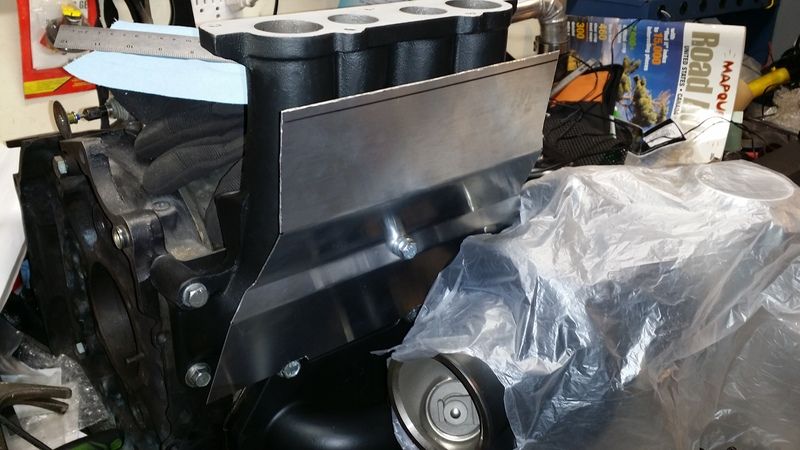
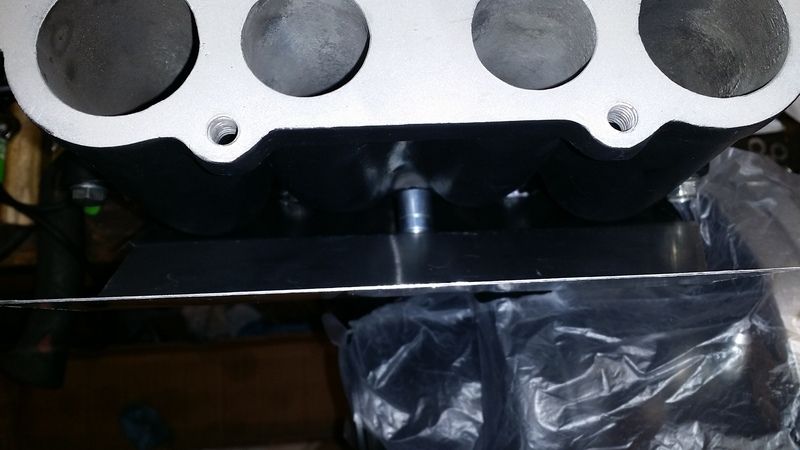
Alas, I was wrong. I had to cut some space for the coolant line. I had only made room for the banjo bolt. And I ended up cutting this more than once to make even more room.
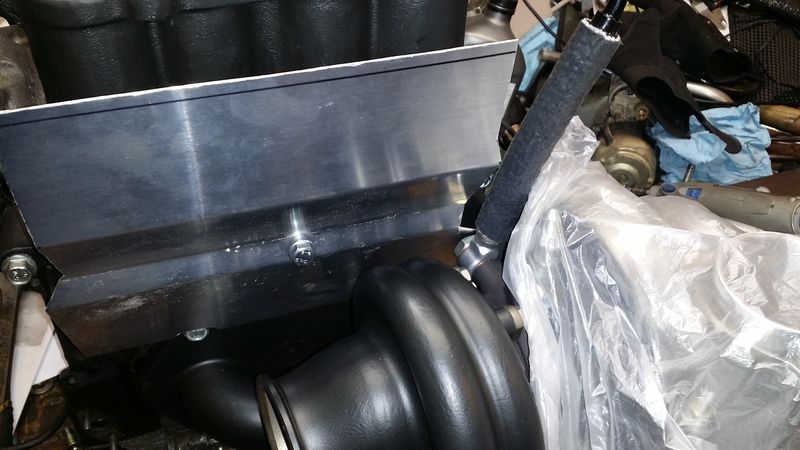
And the final product (hopefully).
After all that I installed the secondary fuel rail on the LIM, installed the LIM and connected all the wiring and lines I could. I finally ordered the mica sheet tonight after finishing the shield. I was afraid I'd order a sheet not big enough to cover it all. And I ordered two sheets, one 1/8" thick and rigid, and one .024" thick and flexible, both ultra high temp though.
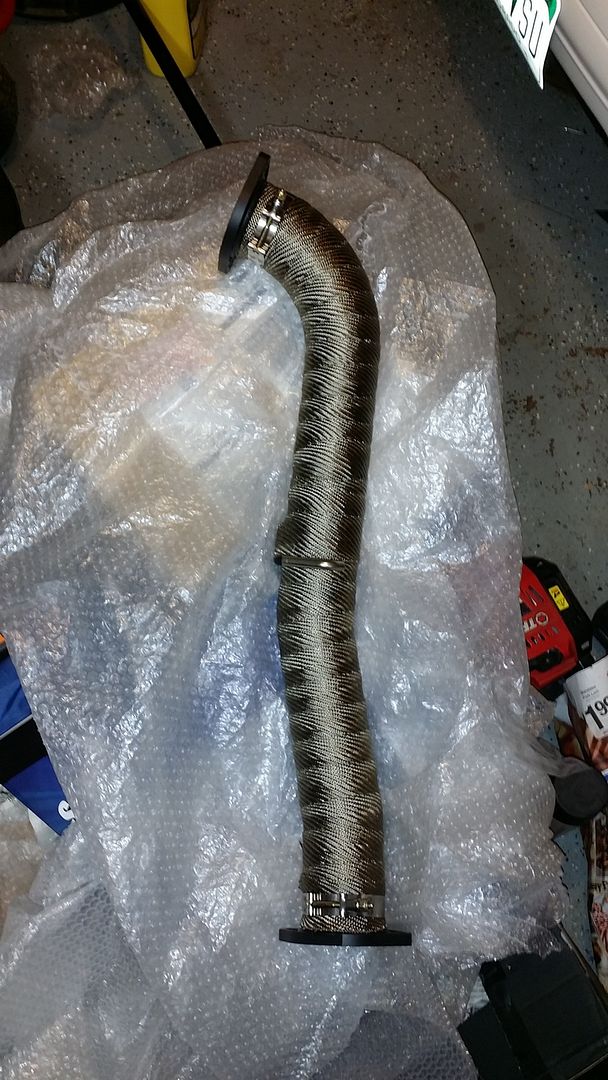
Then I wrapped the exhaust pipe and installed it.
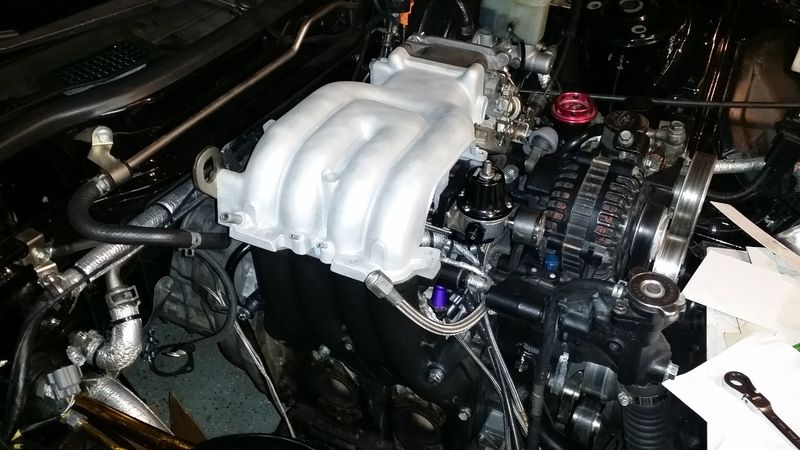
I washed the UIM before doing the exhaust so it could dry. Then I installed all the accessories and almost installed it back on the engine, but I decided to call it a night instead. I kinda like the bright UIM against the black LIM and everything else.
So like I said, I had to make several adjustments to the shield. I put a couple extra bends in it as needed, I had to redo a bend, and then I had to cut some extra because I didn't take the coolant hose routing into account.
Here it is with the first two bends.

On the bending brake getting another bend to bring the top in. After the first bend I couldn't use the brake the way you're supposed to, so I improvised.


At this point I thought I was done with it aside from widening these holes around the top manifold bolts.


Alas, I was wrong. I had to cut some space for the coolant line. I had only made room for the banjo bolt. And I ended up cutting this more than once to make even more room.


And the final product (hopefully).

After all that I installed the secondary fuel rail on the LIM, installed the LIM and connected all the wiring and lines I could. I finally ordered the mica sheet tonight after finishing the shield. I was afraid I'd order a sheet not big enough to cover it all. And I ordered two sheets, one 1/8" thick and rigid, and one .024" thick and flexible, both ultra high temp though.
Then I wrapped the exhaust pipe and installed it.


I washed the UIM before doing the exhaust so it could dry. Then I installed all the accessories and almost installed it back on the engine, but I decided to call it a night instead. I kinda like the bright UIM against the black LIM and everything else.

-
speedjunkie
- Senior Member
- Posts: 5290
- Joined: Wed Jan 02, 2008 9:14
- Location: Colorado Springs
- Contact:
Re: Build thread
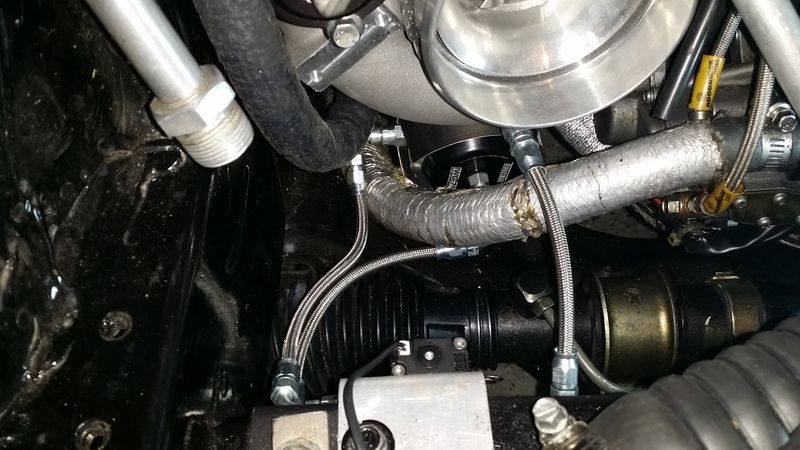
I had another productive night tonight. I got everything connected to the UIM but I haven't bolted it down because I want to check for fuel leaks first. The upper o-rings on a couple of the injectors had a small tear at the top but I don't feel like they were bad enough to cause an issue. I hope I'm right lol. And tonight I had the battery connected and when I was running the throttle cable it arced against the oil feed line for the turbo, so I'm going to watch that for leaks too. I don't think it melted through the teflon because it was only a second and the wire braid on the outside looks like it's still intact. But I'm definitely checking for all the leaks first.

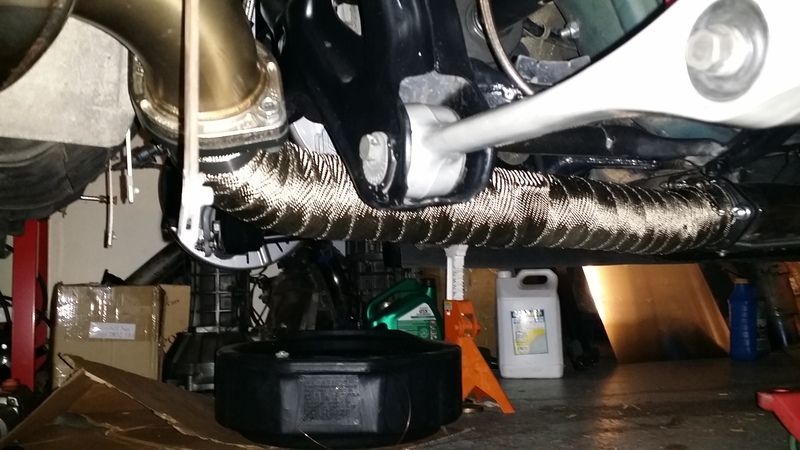
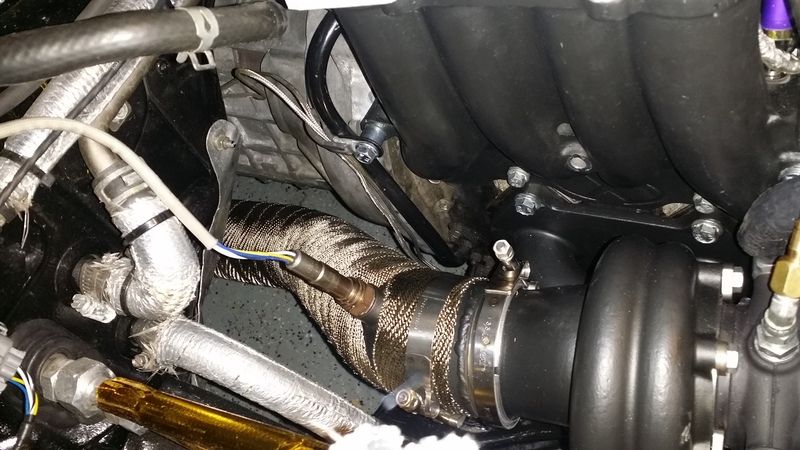
I got the turbo in, downpipe installed, EGT sensors and wideband sensor connected... I decided to wrap the downpipe anyway. If the ceramic coat chips off I'll just get it done again. I wanted the most heat regulation as possible since it's running right next to the transmission. My biggest problem with all this is that the turbo seems to be pressing against the LIM even though I ground it down to what looked like a good amount of space.
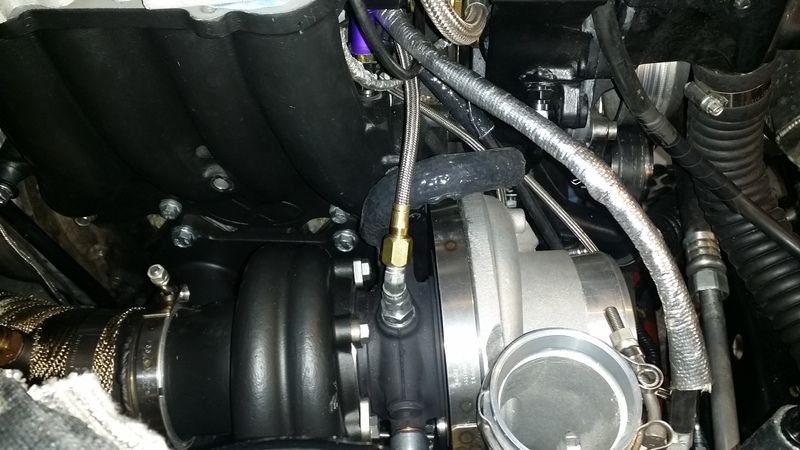
I made a couple of the lines for the turbo/MAC valve connection. I would have made the last line too but I need to go to Whisler again tomorrow and swap a straight fitting for another 90 degree. I looked up the prices for those fittings on Summit vs. what I paid at Whisler...I paid almost double. RIDICULOUS. I really wish I'd just bought these on Summit.
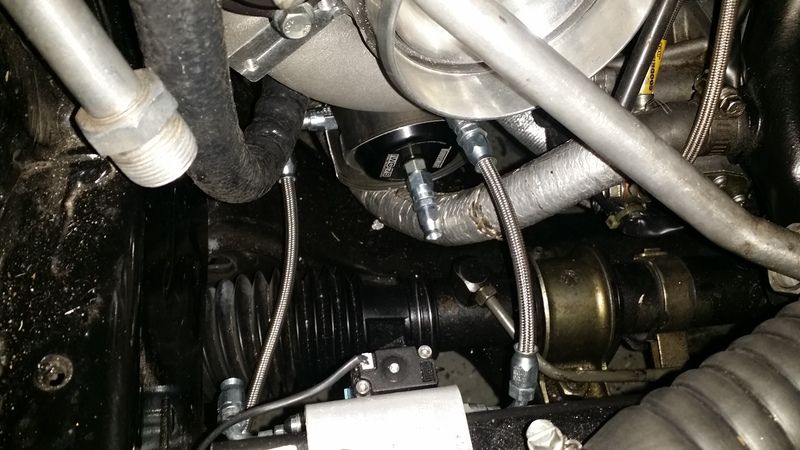
I had a couple issues tonight. For one, the vacuum routing between the turbo and MAC valve is confusing because there are two different versions I've found, so I emailed Chris to ask him which one I should use. The way I was going to hook them up had the bottom port (B) of the valve going to the side/bottom port of the actuator and the top port (A) of the valve going to the top of the actuator. The other way I just saw tonight had those reversed. The other issue I had was when I was trying to figure out which EGT probe went into which runner and I was going to watch the Syvecs app on the iPad while holding a lighter on one of them. I connected the iPad to the Syvecs Bluetooth module, but it wouldn't show up as connected within the app. So I asked Chris about that too. I really hope I connected all the wires correctly, but I can't see why that would be the problem since the iPad said it was connected to the module.
I might actually be able to finish this by the 7th. My only holdups should be getting it tuned and getting Mitch over to do his part, but I'm hopeful I can get those taken care of too.

I got the turbo in, downpipe installed, EGT sensors and wideband sensor connected... I decided to wrap the downpipe anyway. If the ceramic coat chips off I'll just get it done again. I wanted the most heat regulation as possible since it's running right next to the transmission. My biggest problem with all this is that the turbo seems to be pressing against the LIM even though I ground it down to what looked like a good amount of space.


I made a couple of the lines for the turbo/MAC valve connection. I would have made the last line too but I need to go to Whisler again tomorrow and swap a straight fitting for another 90 degree. I looked up the prices for those fittings on Summit vs. what I paid at Whisler...I paid almost double. RIDICULOUS. I really wish I'd just bought these on Summit.

I had a couple issues tonight. For one, the vacuum routing between the turbo and MAC valve is confusing because there are two different versions I've found, so I emailed Chris to ask him which one I should use. The way I was going to hook them up had the bottom port (B) of the valve going to the side/bottom port of the actuator and the top port (A) of the valve going to the top of the actuator. The other way I just saw tonight had those reversed. The other issue I had was when I was trying to figure out which EGT probe went into which runner and I was going to watch the Syvecs app on the iPad while holding a lighter on one of them. I connected the iPad to the Syvecs Bluetooth module, but it wouldn't show up as connected within the app. So I asked Chris about that too. I really hope I connected all the wires correctly, but I can't see why that would be the problem since the iPad said it was connected to the module.
I might actually be able to finish this by the 7th. My only holdups should be getting it tuned and getting Mitch over to do his part, but I'm hopeful I can get those taken care of too.
-
speedjunkie
- Senior Member
- Posts: 5290
- Joined: Wed Jan 02, 2008 9:14
- Location: Colorado Springs
- Contact:
Re: Build thread
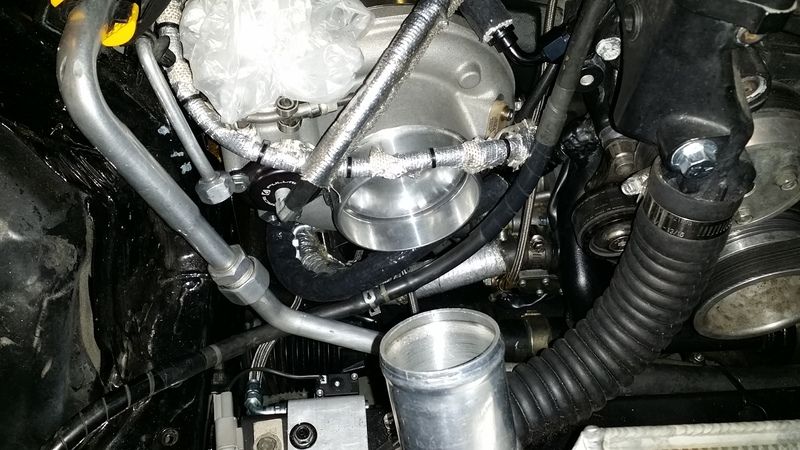
I went to Whisler this morning and swapped out the straight fitting for the 90, then at lunch I built the line and sprayed some brake cleaner in all the lines, blew them out with compressed air at work, and put them on tonight after work. I wanted to shorten the first line I made (from the bottom of the actuator to the top port of the valve) because it's just a tad bit too long and a tad longer than the other line (top of actuator to bottom port on valve), and I'm not sure if I'm just being anal or if I remember someone telling me that there is a benefit of the lines being the same length. Of course this was on my old turbo setup that I heard that, so it may not apply here. Either way, the fitting was being a PITA to remove from the line (reusable my butt lol) and it's only about 1/4" longer than the other line, so I doubt it's a big deal in this case even if they are supposed to be the same length. And it installed alright too, so I'm not too worried about it. I finished connecting all the lines (vacuum, coolant, AC, etc). I keep forgetting to mention, I can't believe how easy it is to make teflon lines, and I always heard it was difficult. I might just stick to teflon lines from now on lol. Oh, also, the two vacuum routing pics I saw for the MAC valve were both right...one is for internal wastegate, the other is for external. I hadn't noticed that before.
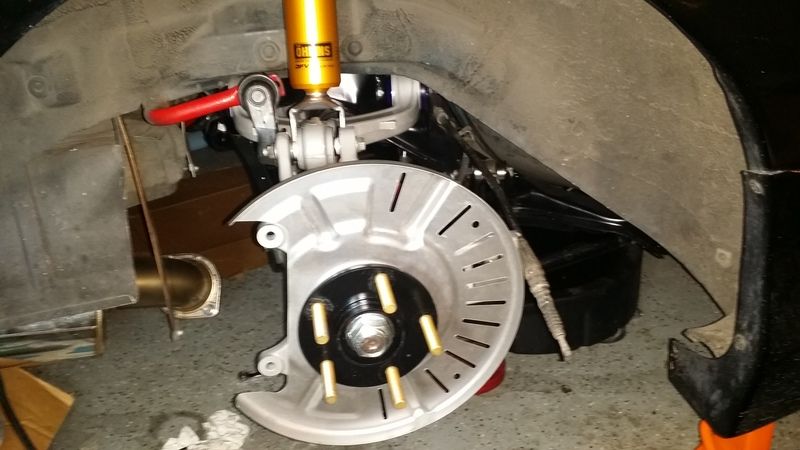
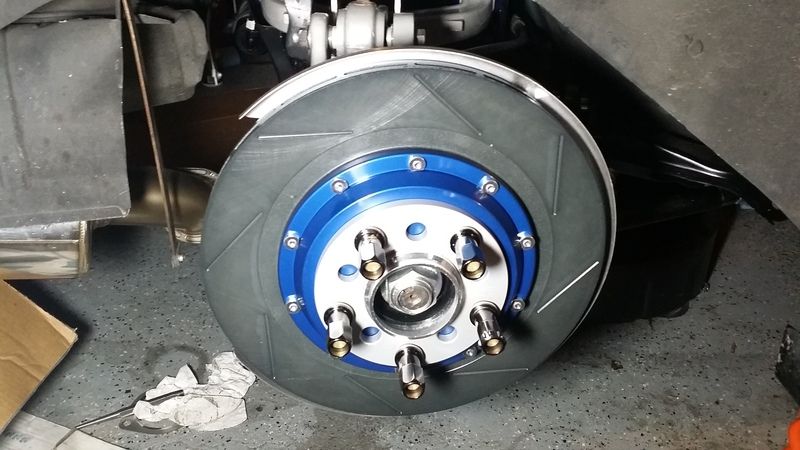
I brought home some sheet protectors to cut up to use between the brake rotors and hubs (couldn't hurt lol), so tomorrow night I guess I'll do that and get the front lower suspension arms ready and installed. I'll probably see if I can get Mitch over this weekend too. I might need to modify the plans on the OMP tank a little, it might be too tight of a fit and the bottom of it will not be an optimal design.
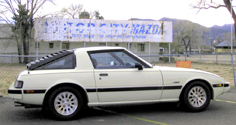
The guy I bought the car from still lives in Littleton and I messaged him on facebook a few months ago to see if he wanted to see the car. It went to his other messages folder and I guess he just saw it because he messaged me back tonight and said he'd love to see it. He also said he really misses it and keeps telling his wife they should get another one lol. So once the car is back on the road I'm going to take it up there and take him for a ride.
Tomorrow is my last day at work and I'm pretty sure they're going to "washrack" me, so I chose not to work on the car again after dinner in lieu of getting a change of clothes ready for tomorrow and preparing myself in general for my last day. I'm kinda bummed actually. This is the only life I've known for two decades and soon it will be gone. Part of me is happy because it's gotten so stupid in so many ways and every little thing makes me want to run immediately, but I'll definitely miss the people. I've made so many good, lifelong friends throughout my career, and they're not all military either. I've made great civilian friends too, but I wouldn't have met them/you all if it weren't for the military. So as much as I hate some of the things I see happening now, I will never regret my time served.


I brought home some sheet protectors to cut up to use between the brake rotors and hubs (couldn't hurt lol), so tomorrow night I guess I'll do that and get the front lower suspension arms ready and installed. I'll probably see if I can get Mitch over this weekend too. I might need to modify the plans on the OMP tank a little, it might be too tight of a fit and the bottom of it will not be an optimal design.
The guy I bought the car from still lives in Littleton and I messaged him on facebook a few months ago to see if he wanted to see the car. It went to his other messages folder and I guess he just saw it because he messaged me back tonight and said he'd love to see it. He also said he really misses it and keeps telling his wife they should get another one lol. So once the car is back on the road I'm going to take it up there and take him for a ride.
Tomorrow is my last day at work and I'm pretty sure they're going to "washrack" me, so I chose not to work on the car again after dinner in lieu of getting a change of clothes ready for tomorrow and preparing myself in general for my last day. I'm kinda bummed actually. This is the only life I've known for two decades and soon it will be gone. Part of me is happy because it's gotten so stupid in so many ways and every little thing makes me want to run immediately, but I'll definitely miss the people. I've made so many good, lifelong friends throughout my career, and they're not all military either. I've made great civilian friends too, but I wouldn't have met them/you all if it weren't for the military. So as much as I hate some of the things I see happening now, I will never regret my time served.
-
Saul_Good

- Senior Member
- Posts: 480
- Joined: Sun Jul 22, 2012 9:14
- Location: Cerritos, CA (DW says i can't play here anymore...)
- Contact:
Re: Build thread
Oh snap! This came up quick from our last time together! Congrats and thanks for your service.
-
RX-7 Chris
- Posts: 7800
- Joined: Tue Oct 02, 2007 9:14
- Location: Colorado Springs
- Contact:
Re: Build thread
speedjunkie wrote:Tomorrow is my last day at work and I'm pretty sure they're going to "washrack" me, so I chose not to work on the car again after dinner in lieu of getting a change of clothes ready for tomorrow and preparing myself in general for my last day. I'm kinda bummed actually. This is the only life I've known for two decades and soon it will be gone. Part of me is happy because it's gotten so stupid in so many ways and every little thing makes me want to run immediately, but I'll definitely miss the people. I've made so many good, lifelong friends throughout my career, and they're not all military either. I've made great civilian friends too, but I wouldn't have met them/you all if it weren't for the military. So as much as I hate some of the things I see happening now, I will never regret my time served.
I didn't realize that is how it is going down. Thanks for your service. What are your plans now?
Looks like you are getting really close on the car. Let me know if you need any help.
1984 RX-7 GSL-SE [size=84]My restomod project[/SIZE]
1964 Ford Galaxie 500XL flat black w/ white interior, 2 dr fastback, 390 thunderbird, C6 auto, 2500 rpm high stall converter, shift kit, AC, Holley 750 cfm
[size=100]RIP 1983 RX-7[/SIZE]
My Car Blog
Re: Build thread
Thanks Junkie! I hope you have a fantastic last day and that you continue to have great memories of the service you provided to your country. I know you will have great success in the civilian world, but wish you the best of luck anyway.
I'd also like a ride in your car when you are up and running again...say at HPR or PMP?
I'd also like a ride in your car when you are up and running again...say at HPR or PMP?
Who is online
Users browsing this forum: No registered users and 14 guests