I like the dual tip a lot too, but because the FD came with a dual tip stock, I don't see FB lol.
Tonight I put the tail lights back on and finished some more interior stuff.
I replaced the bushing on the base of the shifter because it was sloppy, but that's not where my problems end. The groove on the ball (fulcrum point) of the shifter is worn out, as is the little post that goes into it. So basically I'll need a new shifter, but this is a C's short shifter and they're not made anymore. The only other way would be if someone could weld some material on there and then machine it down, but I don't see that happening. The new bushing helped a little at least.
Then when I was about to put the center console back on I remembered one of the connectors had a broken wire, and it goes to the defrost on the hatch window. So I soldered that. Then reassembled the rest of the center console.
The downpipe should be ready tomorrow afternoon. I'll be glad when the exhaust is finally finished and I can move on to the suspension again.
Build thread
-
speedjunkie

- Senior Member
- Posts: 5294
- Joined: Wed Jan 02, 2008 9:14
- Location: Colorado Springs
- Contact:
-
RX-7 Chris
- Posts: 7800
- Joined: Tue Oct 02, 2007 9:14
- Location: Colorado Springs
- Contact:
Re: Build thread
Sound like you are getting close. What else is left to do?
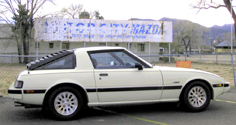
1984 RX-7 GSL-SE [size=84]My restomod project[/SIZE]
1964 Ford Galaxie 500XL flat black w/ white interior, 2 dr fastback, 390 thunderbird, C6 auto, 2500 rpm high stall converter, shift kit, AC, Holley 750 cfm
[size=100]RIP 1983 RX-7[/SIZE]
My Car Blog
-
speedjunkie
- Senior Member
- Posts: 5294
- Joined: Wed Jan 02, 2008 9:14
- Location: Colorado Springs
- Contact:
Re: Build thread
I have to press out more bushings, sandblast the suspension arms, and get them to David for coating. Then press in the new bushings and install the arms. Press out the bearings on the rear knuckles and sandblast those and get them coated, then press in the new bearings and put the new dust shields on them and install. Install the new brakes, and the suspension, and the brake ducts for the front. Install the turbo and everything when I get the pieces back from ceramic coating, install the 4 port valve, figure out what I'm doing for the speaker covers and install the rest of the plastics in the interior, along with the seats. Install the OMP, get a reservoir made for the OMP, get the intake pipe and IC piping made, get the IC end tank inlet and outlet modified. Then I hope the new firmware and software make it possible to get a good tune over the internet because it won't be ready for Chris if I still have to fly him out here, and tickets are probably crazy now anyway.
I might be missing a few things too haha. Man, I thought I was getting close but I'm really not.
I got the downpipe back, so I just need to test fit it tonight. And I had an idea today about how to mount a heat shield to the LIM. There is a hole that passes through right in the middle of it, so I'm going to tap that hole and bolt the shield right there using a spacer. I'll just make a simple heat shield using aluminum and the bending brake.
-
RX-7 Chris
- Posts: 7800
- Joined: Tue Oct 02, 2007 9:14
- Location: Colorado Springs
- Contact:
Re: Build thread
It sounds like a lot and it will take time but compared to where you started it is a short list.
1984 RX-7 GSL-SE [size=84]My restomod project[/SIZE]
1964 Ford Galaxie 500XL flat black w/ white interior, 2 dr fastback, 390 thunderbird, C6 auto, 2500 rpm high stall converter, shift kit, AC, Holley 750 cfm
[size=100]RIP 1983 RX-7[/SIZE]
My Car Blog
-
speedjunkie
- Senior Member
- Posts: 5294
- Joined: Wed Jan 02, 2008 9:14
- Location: Colorado Springs
- Contact:
Re: Build thread
Yeah that's true. Once I get the other bushings pressed out and get the arms blasted I think it will go by pretty quick. About half of the list will be completed by others anyway, with the welding and coating. Speaking of which, I dropped off the calipers (and brackets) with David tonight, along with the LIM, turbo manifold, downpipe and turbine housing. I forgot I wanted to take the piece of the RB dual exhaust too. I guess I'll have to take that tomorrow night or something. He's giving me a killer deal coating this stuff though.
Anyway, once I have everything back and it's ready to assemble I will be excited and get it done pretty quick, barring any other problems.
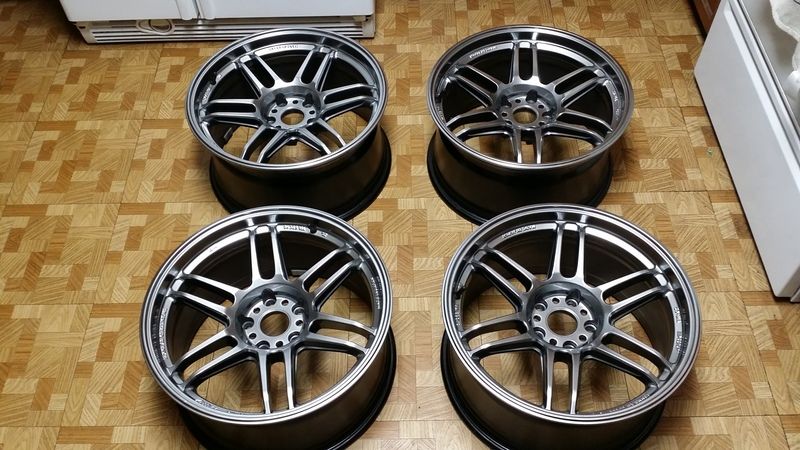
Also I believe the wheels should be here by Friday. I'll need to wait until payday to get them widened but since they have a 5 week turnaround anyway I'll probably just send them straight there. I was thinking about having the guy just ship them to Weldcraft, but I wanted to see them first and make sure they're good to go, and also this way I can ensure there won't be any issues with making sure the wheels actually go there and not have to deal with any dishonest parties if that were to arise.
EDIT: I just checked the tracking on the wheels and it looks like they'll be here tomorrow. They're in Henderson right now.
Anyway, once I have everything back and it's ready to assemble I will be excited and get it done pretty quick, barring any other problems.
Also I believe the wheels should be here by Friday. I'll need to wait until payday to get them widened but since they have a 5 week turnaround anyway I'll probably just send them straight there. I was thinking about having the guy just ship them to Weldcraft, but I wanted to see them first and make sure they're good to go, and also this way I can ensure there won't be any issues with making sure the wheels actually go there and not have to deal with any dishonest parties if that were to arise.
EDIT: I just checked the tracking on the wheels and it looks like they'll be here tomorrow. They're in Henderson right now.
-
chickenwafer
- Posts: 2515
- Joined: Wed Mar 11, 2009 9:14
- Location: Greeley
Re: Build thread
Wait, did you get yet another set of wheels? LOL I haven't kept up with this thread.
-
speedjunkie
- Senior Member
- Posts: 5294
- Joined: Wed Jan 02, 2008 9:14
- Location: Colorado Springs
- Contact:
Re: Build thread
Yeah lol. There are really only two reasons though, because they're the same wheels I have now.
1. They're a square setup, so I'll be able to rotate the wheels when the tires get to that point, and I'll just use spacers to get the final offset I want front and rear.
2. I'm getting them widened to 11.5" all around, and I was concerned that if I sent off my current wheels I wouldn't get them back in time or something would happen to them. It's my luck lol.
I've actually been working on doing a set of custom 3pc wheels based on the TM02 design, and the CAD is already done, but I'm having a hard time finding a machinist to cut them for less than an arm and a leg. Tom is supposed to be getting me contact information to have them cut in China for much cheaper, but I haven't heard anything yet and I want to have wider wheels for this summer.
I installed the OMP again tonight. I had some issues getting the bolts in, they were tight immediately and I was afraid I was cross threading them, but they were still turning in regardless and ended up turning in all the way, so whatever lol. I also realized I never bought new copper washers for the lines, and the figure 8 washer was ruined when Chris tightened down the bolts through the ends of the lines and hung them with a ziptie around the coolant hose. But I found an old one that was still in decent shape. I might go ahead and get new ones just in case and swap them out before putting the turbo back in, because I really don't want to get in there after the turbo is in.
Oh yeah, I got a new turbo too, Dave. lol
-
speedjunkie
- Senior Member
- Posts: 5294
- Joined: Wed Jan 02, 2008 9:14
- Location: Colorado Springs
- Contact:
Re: Build thread
I did a few things tonight.
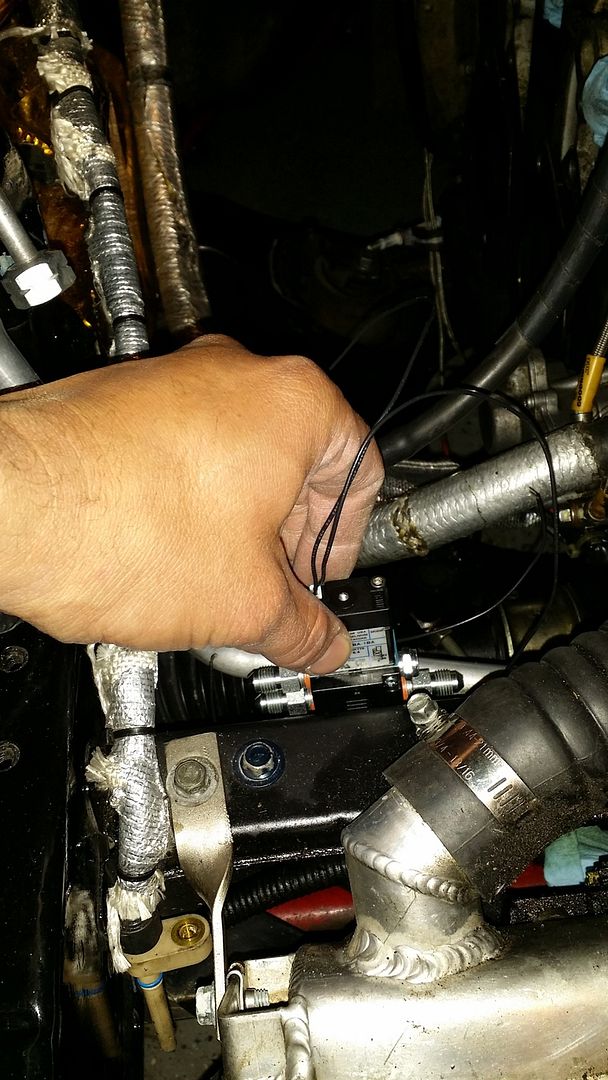
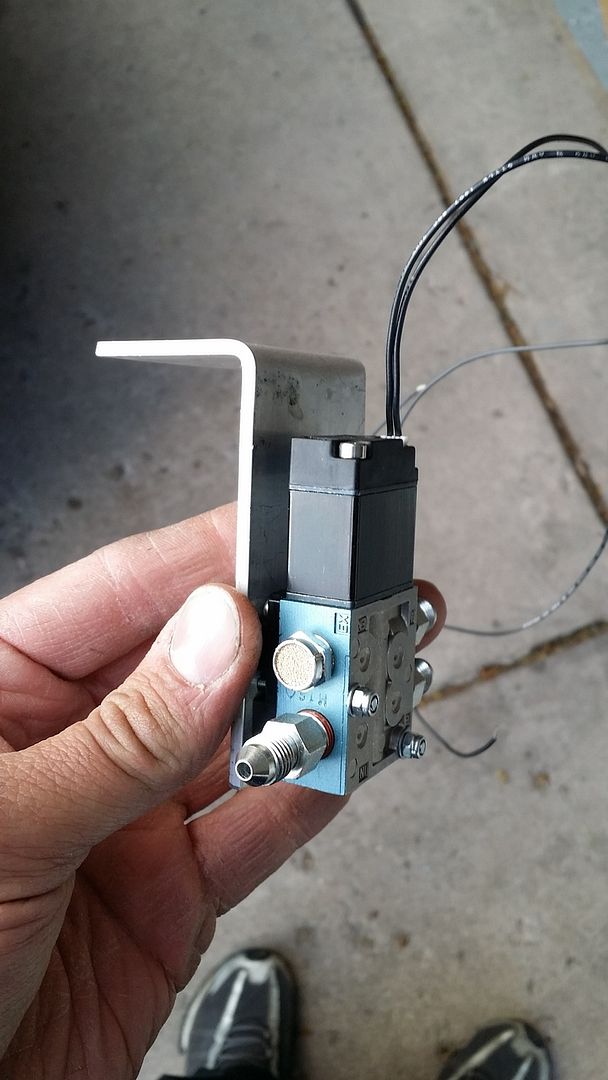
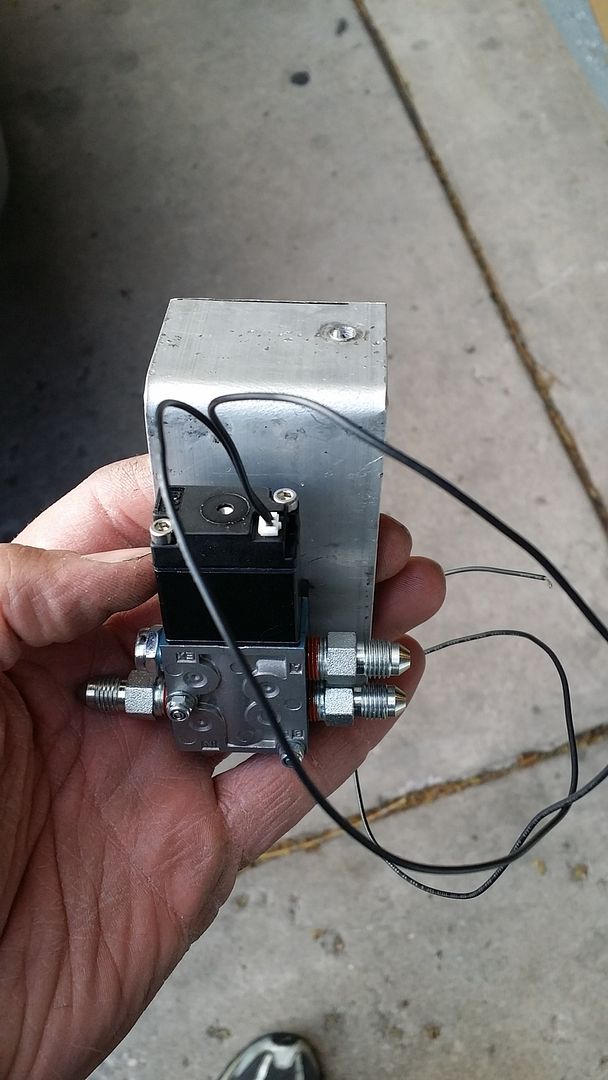
I almost made a bracket to mount the 4 port valve, but this was at the end of the night and I'll just do it tomorrow. I figured out the other night where to mount it though.
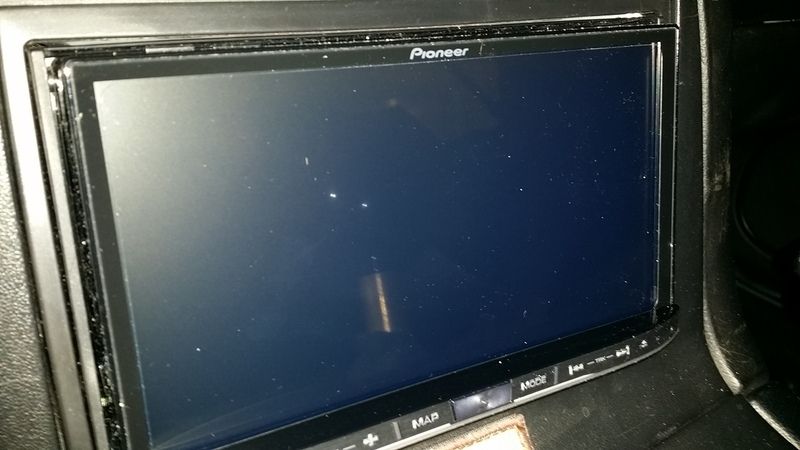
I put a screen protector on the stereo screen but I had some issues and stuff got on the back side of it. Not sure if you can tell from this pic but I was kinda ticked lol.
I put the driver's side fender back on and noticed a piece broke off where it mounts at the front so I had to use a washer for now. Hopefully it works.
I put an extra screw in each of the front ends of the side skirts because the passenger side skirt broke right there. This is a temporary fix also until I pull them off and get them repaired the right way. Maybe next year.

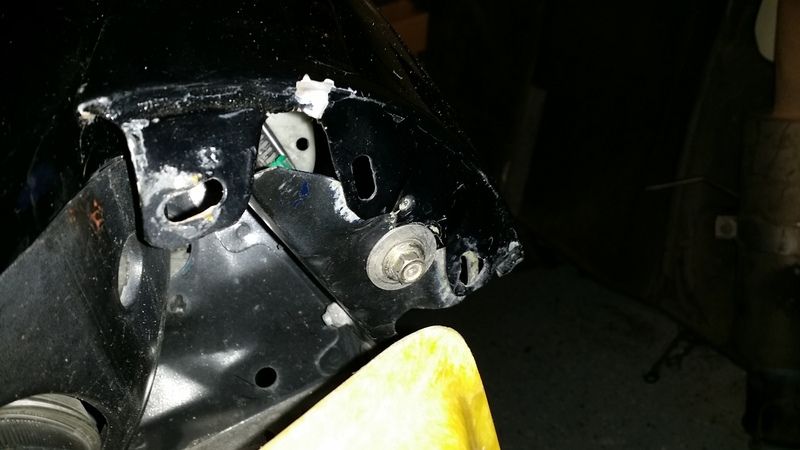
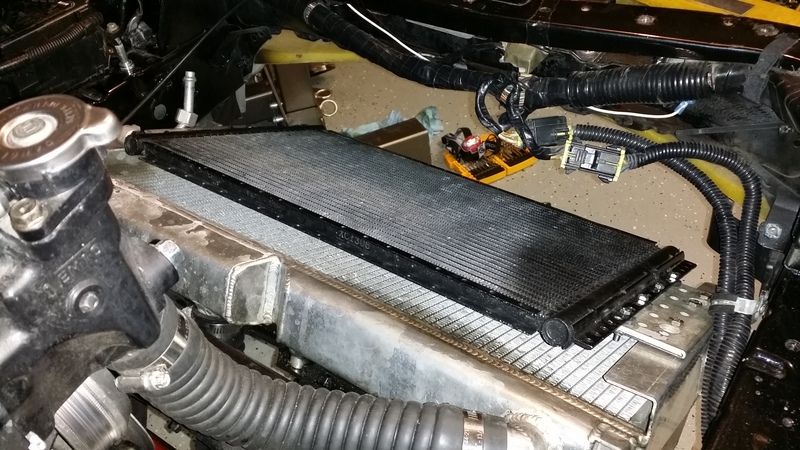
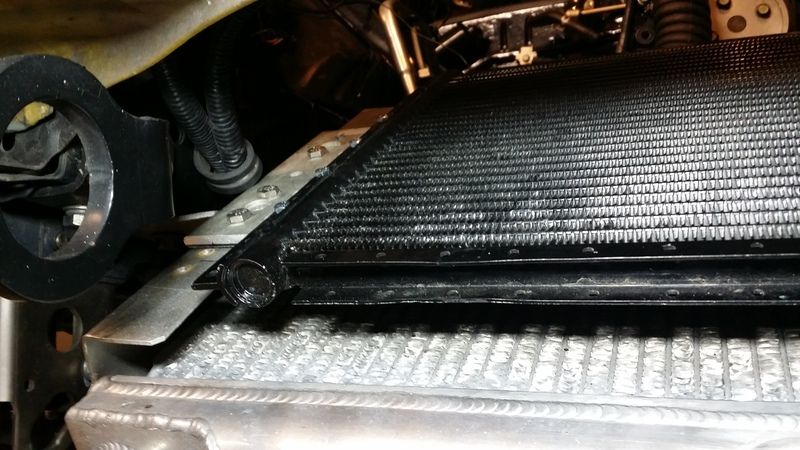
I changed the bolts on the oil cooler mounts because the alloy screws that I used before were pretty rusty.
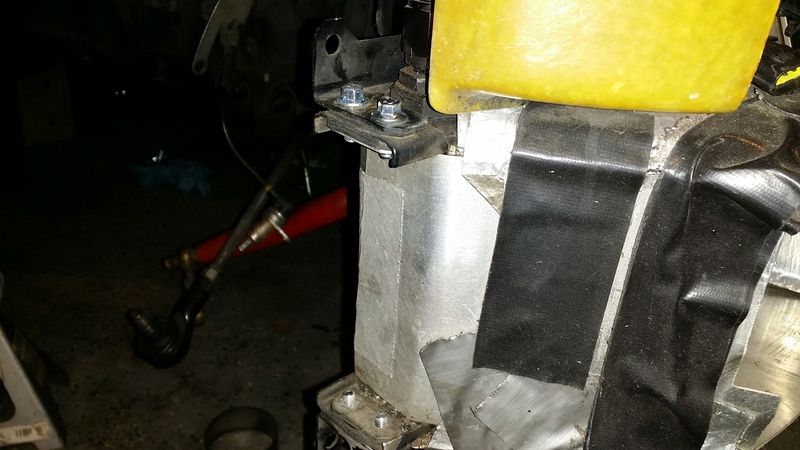
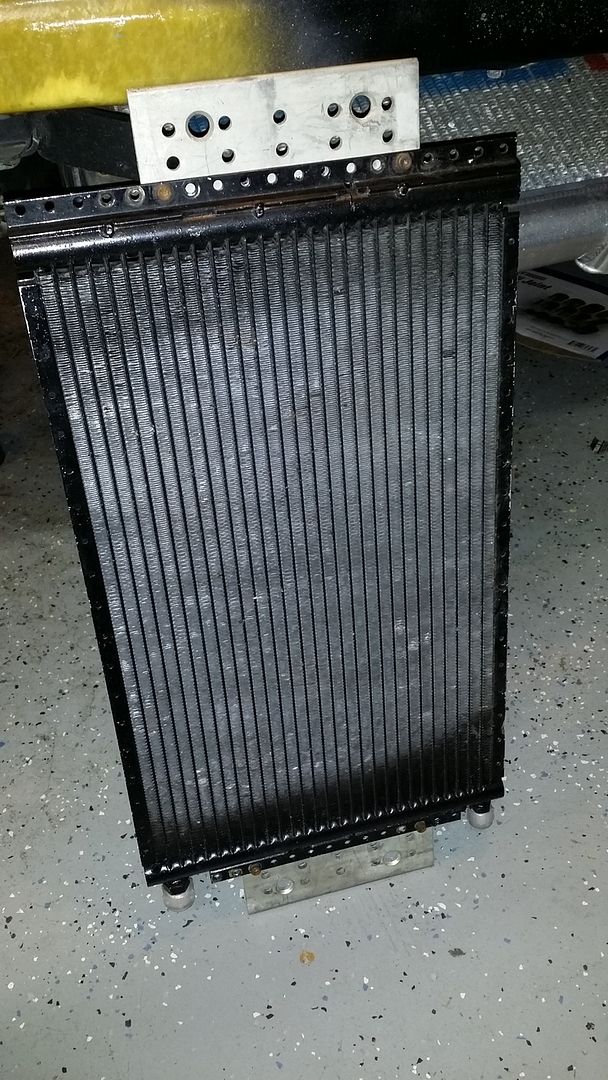
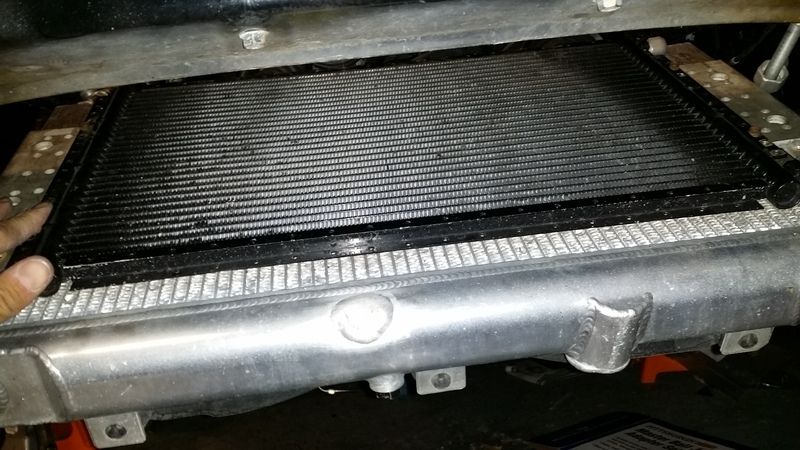
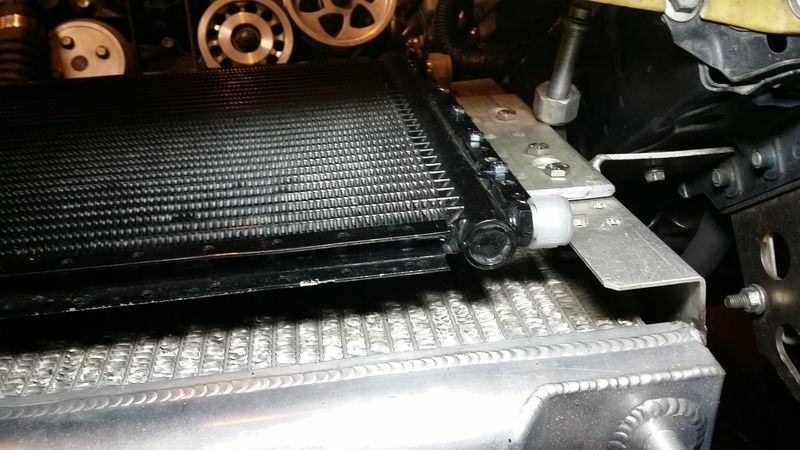
I made the new mount brackets for the condenser to drop it down, but I need to get longer bolts.
I almost made a bracket to mount the 4 port valve, but this was at the end of the night and I'll just do it tomorrow. I figured out the other night where to mount it though.

I put a screen protector on the stereo screen but I had some issues and stuff got on the back side of it. Not sure if you can tell from this pic but I was kinda ticked lol.

I put the driver's side fender back on and noticed a piece broke off where it mounts at the front so I had to use a washer for now. Hopefully it works.

I put an extra screw in each of the front ends of the side skirts because the passenger side skirt broke right there. This is a temporary fix also until I pull them off and get them repaired the right way. Maybe next year.

I changed the bolts on the oil cooler mounts because the alloy screws that I used before were pretty rusty.

I made the new mount brackets for the condenser to drop it down, but I need to get longer bolts.


-
speedjunkie
- Senior Member
- Posts: 5294
- Joined: Wed Jan 02, 2008 9:14
- Location: Colorado Springs
- Contact:
Re: Build thread
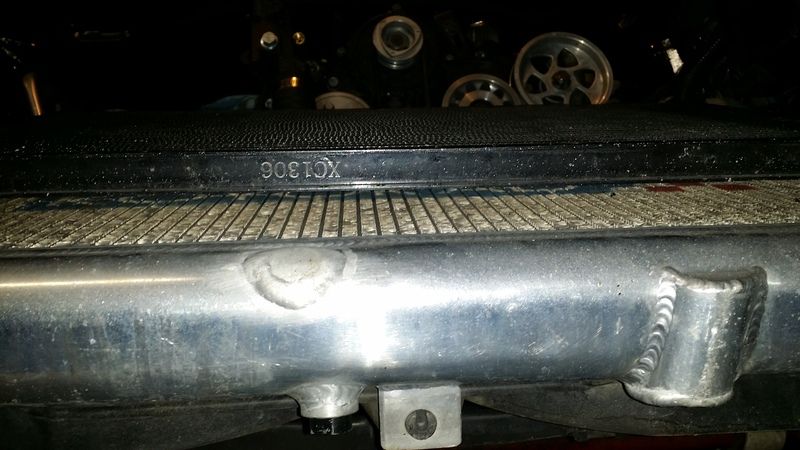
I basically wasted most of the day and only did a couple things. I mounted the MAC valve and finished the new brackets for the condenser, and they didn't drop it all that much after all was said and done. I used rubber insulators again that raised it a bit, and the thickness of the brackets raised it a lot too. I think it's only sitting about another 1/4" lower. I'm planning on making a little splitter for the front of the condenser too so air is forced either up and over the top or under to the radiator. I doubt it will make that much difference, but I might as well. There are holes to mount it to running along the top and bottom of the leading edge lol.
The connector for the valve comes pretty close as it is, so I really only need an adapter, but I told Chris the other day I'd need probably about an extra 6" on the extension. I emailed today to tell him I didn't need the bracket anymore and only needed an adapter, hopefully it catches him in time.
Maybe tomorrow I'll finally overcome my fear and finish pressing out the last of the bushings and the rear knuckle bearings lol.
The connector for the valve comes pretty close as it is, so I really only need an adapter, but I told Chris the other day I'd need probably about an extra 6" on the extension. I emailed today to tell him I didn't need the bracket anymore and only needed an adapter, hopefully it catches him in time.


Maybe tomorrow I'll finally overcome my fear and finish pressing out the last of the bushings and the rear knuckle bearings lol.
-
speedjunkie
- Senior Member
- Posts: 5294
- Joined: Wed Jan 02, 2008 9:14
- Location: Colorado Springs
- Contact:
Re: Build thread
I finally overcame my fear today and got the bushings ready to push out. I had to cut away at one side of each bushing so I have an area to rest on the bars on the press. I'm going to Jesse's tomorrow after work to press them out. Then I just have to take them somewhere to sand blast them, which brings me to the next topic lol. I've been looking at 60 gal compressors and Lowe's has them for $500 with a 3 year warranty. The guy there told me they'll deliver it for $79 and if something is wrong with it in that 3 years they'll come and swap it out for free. But if I were to get it home myself I'd need a truck so I can stand it upright (laying it down voids the warranty) and if something happened to it I'd have to get it back there to swap it out. Screw that lol. He acted like laying it down automatically broke it though lol. There is a Craftsman 60 gal on Craigslist for $400. I might just do that instead.
The only problem with either option is that I have no way to hook it into power. I was planning on running the cable down to the laundry room and just plugging it into the dryer outlet, but it doesn't have a cable. Chris, any ideas? lol
Ok there are actually two problems. I'm not sure where exactly I'm going to put it. Either place that I've been thinking about putting it requires hacking out some shelves, which I'm not above doing. I'm just trying to weigh all the options before I do that.
-
RX-7 Chris
- Posts: 7800
- Joined: Tue Oct 02, 2007 9:14
- Location: Colorado Springs
- Contact:
Re: Build thread
I think I just need to Come by and take a look. I can help you get the compressor with my pickup.
Don't worry about what the Lowes guy says, it sounds like he's just trying to sell you on a delivery you don't need. I would go with the Lowes compressor mainly because of the warranty.
Don't worry about what the Lowes guy says, it sounds like he's just trying to sell you on a delivery you don't need. I would go with the Lowes compressor mainly because of the warranty.
1984 RX-7 GSL-SE [size=84]My restomod project[/SIZE]
1964 Ford Galaxie 500XL flat black w/ white interior, 2 dr fastback, 390 thunderbird, C6 auto, 2500 rpm high stall converter, shift kit, AC, Holley 750 cfm
[size=100]RIP 1983 RX-7[/SIZE]
My Car Blog
-
speedjunkie
- Senior Member
- Posts: 5294
- Joined: Wed Jan 02, 2008 9:14
- Location: Colorado Springs
- Contact:
Re: Build thread
Someone I talked to said a buddy had wired in a cable and ran it to their laundry room. I think that's the easiest thing considering I won't be using it all that much and the laundry room is really close. Well if we pick it up and something goes wrong with it I have to take it back to Lowe's instead of them coming to replace it. If I pick it up I might as well just get the one on craigslist. It does sound like he was trying to sell me on delivery though.
Re: Build thread
I've done both methods. When I lived in Florida, my dryer was in the garage. So using the dryer receptacle for my high voltage needs made sense. Here (Colorado), my dryer is on the second floor, so using that method wasn't practical. Since the circuit breaker is in the garage, installing a 240v receptacle in the garage made more sense.
Here are my recommendations:
1. If your circuit breaker is in the garage, you have space for a 240v circuit (2 empty spaces on your breaker), and your breaker can support the extra demands, install a 240v receptacle in your garage. It's not difficult at all.
2. If your dryer is nearby, go ahead and use it. But keep in mind, you're going to need a long extension cord, can't use your dryer, and will need to keep your garage door open (if dryer is in the house). Additionally, you're going to have to adapt the dryer receptacle into a receptacle that your end device uses. In other words, if your dryer receptacle is for a NEMA 10-30R plug (like mine was), you're going to have to buy cable to put a male NEMA 10-30R plug on one end and whatever receptacle your end device uses on the other end. In my case, a NEMA 10-30R plug was on one end and I put a NEMA 6-50R receptacle on the other end. When it's all done, buy a NEMA 6-50R extension cord (or whatever you use) and go to town.
If you're not comfortable with working around wires, I HIGHLY HIGHLY HIGHLY recommend you hire an electrician. 220-240v is nothing to play around with. Although 110v will shock you, 220v will kill you.
In regards to compressors, I've got an Ingersoll Rand. If I were to rank 60-80 gallon single stage compressors, I'd go with:
1. Home Depot (Maxair Premium Industrial)
2. Harbor Freight (I think the one they have is dual stage at the price of a single stage)
3. Lowes Kobalt
4. Ingersoll Rand
If you replace some of the Chinese fittings on the Maxair compressor, you'll have a pretty stout compressor at a cheap price. I'd put Ingersoll Rand higher on the list, but their single stage compressors aren't that great in the 60-80 gallon range. Dual stage is a different story though. In the end, it all depends on what your cfm requirements are (example @ 90 psi).
-
speedjunkie
- Senior Member
- Posts: 5294
- Joined: Wed Jan 02, 2008 9:14
- Location: Colorado Springs
- Contact:
Re: Build thread
My breaker box is in the living room and I have no more room to add anything. If I put the compressor near the door leading into the house I'd need possibly 15' for a cord. The compressor at Lowe's doesn't have any kind of connector on the cable because they assume you're going to hard wire it. I was thinking about just wiring on a cable with the proper end on it, that way I'll just unplug the dryer while I'm using the compressor, which won't be often.
My whole job in the AF has to do with power, especially my current job where we deal with 220 all the time, so I'm not too worried about that lol.
I'll probably look for a dual stage, as long as I can find one for a decent price. I'm a little sketchy about getting this at HF. I usually don't have a problem with stuff there but this isn't something I want to be hauling back and forth all the time if I have problems.
I went to Jesse's again this afternoon and we pressed the bearings out of the rear knuckles, so now everything is ready to be blasted and coated. I still need to get the race off of each hub too.
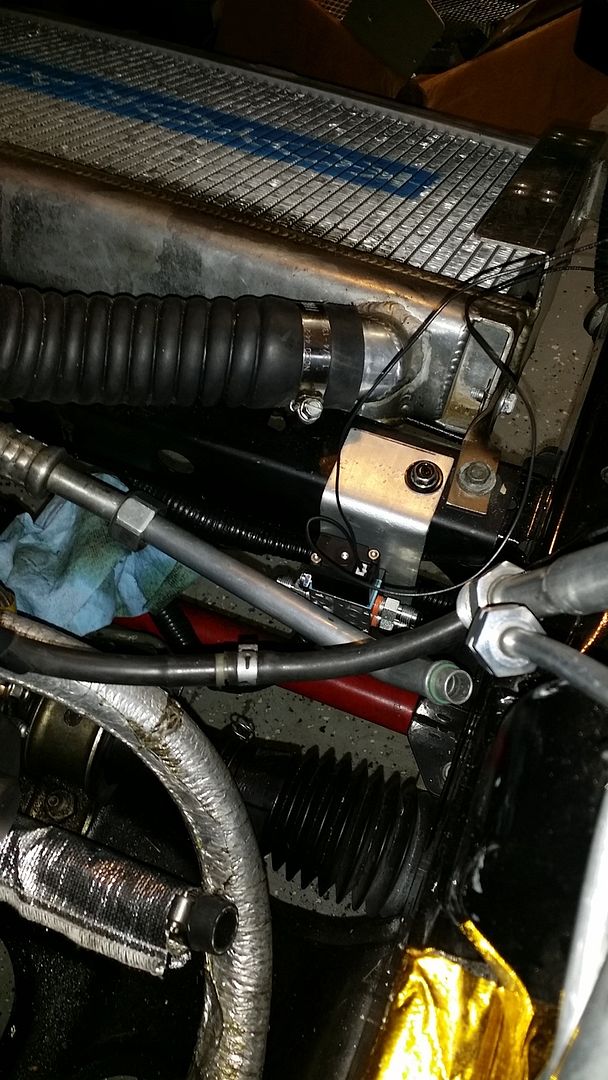
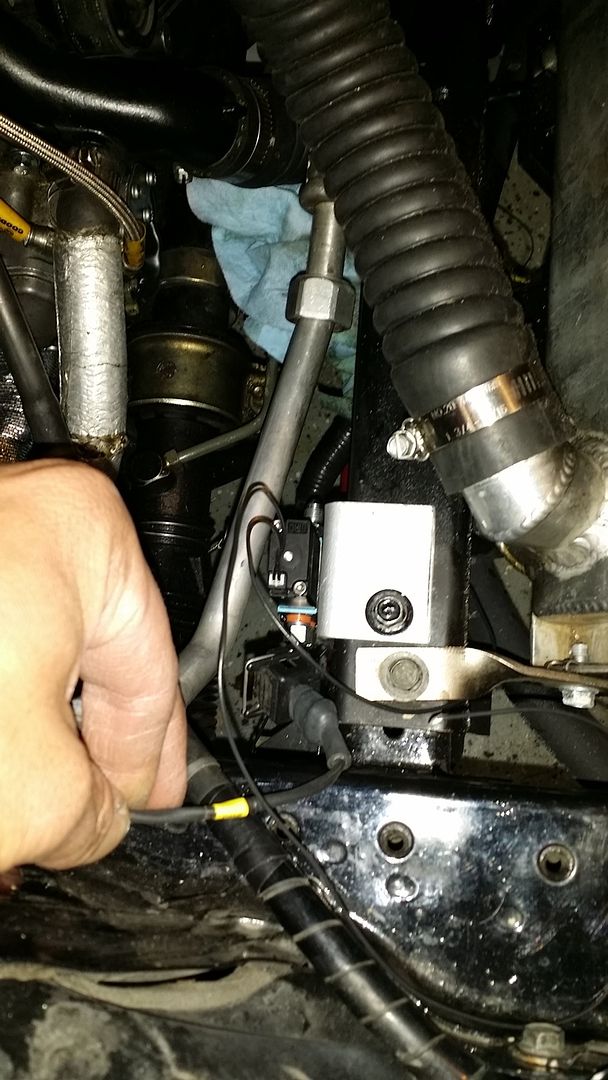
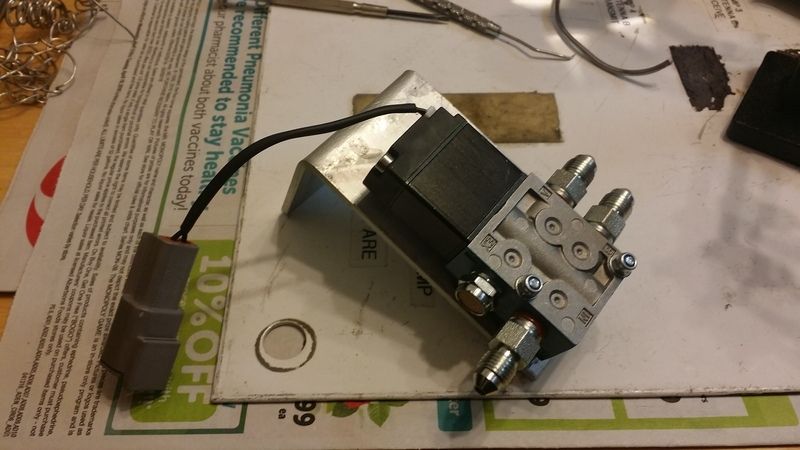
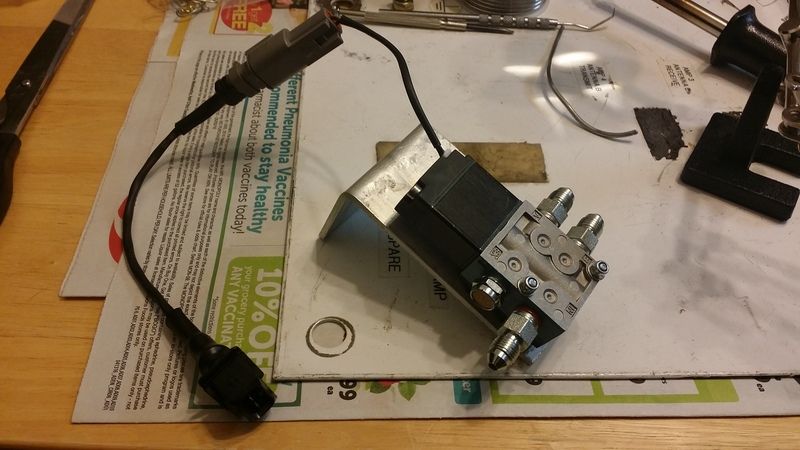
I soldered the connector that Chris sent me onto the valve wiring. It's all hooked up and installed.
I also shipped off the wheels today to get widened. It'll be 8-9 weeks.
My whole job in the AF has to do with power, especially my current job where we deal with 220 all the time, so I'm not too worried about that lol.
I'll probably look for a dual stage, as long as I can find one for a decent price. I'm a little sketchy about getting this at HF. I usually don't have a problem with stuff there but this isn't something I want to be hauling back and forth all the time if I have problems.
I went to Jesse's again this afternoon and we pressed the bearings out of the rear knuckles, so now everything is ready to be blasted and coated. I still need to get the race off of each hub too.
I soldered the connector that Chris sent me onto the valve wiring. It's all hooked up and installed.


I also shipped off the wheels today to get widened. It'll be 8-9 weeks.


Re: Build thread
Not to belabor the point of electrical simplicity, but if you could add a subpanel in the garage and take power from your current panel to that, then you may have a better solution for the garage as a whole. I don't know how your house is laid out though; if your garage isn't close to your living room (opposite wall so to say) and you can't run power down through a basement it may be tough. I had to have an electrician upgrade my entire service panel and add a subpanel in my garage to make things work. If your service Panel is 200 amp now, adding a subpanel may be a good answer, especially if it is close to the garage and you can take the breakers currently running garage functions and move them into the garage as well opening up the space for the subpanel breaker in the current service panel.
Who is online
Users browsing this forum: No registered users and 57 guests