Build thread

Talk about your Rotaries!
User avatar
speedjunkie
Senior Member
Posts: 5290
Joined: Wed Jan 02, 2008 9:14
Location: Colorado Springs
Contact:

Re: Build thread

Postby speedjunkie » Thu Mar 24, 2016 9:14

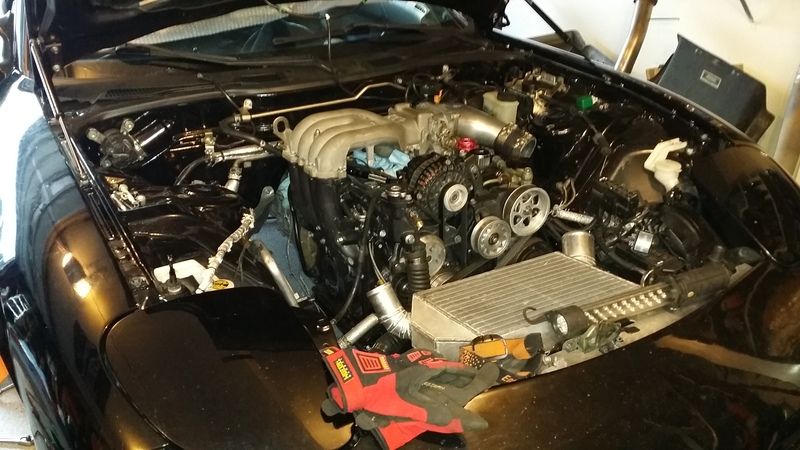
Ok, it's been quite a while since my last update and I'm going to forget a lot of what I've done because I found several things to take care of that weren't on the list. But I'll also try to keep this short, unlike usual lol.

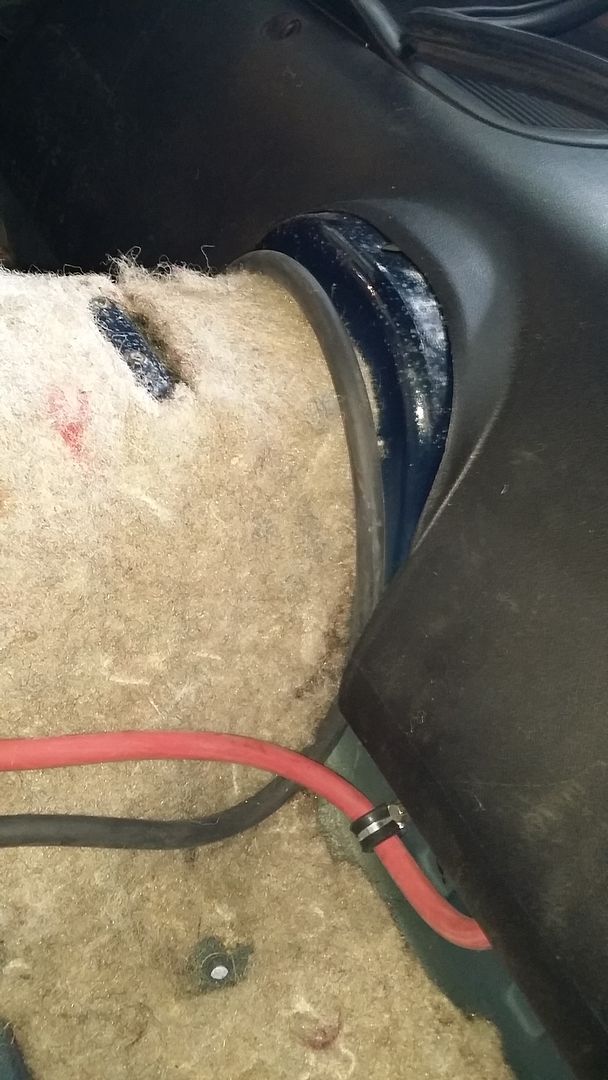
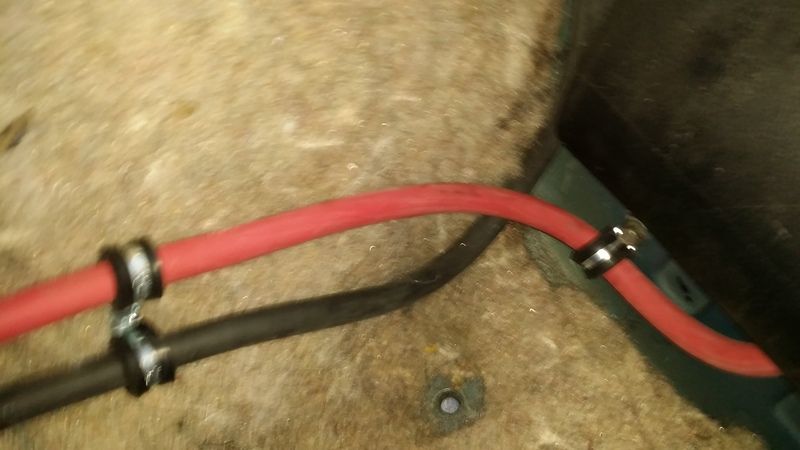
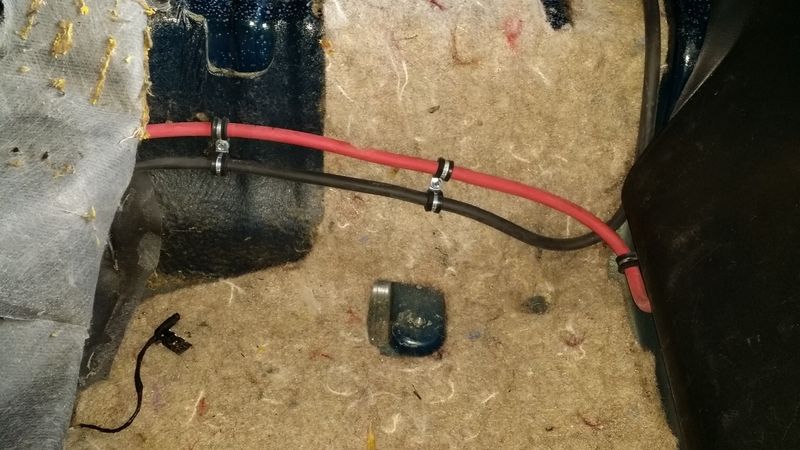
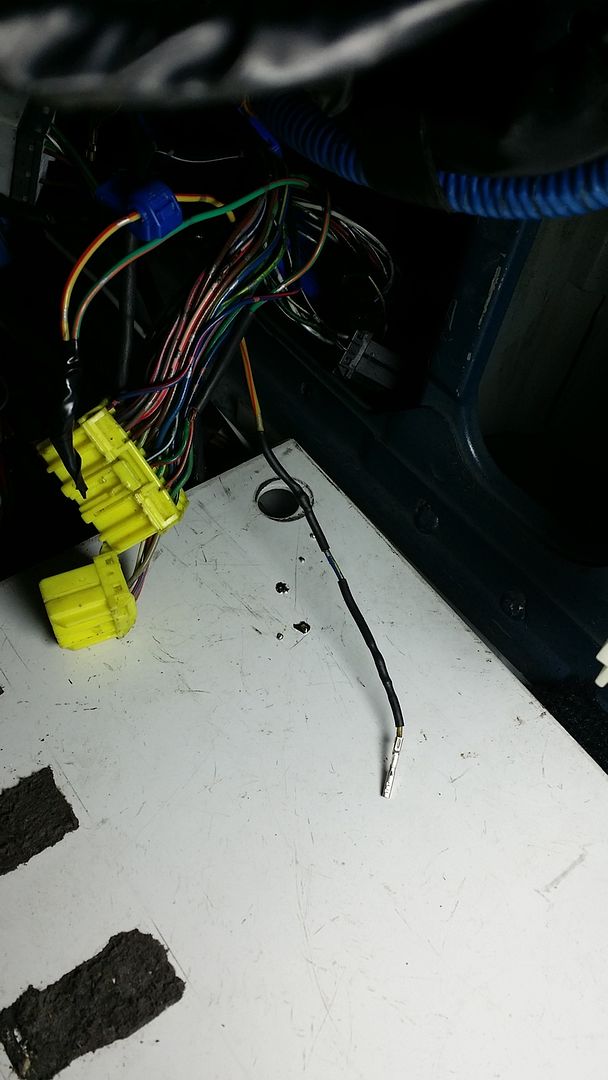
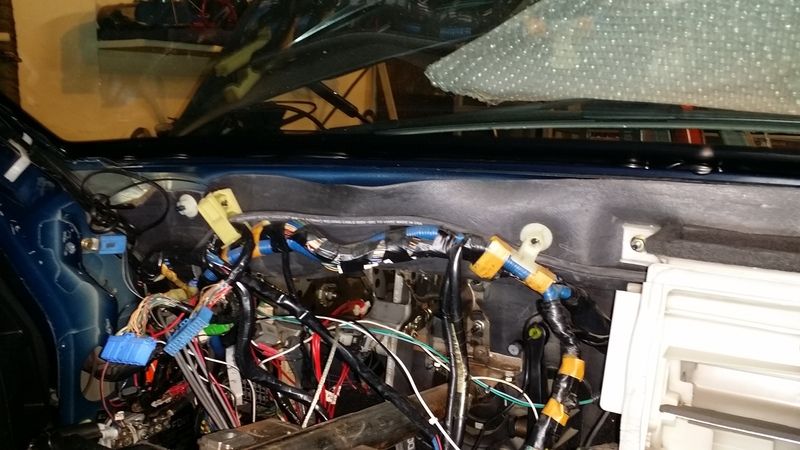
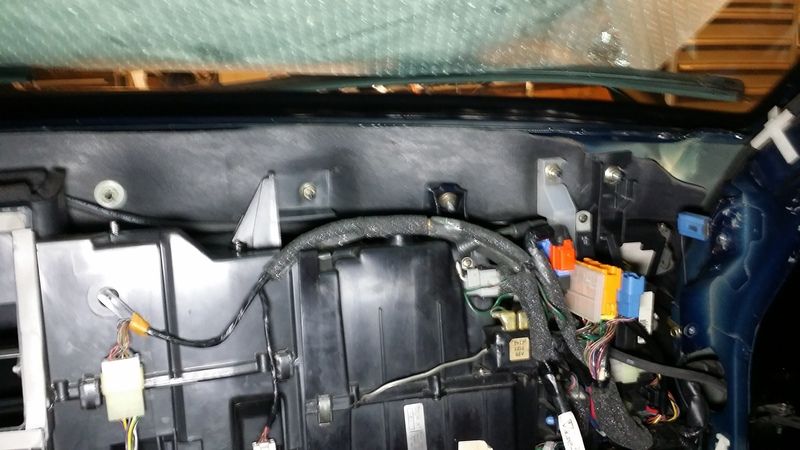
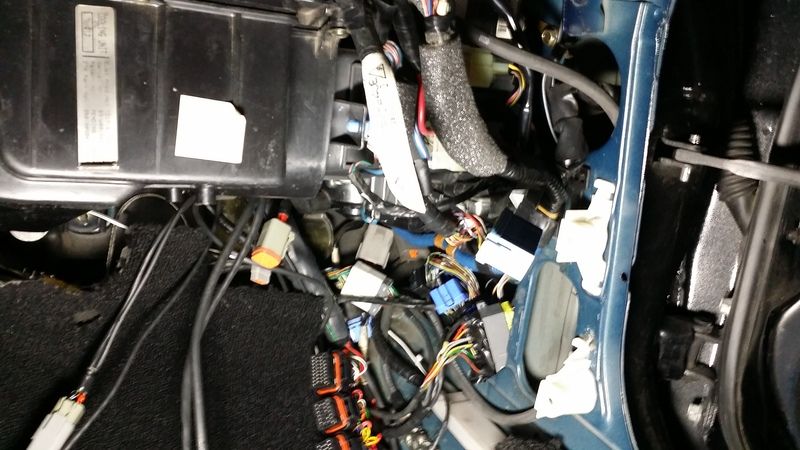
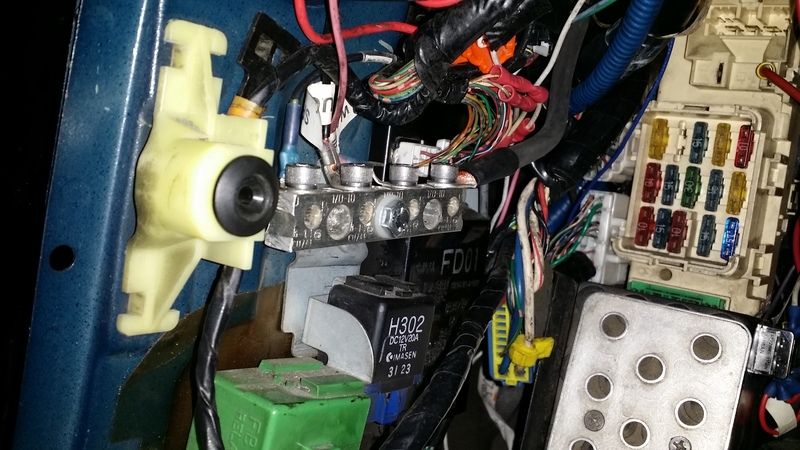
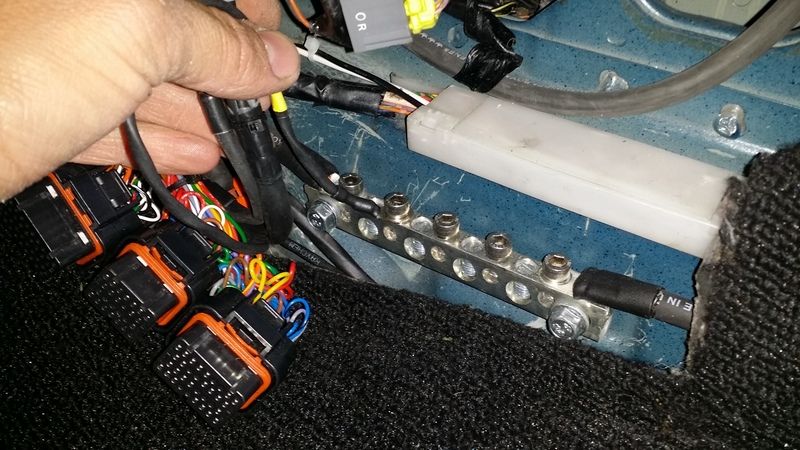
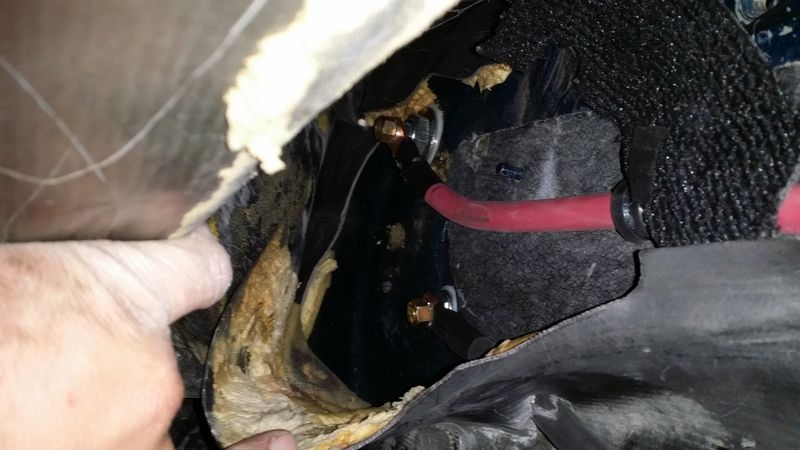
I ordered cable terminal ends to fit all the different bolt sizes. Selection at local places was pretty slim. I finally got them the other night and made the cables and installed them. I should also take this time to say the very next day after drilling the hole in the passenger side I realized that the cable would be right next to the exhaust. DERP. So I drilled another hole in the driver's side, this time using a hole saw again, and it came out PERFECT. And these cables are a lot larger than the old ones so the carpet sticks out a bit more now, I hope I can get the knee oval back on.
Image
Image
Image
Image

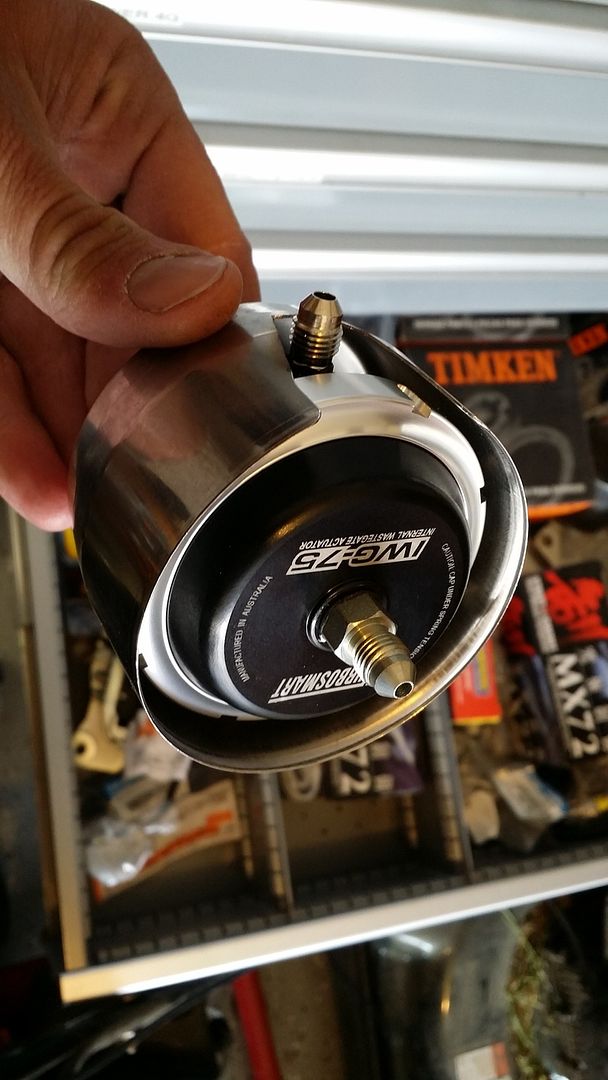
So the top of the Turbosmart wastegate actuator takes a 3AN coupler. When I finally got the coupler I turned it into the top of the actuator and I couldn't get it in all the way because it started pushing the valve down, so I cut off the end of the fitting and then wrapped teflon tape around the end, along with installing an o-ring to help seal it.
Image

I haven't done anything with the knuckles yet, and I've only pressed out a few bushings on the suspension arms. I'm dreading doing that for fear of breaking something haha, but it's going to end up holding up the project if I don't get to it soon. I did buy some Project Kics R40 lug nuts, they are open end so I can use them with the extended studs. I'm hoping to get those soon.

I got the turbo back from Andy and the oil line Whisler made me fits pretty well, so no worries there. Not yet anyway lol, assuming it doesn't leak.

I ended up being very disappointed in the Timken bearing press kit. I discovered I can't use it for much. I might try to take it back.

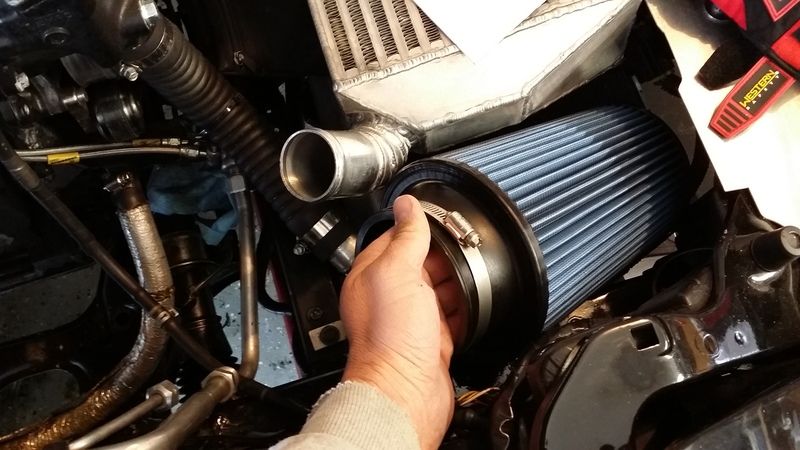
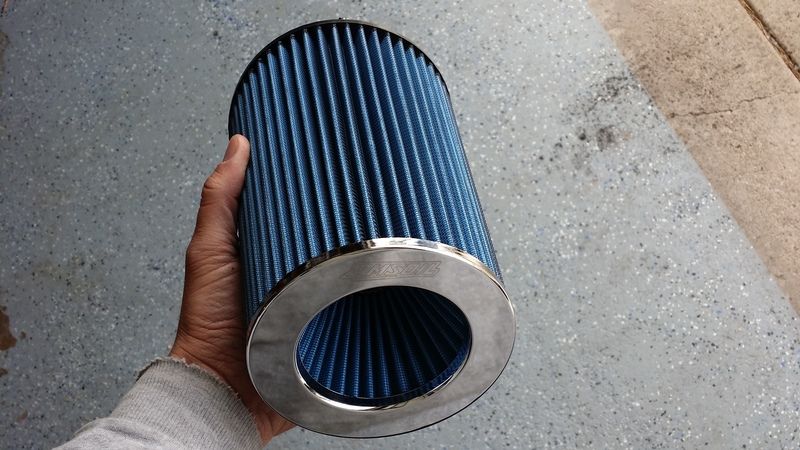
I got the Amsoil filter and test fit it. I think it will work, and I'm going to rearrange some things to hopefully make it fit even better. I didn't get a restriction indicator, just the filter and pre-filter. And when I was putting the pre-filter on I dropped the filter against the mock engine and damaged some of the netting on the outside, really pissed me off haha. But there shouldn't be an issue in functionality and the pre-filter hides it pretty well, and I plan on putting that part towards the ground anyway.
Image
Image

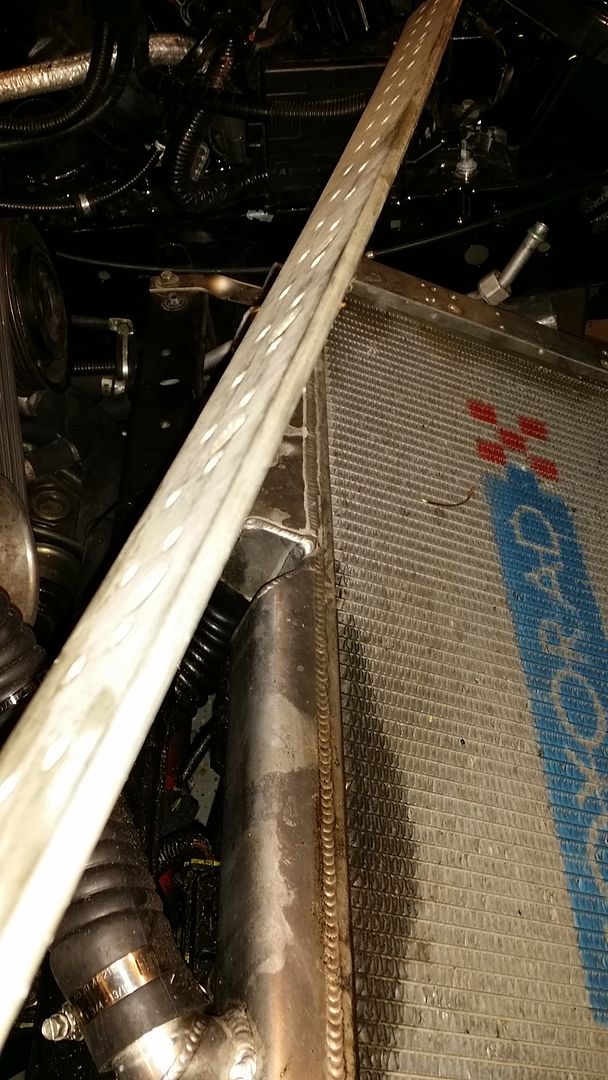
I'm going to use some thick aluminum I have to make the brackets to drop the condenser.
Image

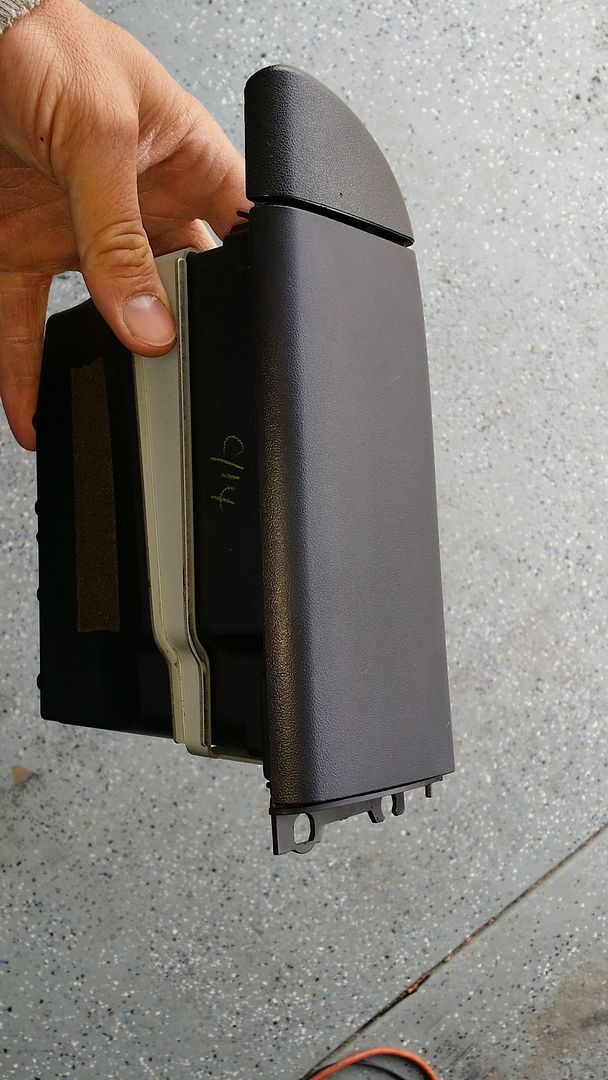
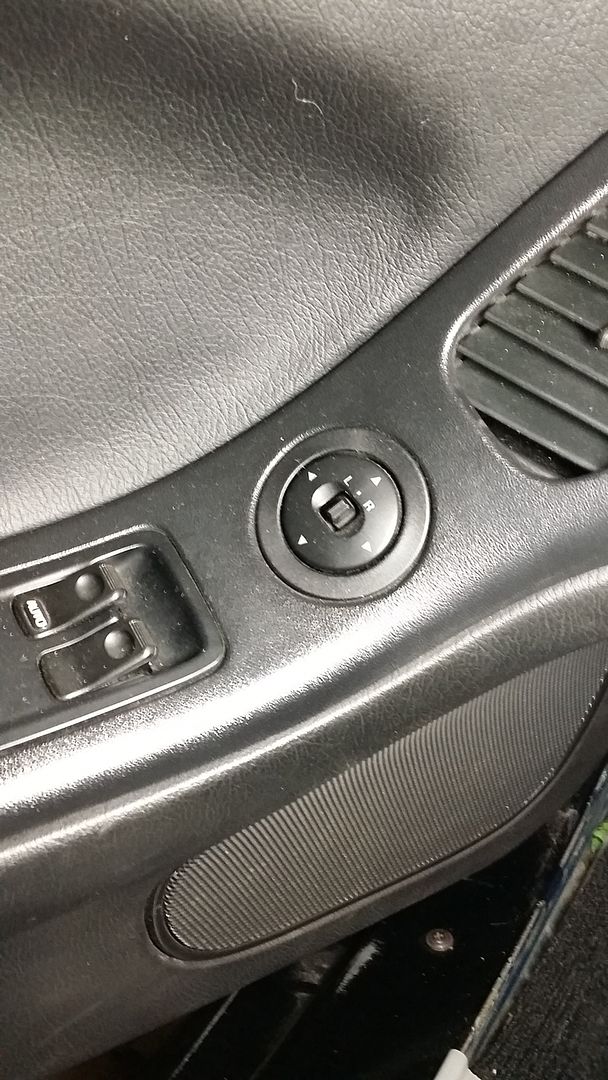
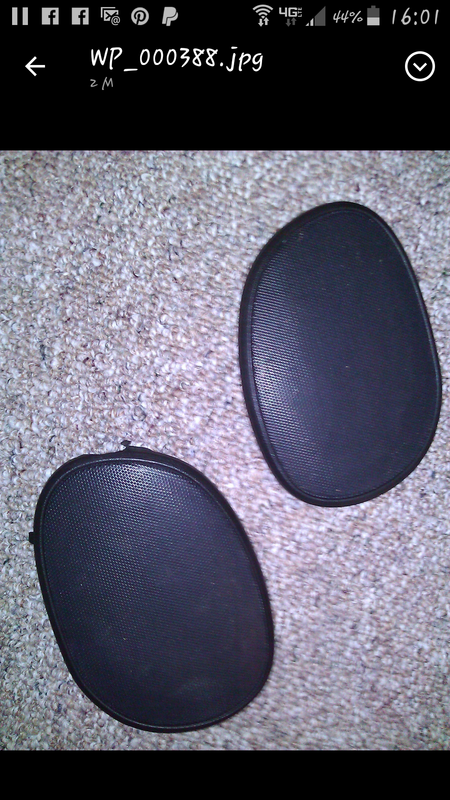
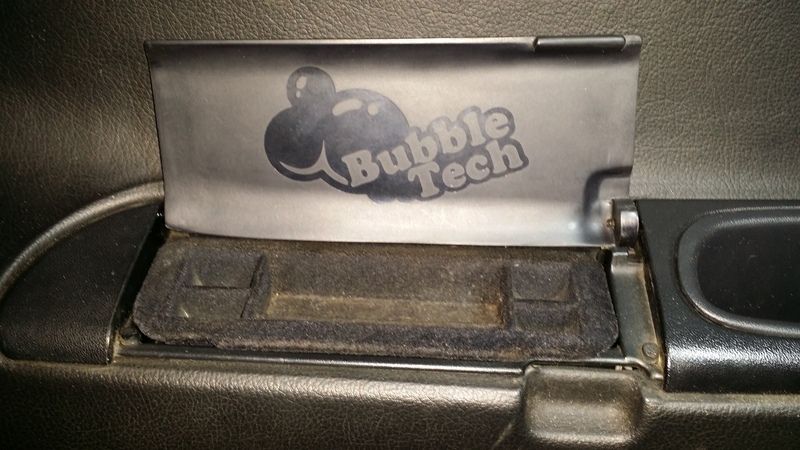
I got the map pocket and after I installed it I discovered that the Bubble Tech lid was the old version that was more purple compared to the stock black plastics, so I swapped out the lid anyway. Then the lid detached from the pocket because the set screw came out of the lid and shifted out too far and the lid was shifting back and forth anyway. And I broke part of the new pocket haha, but at least it wasn't anything important. So the next time I assembled it I used nylon washers on each side of the lid so it doesn't shift now, it's nice and snug. I also got the card/coin holder from Japan. I really like it but it was also a ridiculous purchase lol. And one of the times I had the door panel off I fixed the mirror switch tabs. One of the sides wasn't holding so the right side of the switch would sit out from the panel, now it's nice and snug too. And I'm talking to a guy from 7club that has speaker covers for the rear speakers, but one of them has a broken piece missing. I'm not sure if it will be noticeable though when they're installed and they're the cheapest option.
Image
Image
Image
Image

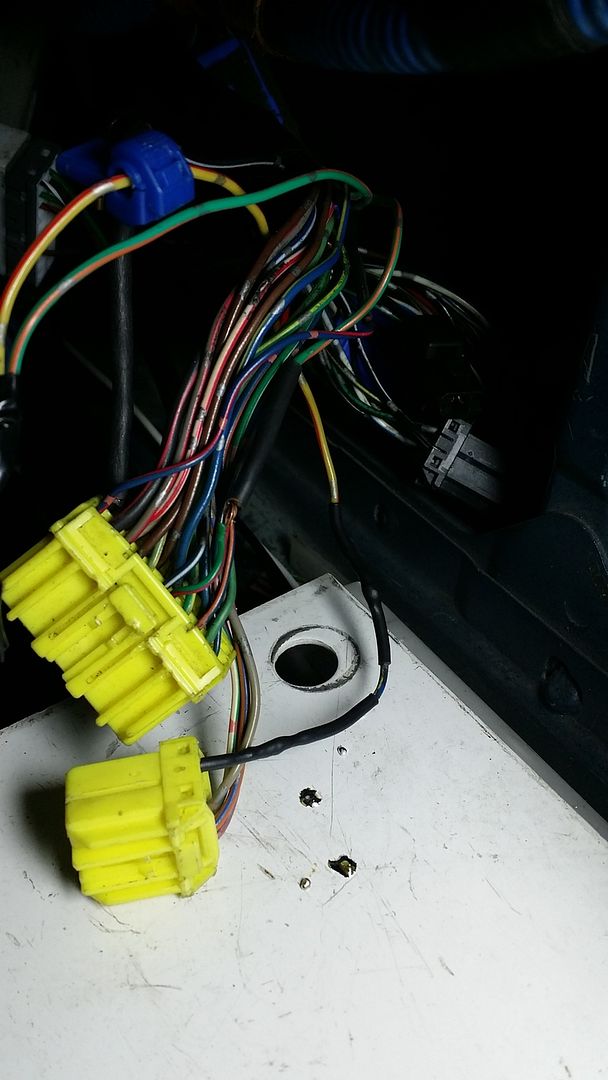
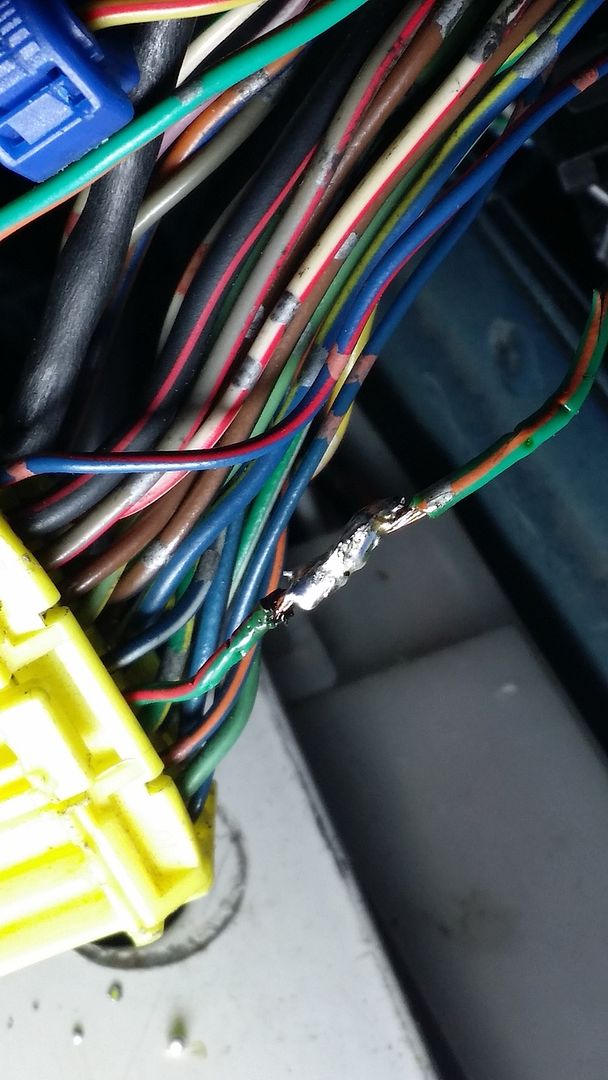
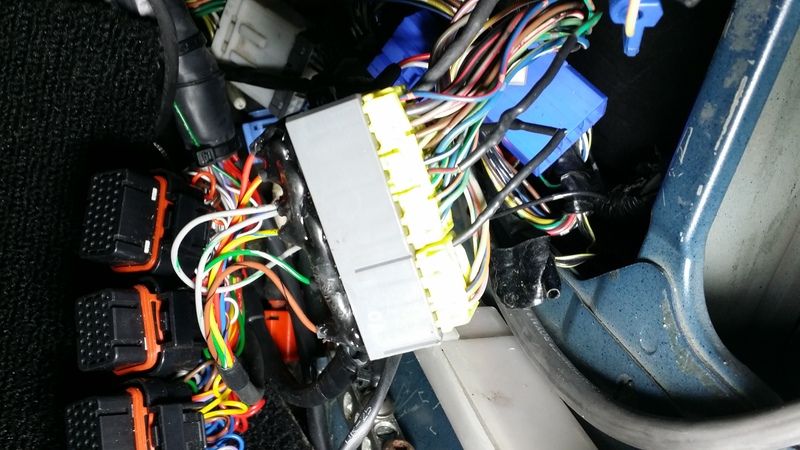
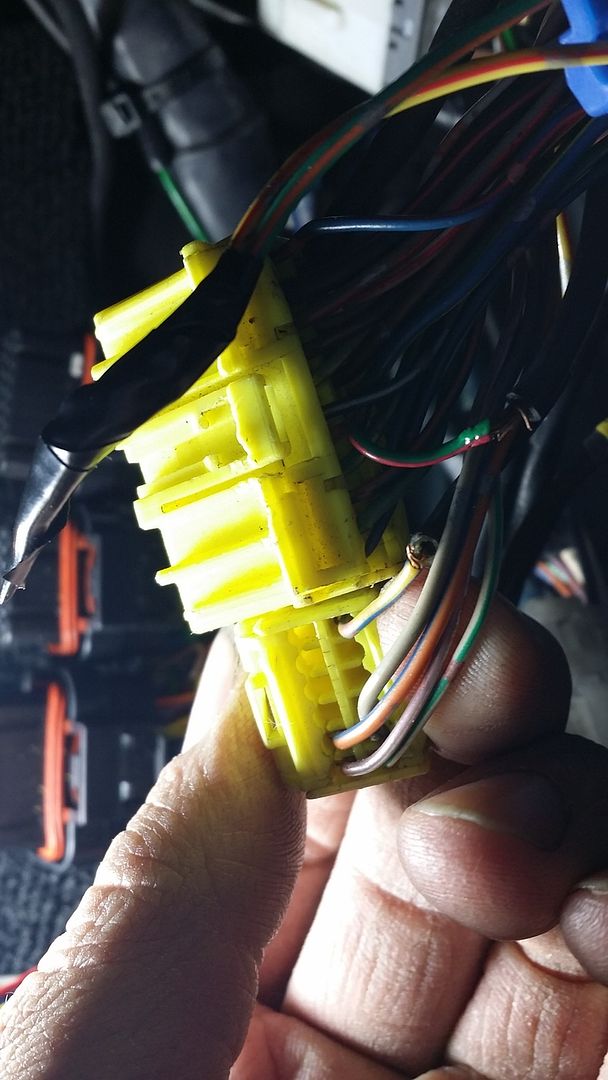
I figured out the water injection wiring tonight. I only hooked up one of the wires for a couple reasons. For starters, it's the only one I plan on using because it's for RPM, and also because it splices into the chassis harness and the other wire (for TPS, which I won't be using) taps into the new harness that Chris made and I didn't want to take a chance on ruining that. And while I was looking at the wiring by the ECU I noticed a couple wires on the chassis harness that were about to break, so I fixed those yesterday. The first one I did I added an extra length of wire, but I should have just reconnected the two pieces after cutting off the old heat shrink, like I did with the second one. Oh well. I'm really just happy to be finished with it.
Image
Image
Image
Image
Image

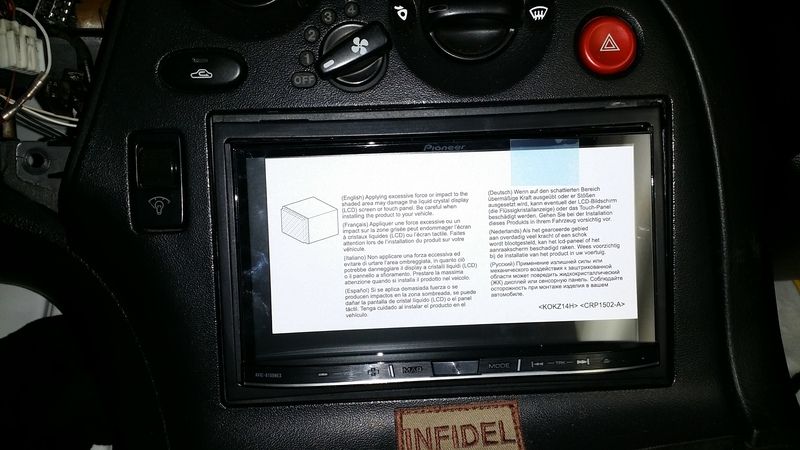
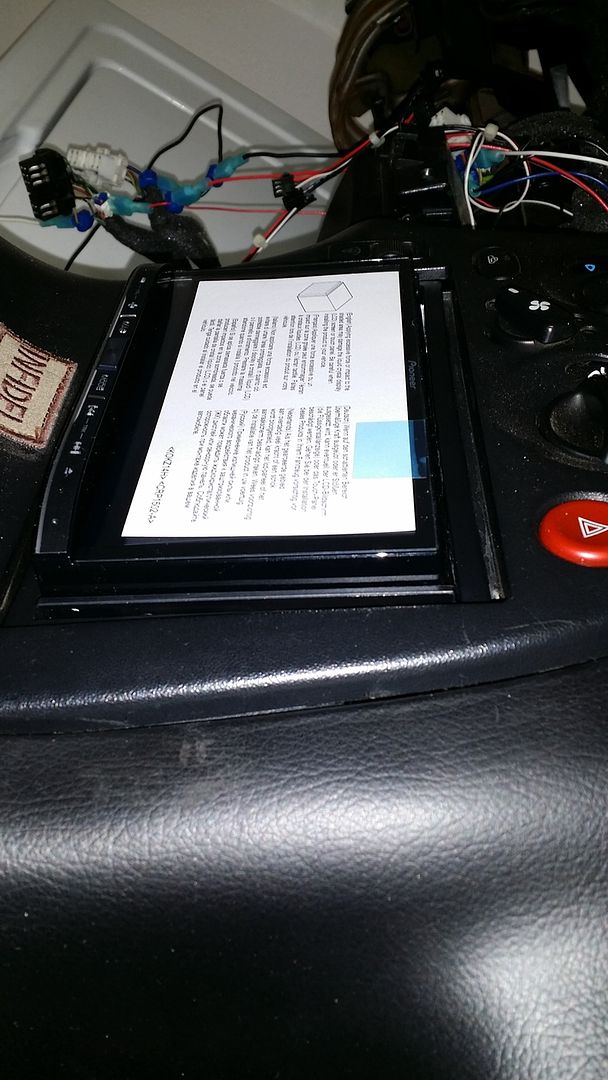
I got some Kenwood 5-way 6x9 speakers from Best Buy and then discovered they were too large. The stock speakers are 5x7 but you can also install 6x8 and I was thinking it was 6x9. So I took them back and got some Pioneer 5x7/6x8 speakers and installed those, then wired them up the other night after running some 18ga wire from the dash area to the speakers. I thought I got pics of the rear speakers installed but I guess not. But while I'm on the subject of audio, I picked up another stereo. This is Pioneer's flagship model, currently anyway. The AVIC 8100NEX. It has Apple Car Play and Android Auto so I'm pretty sure it should connect to the app on my iPad mini once I figure out how to make the iPad compatible with Apple Car Play. It also has a backup camera, built in navigation, DVD playback...I'm probably forgetting a lot. I really like it though. I might get a screen protector for it too.
Image
Image

I'll cover the rest of the updates in the next post.
User avatar
speedjunkie
Senior Member
Posts: 5290
Joined: Wed Jan 02, 2008 9:14
Location: Colorado Springs
Contact:

Re: Build thread

Postby speedjunkie » Sat Mar 26, 2016 9:14

Alright, I'm going to try to cover the stuff I didn't cover last time.

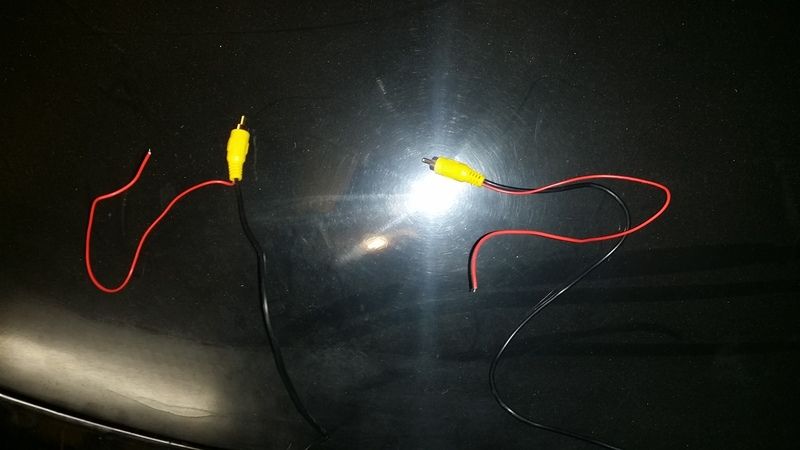
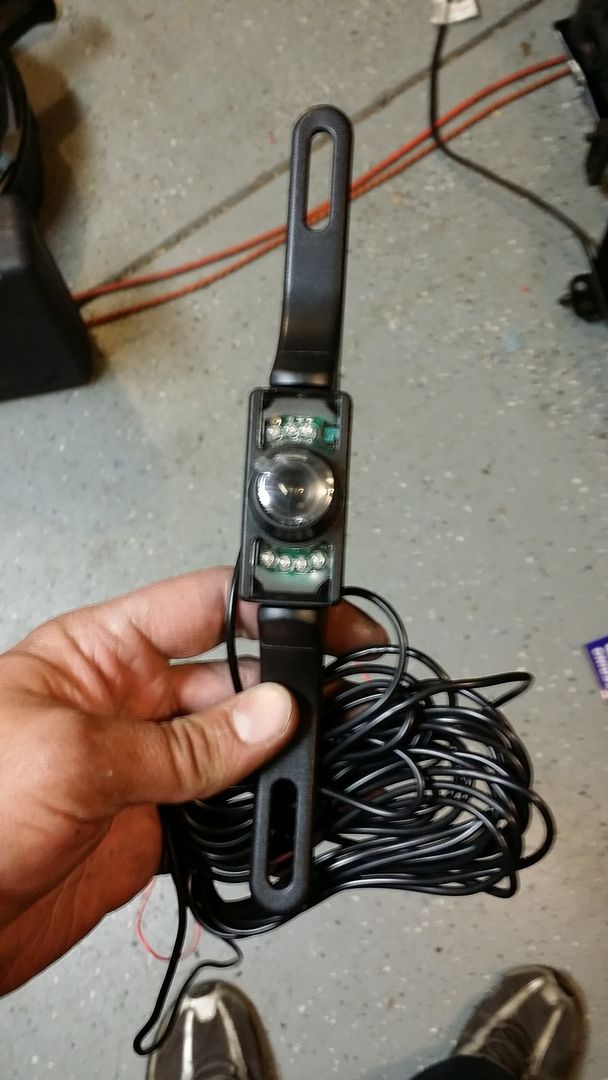
I picked up this other backup camera. I like how this one mounts more than the other one, but this one has some weird wiring. With the video cable, out of each end is a red wire. I'm assuming I need to hook it up to power but I'm not sure. Another guy on 7club got a license plate frame with a backup camera and he said the picture quality is amazing. So this still might not be the final one I go with.
Image

Speaking of backup camera, tonight I ran the wire so the stereo knows when to show the camera feed. I also did a little more troubleshooting for the horn, but I'm still a little lost. On the FD the horn is ran with the airbag system, so if you remove the airbags the horn won't work, at least if you remove the passenger side airbag. But I already sorted that problem before and got it working again. The only thing I can think of is if removing the impact sensors would have caused a problem, but I don't see why it would.
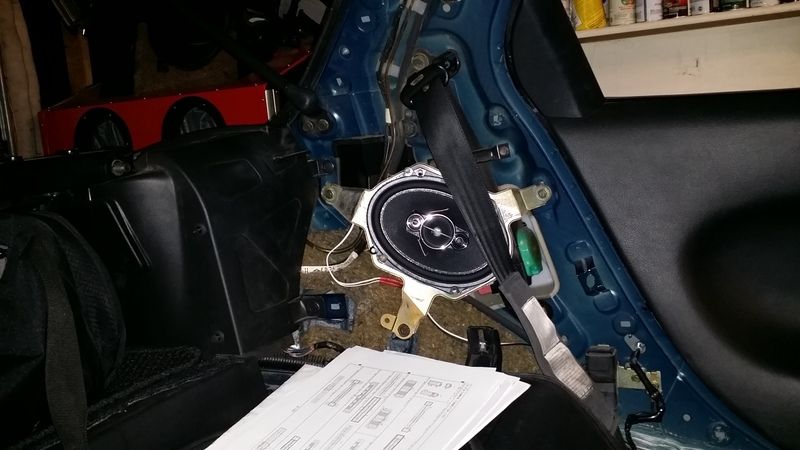
Here is the driver's side rear speaker. I hope it sounds good because I'm getting tired of removing the interior pieces lol.
Image

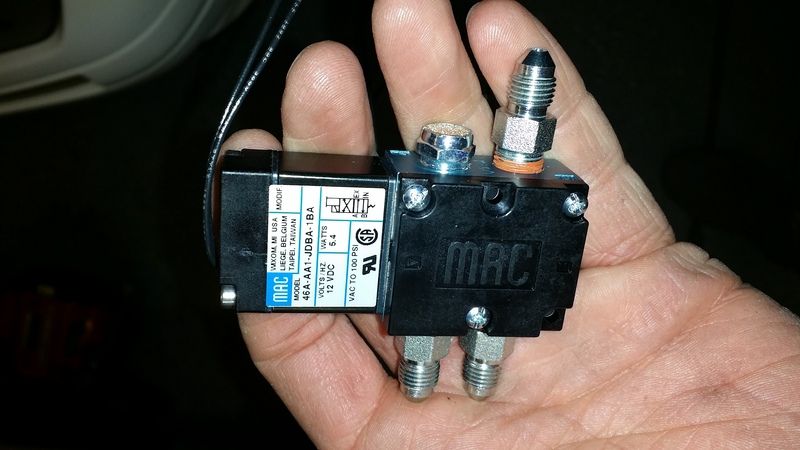
Here is a pic of the 4 port MAC valve, if anyone needs the info on it to get one if they want someday.
Image

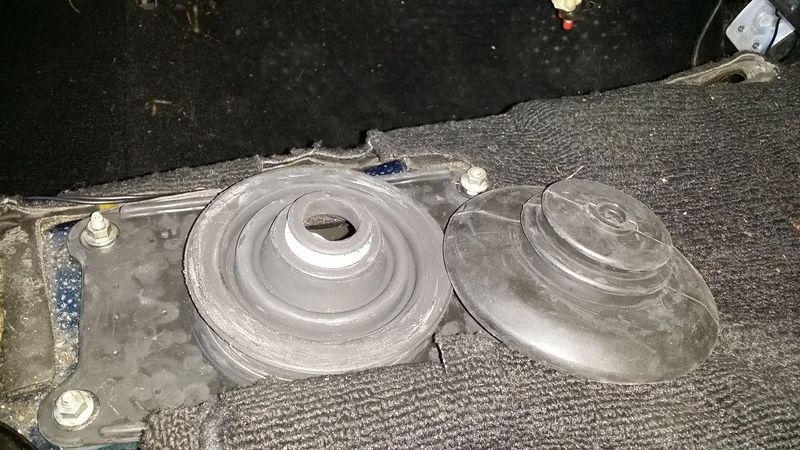
I got a new shifter seal piece since I'm not running the ground cable or wideband cable through there anymore. I swear I have one of these in my shed somewhere but I can't find it for the life of me.
Image

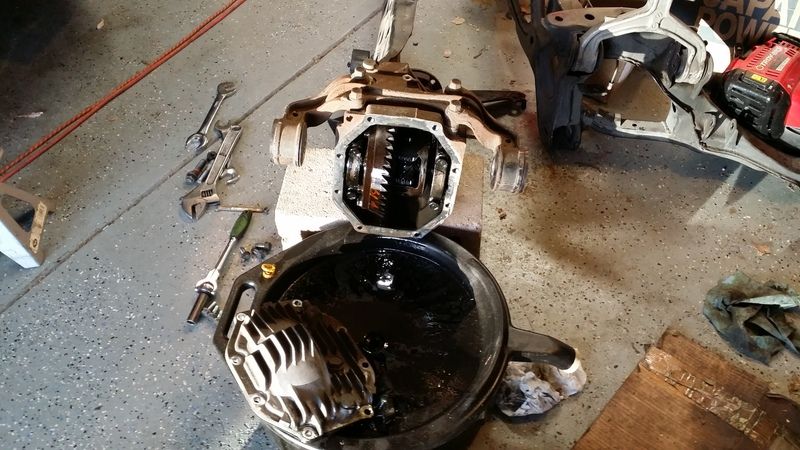
I popped the access cover off the back of the diff to check all the gears. No better time to do it. Everything was good.
Image

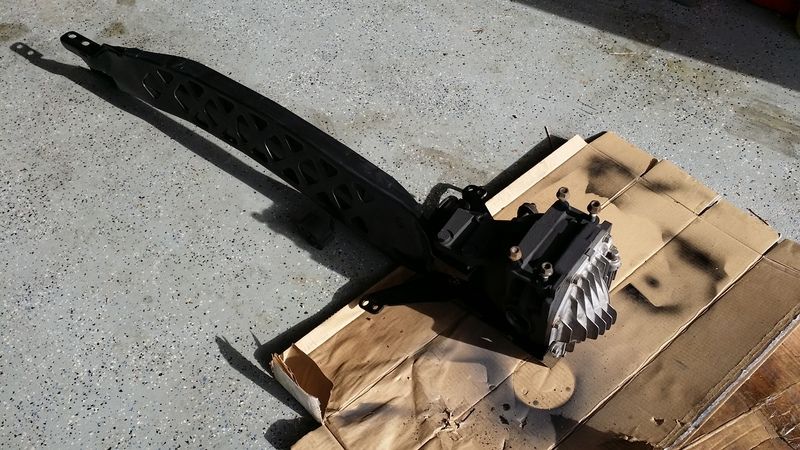
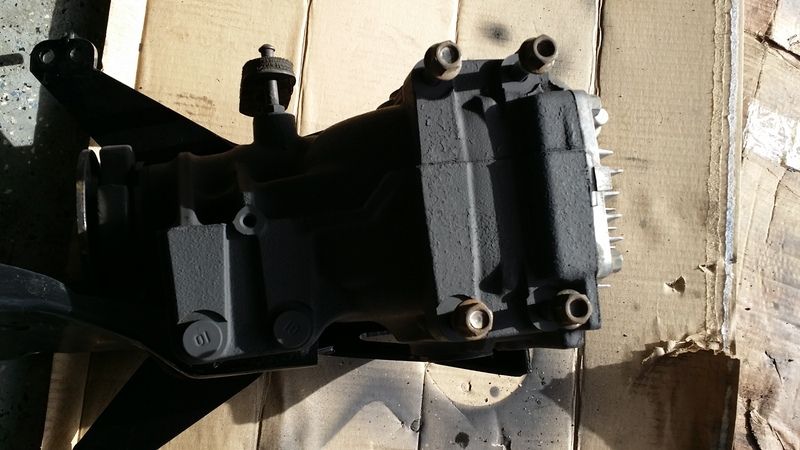
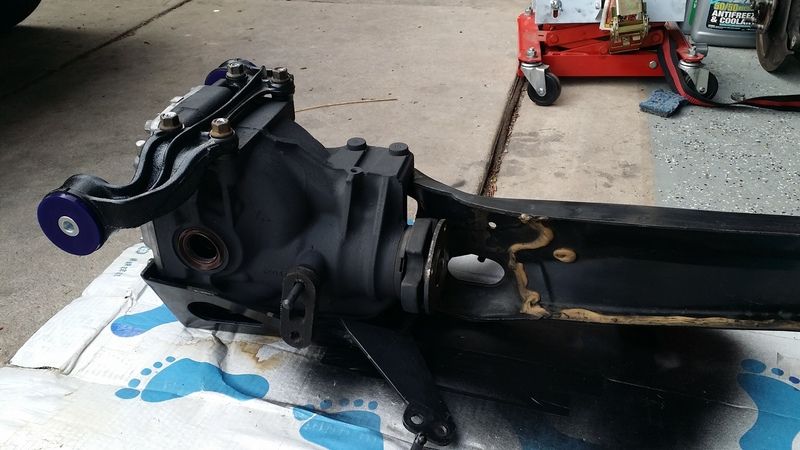
I also used a wire brush and cleaned the access cover and tried to get all the rust off the diff casing. Then I masked off the cover and sprayed the casing with high temp paint. I'm not sure how well it will hold up because I wasn't able to get a good bit of the old coating off and it's still kinda flaky. It won't really matter much anyway. I also pressed in new axle seals while I had it out of the car.
Image
Image

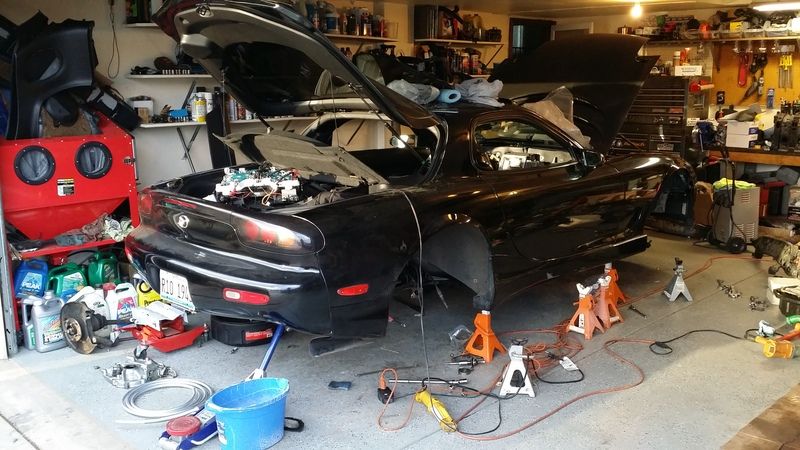
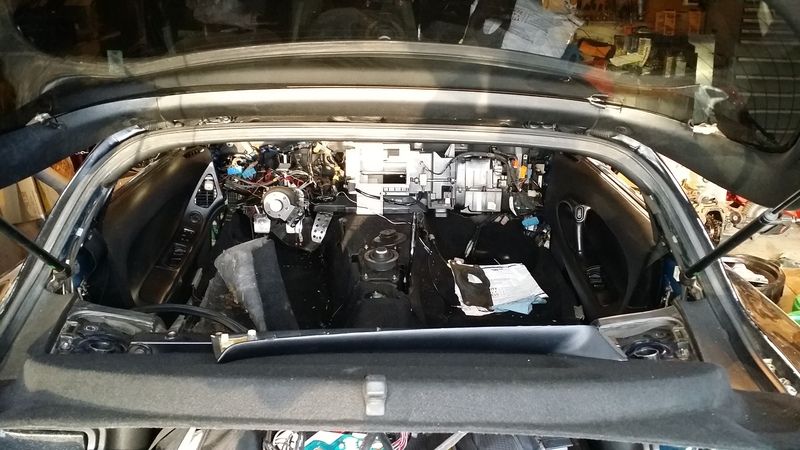
I took these pics to show a friend the current status of the car lol. It's progressed a bit since then though.
Image
Image
Image

And while I'm thinking about it, I replaced the hatch struts with stronger/less mileage ones. The hatch opens a lot better now.

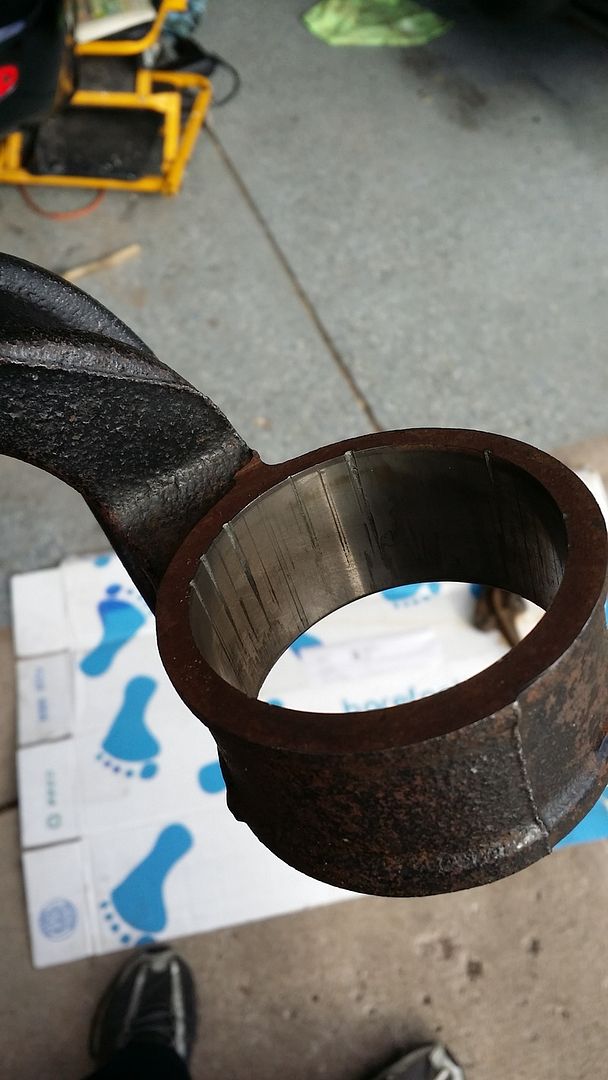
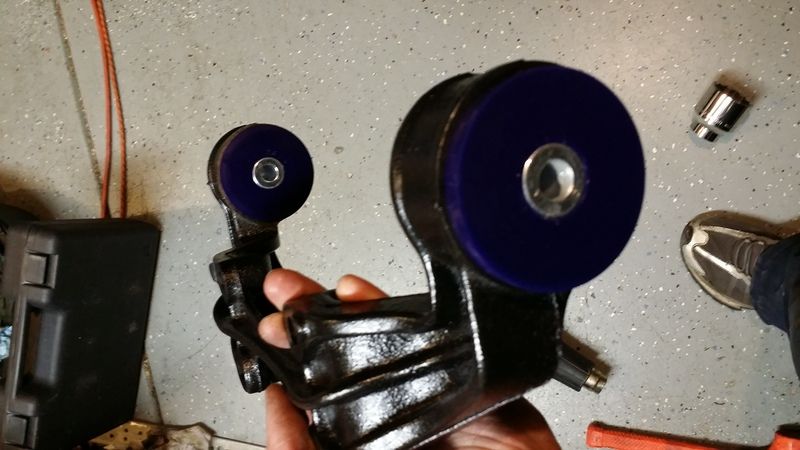
Anyway, while I had the diff out I decided to swap the bushings in the mount bracket. Jesse and I pressed out the old bushings at his house, but before I swapped in the new ones I noticed these grooves. I'm not sure what they came from, and I was worried for a moment that they would destroy the new bushings, but the bushings shouldn't be rotating inside anyway. I asked my buddy Jonathan Bruce of Gorilla Race Engineering and he said to just file down any sharp edges, so that's what I did. Then I pressed in the new bushings and mounted it to the diff.
Image
Image

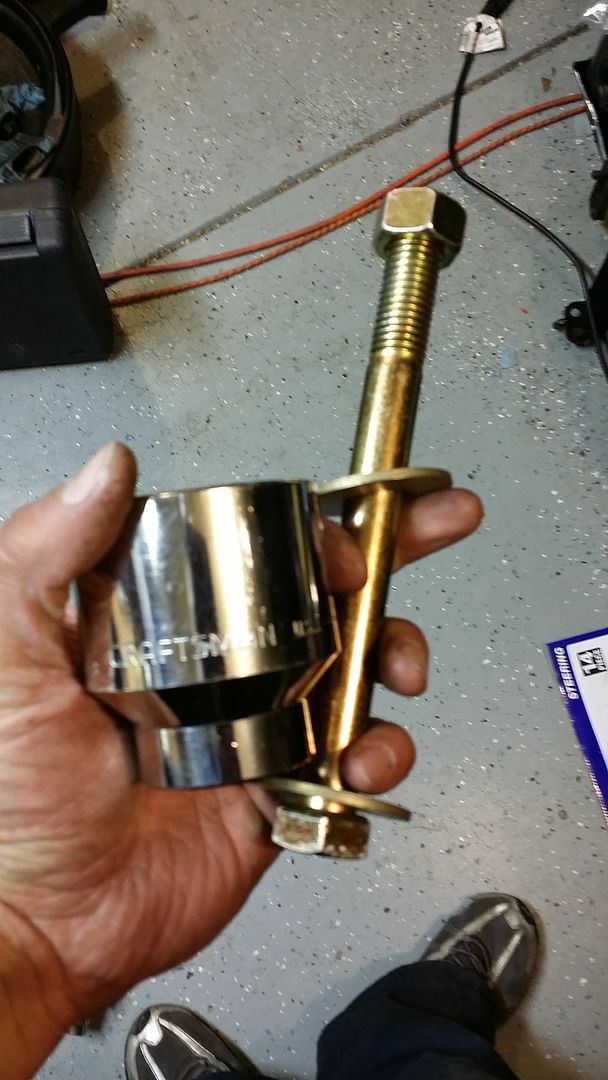
I had a bit of an issue using the vise like I did last time, and I remember I had an issue then too. The hole is greased already and the lip on the edge of the bushing doesn't want to collapse and go in, so it will get to a certain point and then angle so it won't go in. I went to ACE hardware and bought a big bolt that was 8” long, along with a couple of the largest washers I could find and a nut to use with it. Then I put it through the bushing, the bracket, and the flywheel nut socket and used the bolt to pull the bushing into the hole. It worked like a champ because the bushing could only angle so much and it eventually was forced in every time. I think it took a total of about 5 minutes to press them in after that.
Image

The diff was all ready to go in. Only one problem, I torqued down the mount bracket without taking into account the diff cradle/brace wasn't bolted in. After Zico and I mounted it back into the subframe, I ended up loosening every bolt I could think of (including the ones bolting the mount bracket to the diff) to get the brace to bolt down on the wings that angle forward. I eventually got that close enough and tightened all the bolts back up.
Image

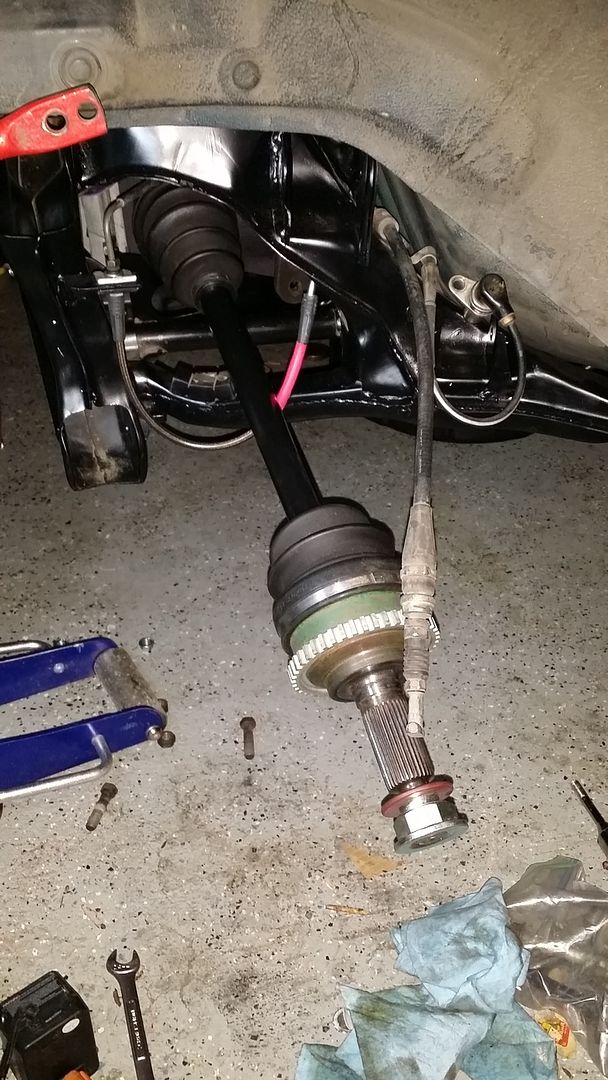
Then we put in the axles. They went in a lot easier than they came out.
Image

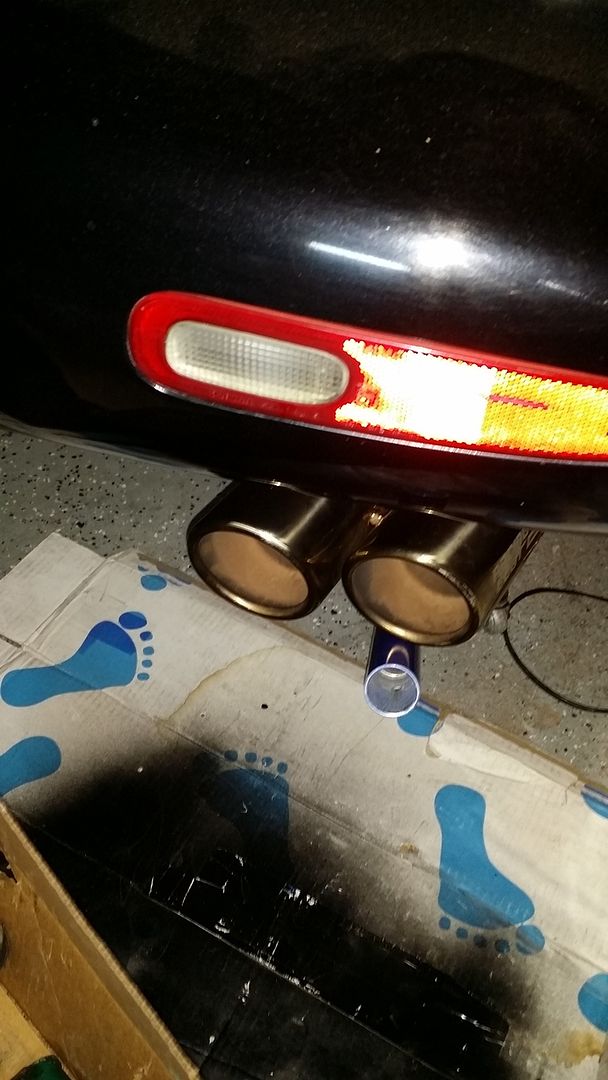
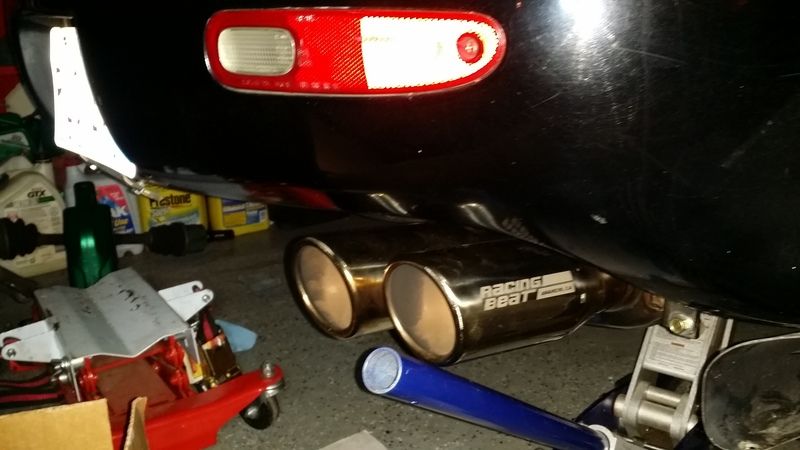
Then we put in the RB dual tip exhaust, or as much as we could anyway. I have to get a gasket to go between the muffler and the pipe that bolts between it and the midpipe. I ordered three new 7 layer metal gaskets from Grimmspeed. I've been using two of them for several years and they're pretty much indestructible. I think I'm going to have one small issue with this exhaust though. It doesn't stick out near as much as the old one, in fact it's in quite a bit. I believe at best I will have way more smoke residue on the bumper, and at worst it will catch fire if I shoot flames lol. But I'm not as concerned about that since I'm running on the lean side now.
Image
Image

I decided to change all my ground cables also. I changed the ones in the engine bay from the old HKS Circle Earth kit I was using to some 4ga welding cable like I was using for the battery cables before. I also used them for the grounding loop inside the car, removing the 10ga wire I was using. I decided to run the cable up and over the HVAC boxes behind the dash instead of under them and along the floor. I figured this would make for an even more anal retentive “clean” install lol, even though I'm the only person that would probably ever see it running along the floor. You can kinda see the cable in these pics.
Image
Image
Image
Image

And along the lines of anal retentive and things only I will see, I also swapped the screws on the grounding blocks inside to stainless steel screws because the black alloy ones had surface rust lol. The added benefit of getting this style is that they're easier to screw in by hand than the alloy ones I was using. The downside is that I had to get them from Fastenal and the shipping was the worst. They were about $.24 a piece, but with shipping it put 10 of them at almost $10. For some screws. Come on.
Image
Image

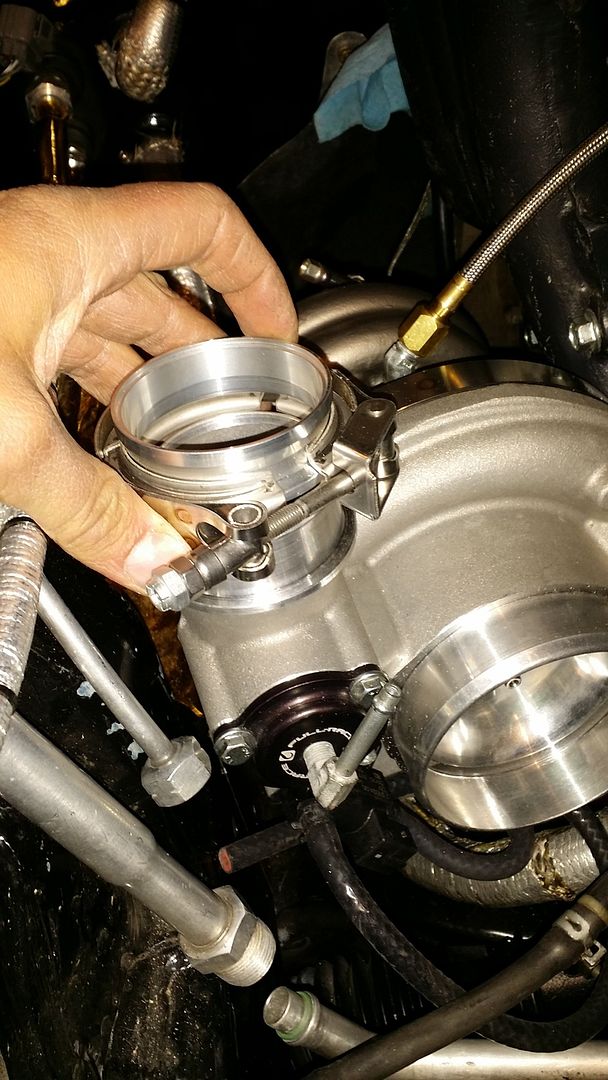
I received the flange and clamp to use for the compressor outlet, but I think the clamp diameter is too small and I might even have to find a low profile version. What makes this even more unfortunate is that I forgot I had already bought the clamp so I bought another one, only to go out to check the mail RIGHT after buying it and finding I had gotten the first one haha. Now I have two clamps I can't use, and they're not exactly cheap. I'm going to see if I can at least send the unopened one back. And I'm still trying to find the info for the clamp I need. There is an EFR install kit that has the clamp I need but the whole kit is $95 and I don't need anything else in the kit. Treadstone sells the clamp separate so I emailed them to see how to buy it and I'm waiting to hear back. I'm really nervous about cutting the outlet of the compressor off anyway, all these snags are making my anxiety about this even worse.
Image

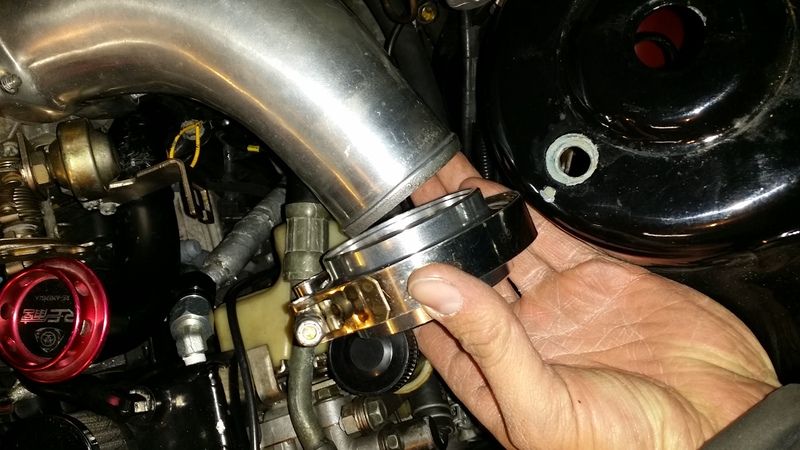
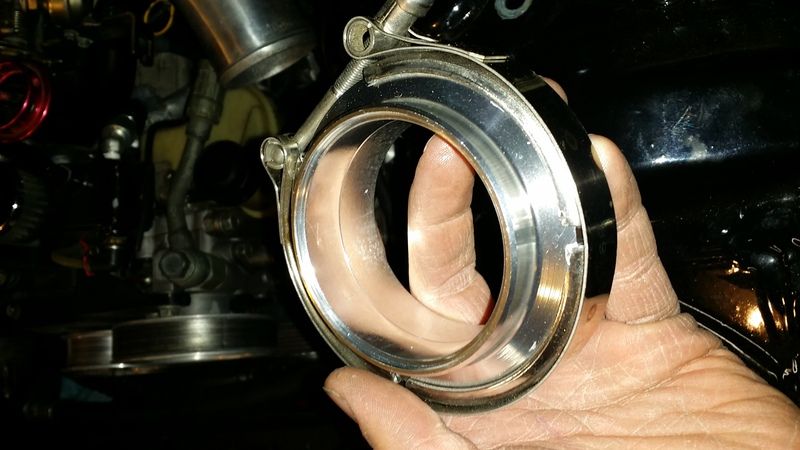
And since I'm doing V-band on the compressor outlet I decided to get one for the inlet of the intake elbow and then do some kind of clamps similar to Wiggins clamps on the IC to piping connections. The only 2.75” V-band I could find was sold by OBX and I got it in the mail only to have an issue. It's too big to use in the tight space available. And it's actually unnecessarily large. They could have made this a lot smaller diameter.
Image
Image

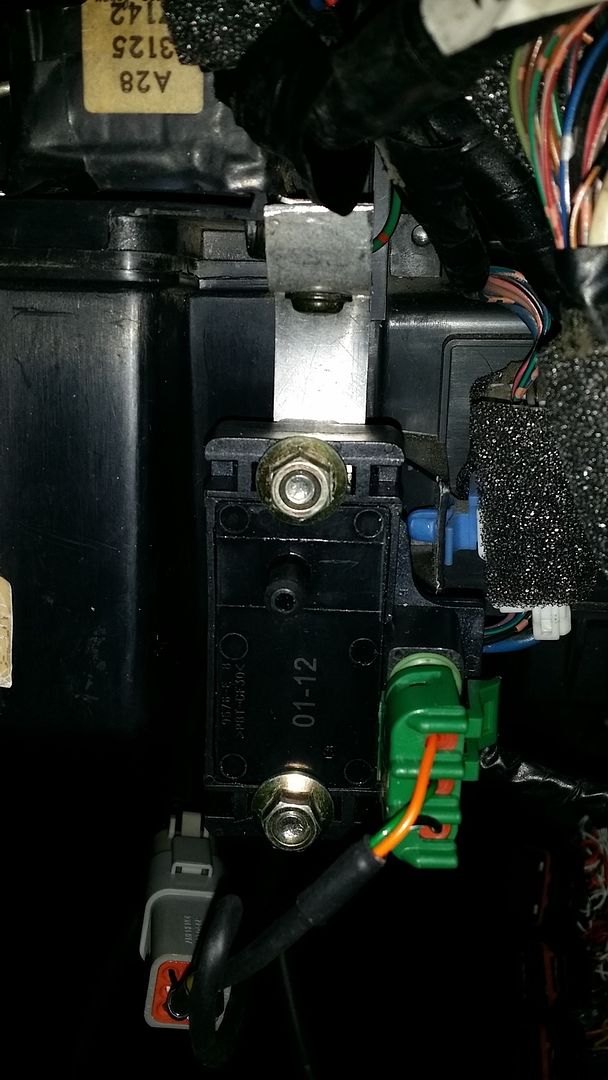
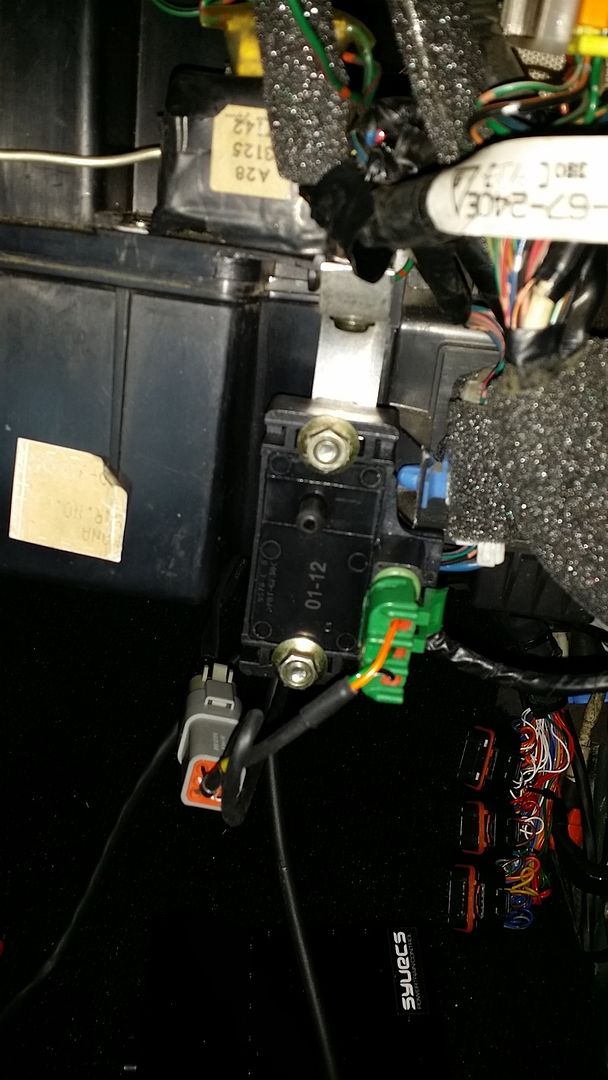
When I got the car back from Chris and was under the dash the first time I noticed he just stuck the barometric pressure sensor (it looks like a 3 bar MAP sensor actually) to one of the HVAC boxes with some double sided tape. I decided I wanted to hard mount it somehow, so I made this bracket the other night in about 10 minutes. It works but it's a little flimsy so I might remake it out of something thicker/stronger than thin aluminum. But it does the job so I might just let it go. (We all know that's not true haha, this will bug me)
Image
Image

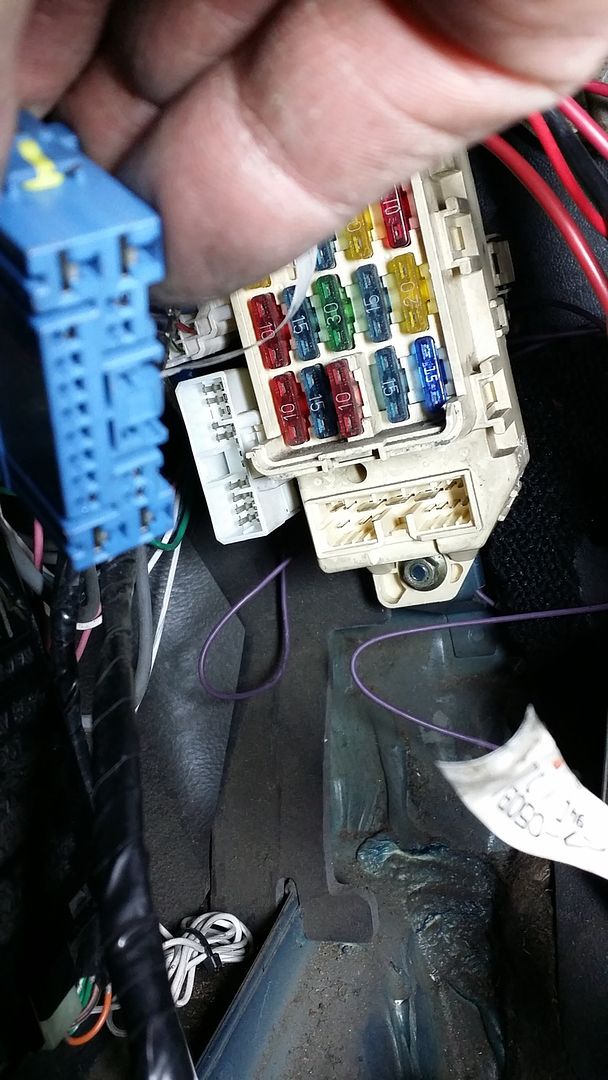
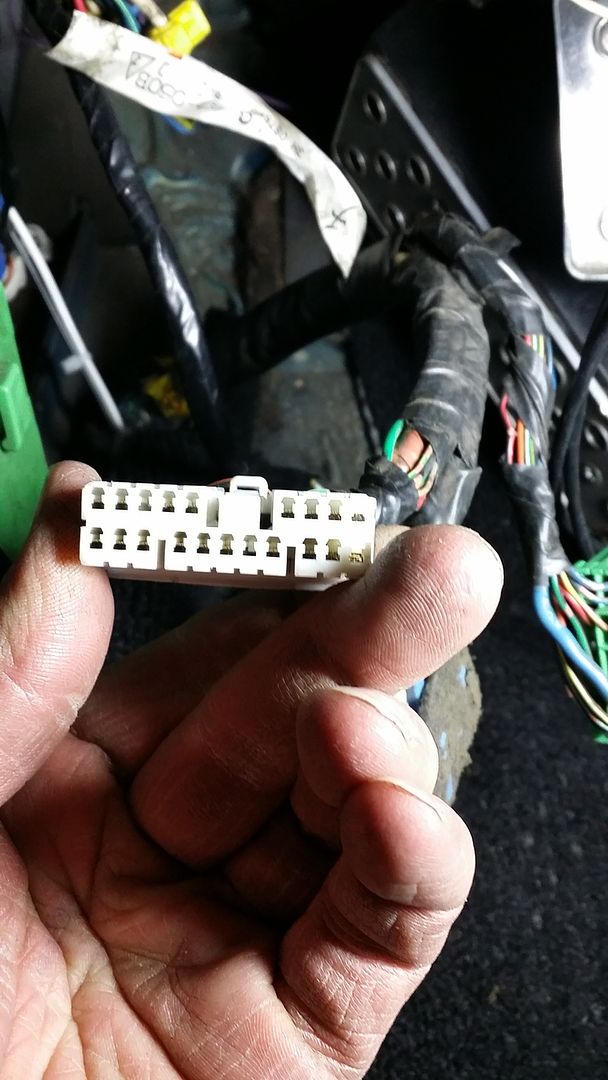
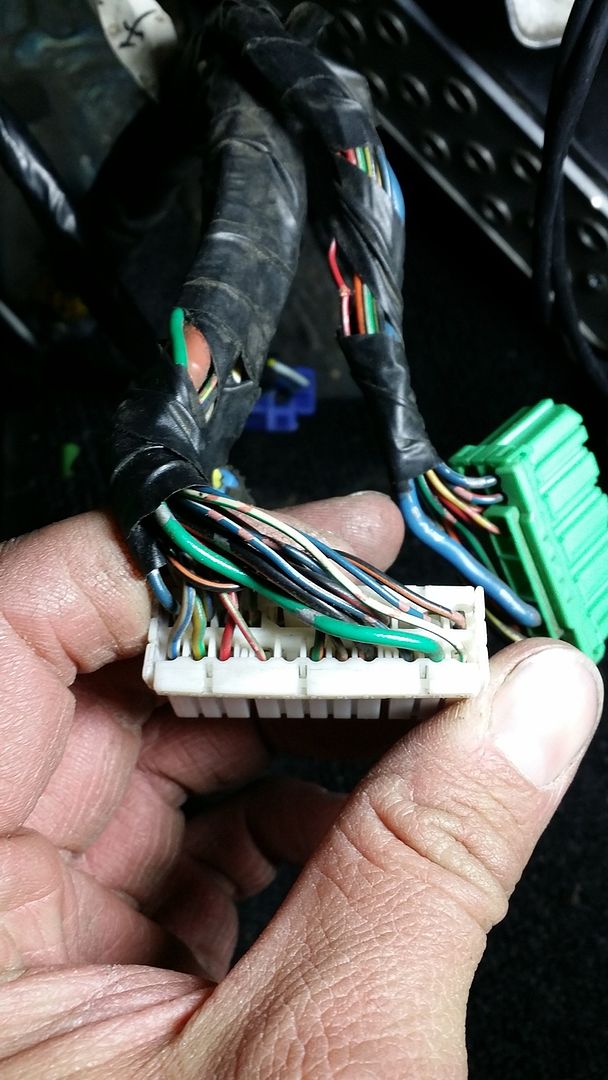
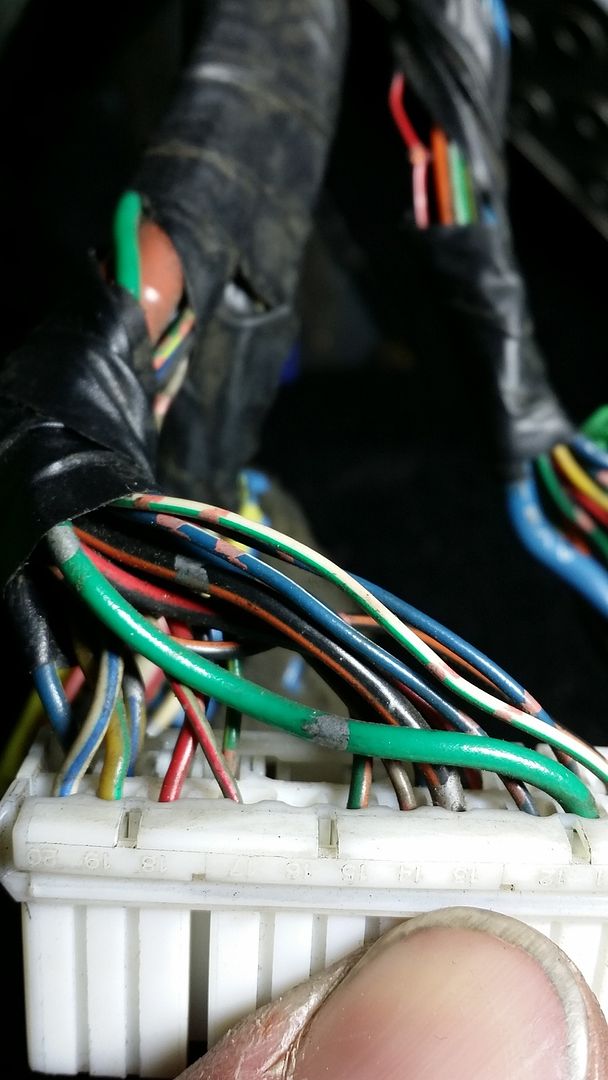
I've been trying to track down where to hook the wire to tell the stereo to put up the backup camera feed, and after reading a thread on 7club and doing some investigating I figured out which wire it was. I'm 99% sure anyway, I'm still going to test it before I bolt the dash in. Connector X-19 on the side of the fuse box by the driver's left foot has a red wire that gets a signal from the reverse sensor on the transmission and sends it back to the reverse lights. I tapped into that, we'll see what happens. Then for the power to the camera I'm trying to decide if I want to tap off the reverse lights or 12v accessory power. My stereo allows you to see the rear camera feed any time you want by selectively pressing some buttons, so it would be nice to have power to the camera with the key turned on, but I'd rather not run a wire all the way to the front of the car if I don't have to. I probably will though.
Image
Image
Image
Image

I bought a bandsaw last Sunday so I could make cleaner cuts through aluminum and steel piping (so we can make the intake and IC piping and downpipe here at home). I got the saw at ACME pawn for a decent price. It's a bench top style but it'll get the job done. I don't really have the room for a floor style right now anyway. The only problem is no one in town has a metal cutting blade for it. I ordered one through Home Depot last Sunday and it still hasn't come in, it's supposed to be in by Tuesday. I'm held up because of this on making the downpipe, then I'll take it and the turbo manifold, the turbine housing, and the lower intake manifold to get ceramic coated.

I decided on Evo Grey for the brake calipers so I'm going to order some of that and disassemble the calipers so David Motley can sand blast them and get them coated. Then I'll rebuild them and get them ready for installation. I've decided to do clear powder on the suspension arms so I have to order some of that too. The only thing holding me up on getting the suspension parts ready for coating is the fear of breaking stuff while pressing the bushings out. I might go to Ft Carson to do that tomorrow though.

I keep forgetting I still need to get an OMP oil reservoir made too.

I think that covers everything, so much for a short post lol.

User avatar
speedjunkie
Senior Member
Posts: 5290
Joined: Wed Jan 02, 2008 9:14
Location: Colorado Springs
Contact:

Re: Build thread

Postby speedjunkie » Sun Mar 27, 2016 9:14

I didn't get a lot done this weekend.

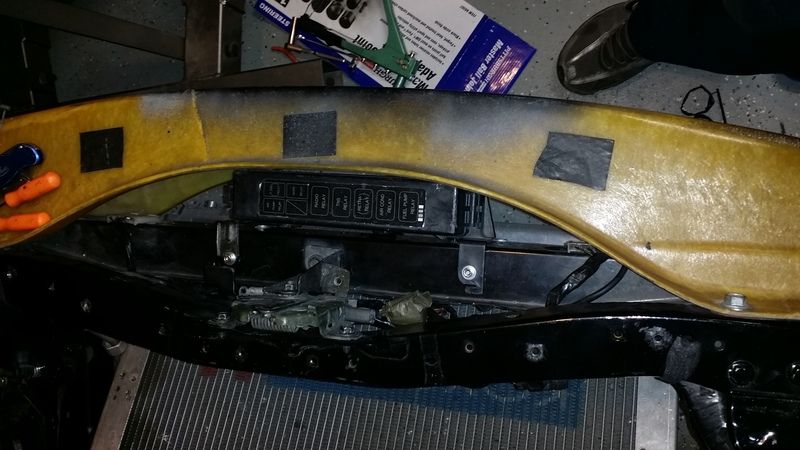
I pressed out the last two bushings from the rear upper control arms, so those are ready to be blasted and coated. I got the new exhaust gaskets in so I modified one of them (the holes need to be lengthened outward) to fit between the two pieces of the RB dual exhaust, then I wrapped part of the pipe and bolted the two together. I also started moving my relay box, the one that usually bolts to the front crossmember, so that the opening is larger and the VMIC ducting will be a little easier to make. I need to find some nutserts, rivnuts, or whatever you want to call them. I'm hoping to find some that are 6x1.0 so I can use the OEM 10mm bolts, but I'll probably have little luck with that.

I've also been trying to figure out the wiring for the new backup camera I bought. The AV cable has a red wire sticking out of each end too, and I wasn't sure if that was meant to power the camera or what. I used a multimeter and discovered that the wire is only ran along with the cable, it doesn't make contact with the cable ends. I think it's just there to make wiring easier if you want to run power from one end of it to the other for the camera. That's how I'm going to try it anyway haha.
Image

User avatar
RX-7 Chris
Posts: 7800
Joined: Tue Oct 02, 2007 9:14
Location: Colorado Springs
Contact:

Re: Build thread

Postby RX-7 Chris » Mon Mar 28, 2016 9:14

It's starting to look like all you will have left that hasn't been replaced is the body and the dash.
1984 RX-7 GSL-SE [size=84]My restomod project[/SIZE]


1964 Ford Galaxie 500XL flat black w/ white interior, 2 dr fastback, 390 thunderbird, C6 auto, 2500 rpm high stall converter, shift kit, AC, Holley 750 cfm

[size=100]RIP 1983 RX-7[/SIZE]

My Car Blog

User avatar
speedjunkie
Senior Member
Posts: 5290
Joined: Wed Jan 02, 2008 9:14
Location: Colorado Springs
Contact:

Re: Build thread

Postby speedjunkie » Mon Mar 28, 2016 9:14

RX-7 Chris wrote:It's starting to look like all you will have left that hasn't been replaced is the body and the dash.


That's pretty accurate lol. Some of the parts I've used as replacements have even been replaced lol.
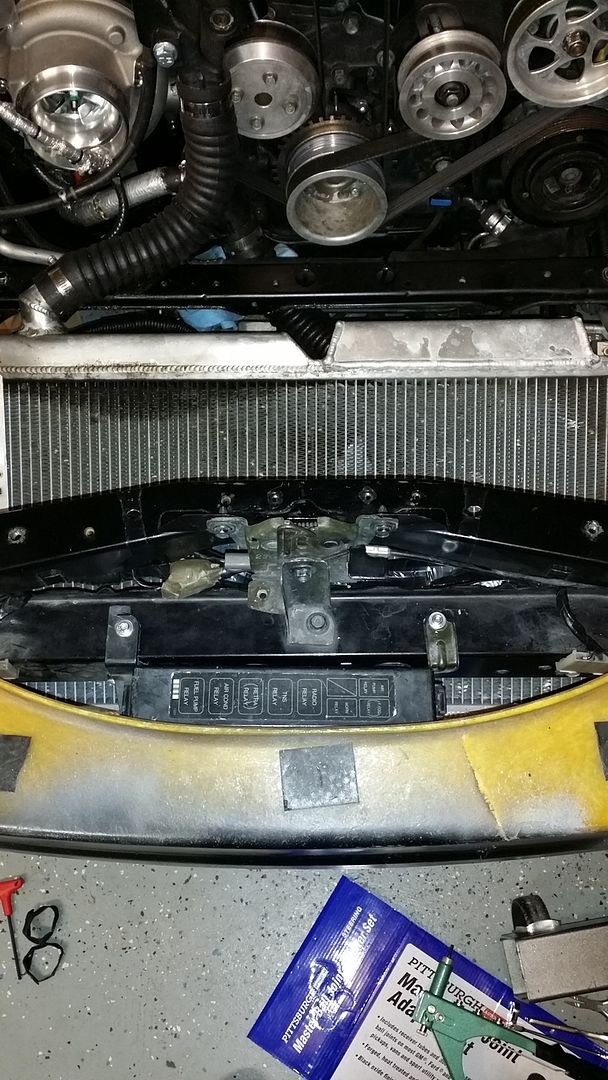
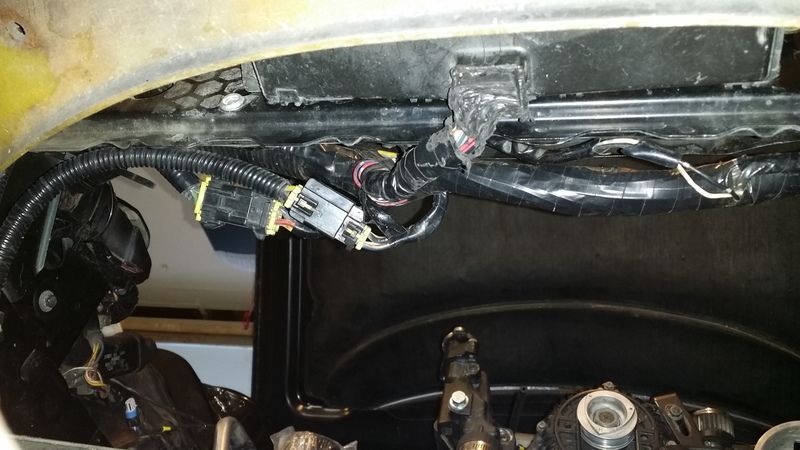
I finished the relay box relocation tonight.
Image
Image

And here is a shot from the VMIC opening, showing there is more space than before.
Image

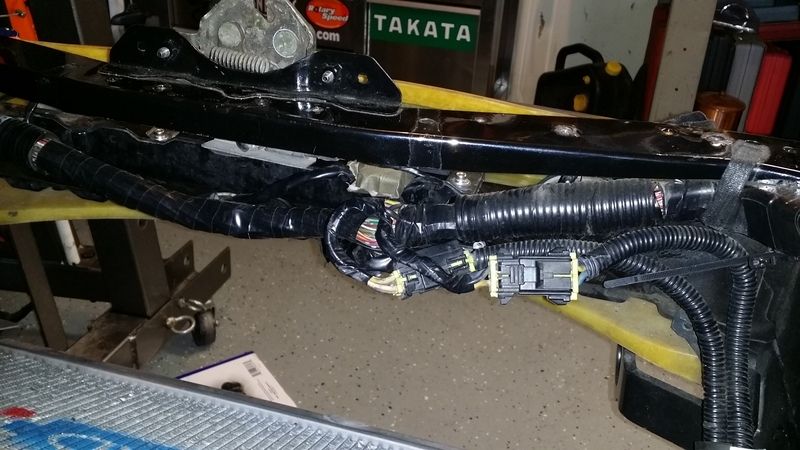
Normally the harness is tucked under the top part of the crossmember but I had to drop it a bit so the box harness would be long enough to wrap underneath.
Image

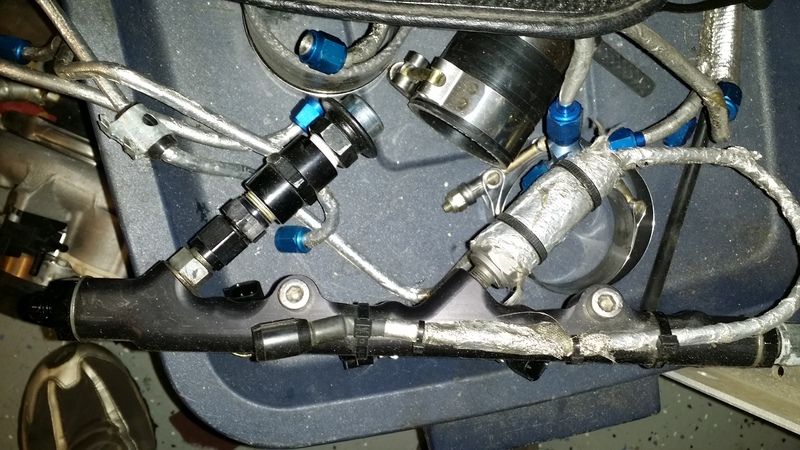
I took this pic for Andy to show him the fuel pulsation damper Chris added. I'd like to find one that fits without the adapter fittings if possible.
Image

I also got a hacksaw today and started cutting one of the rear lower control arm bushings to get it out. That's a PITA.

User avatar
speedjunkie
Senior Member
Posts: 5290
Joined: Wed Jan 02, 2008 9:14
Location: Colorado Springs
Contact:

Re: Build thread

Postby speedjunkie » Tue Mar 29, 2016 9:14

I didn't get a whole lot finished tonight.

I took the midpipe to Beauchamp Racing this afternoon and Tom straightened out the flanges. I picked up the bandsaw blade today too and quickly learned it's not really worth a damn on stainless steel lol, so I ended up using the chop saw anyway to make the first cut for the downpipe. It kinda irks me that I could have done this exhaust already. We're going to cut all the pieces and tack them together tomorrow and then Zico is going to take it to his buddy on Thursday to TIG weld. Then I'll take it and the other exhaust pieces and LIM to get ceramic coated.

The Vision Clear and Evo Grey powder came in today. I'm going to take the calipers apart hopefully tomorrow and take them to David on Thursday. The lug nuts came in today too.

I'm going to look at some air compressors one of these nights and get one so I can sand blast the suspension arms after I get the bushings out.

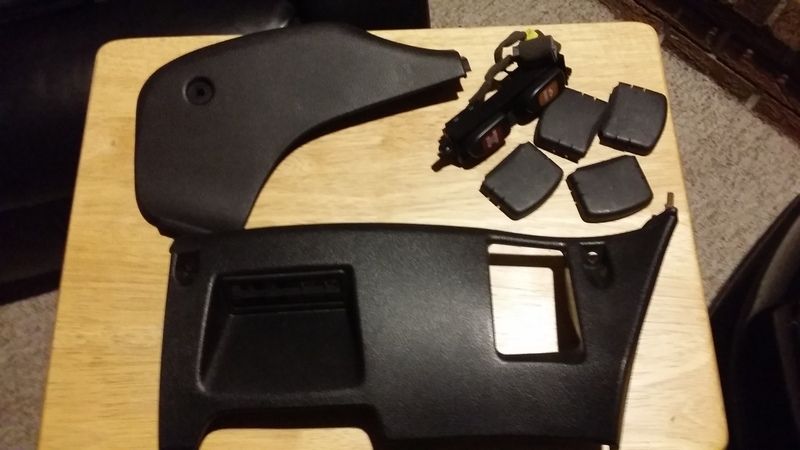
I also finally got the interior pieces I bought from the kid in NY. He sent them in a Smirnoff box and USPS held up the shipment. I closed the PayPal dispute tonight.
Image

And Chris sent me this email today.
"Just saw the notes on the new firmware. You'll be able to map the water injection with the ECU with the new firmware. So no need to wire in the FJO controller."

I've already wired in the FJO controller but I'd really like to simplify the system even more and use the ECU if possible. I'm just not sure how that would work since I believe the output for that is only two wires and I have a few things that need to be controlled; the pump, nozzle, pressure sensor...

He's also going to make an adapter harness so I can use the MAC valve without chopping into the harness, and I might get the mounting bracket from him too depending on where it mounts the valve.

User avatar
speedjunkie
Senior Member
Posts: 5290
Joined: Wed Jan 02, 2008 9:14
Location: Colorado Springs
Contact:

Re: Build thread

Postby speedjunkie » Wed Mar 30, 2016 9:14

I broke down my calipers at work today and cleaned them with brake cleaner when I got home. I'll probably take them to David for powder coating tomorrow night.

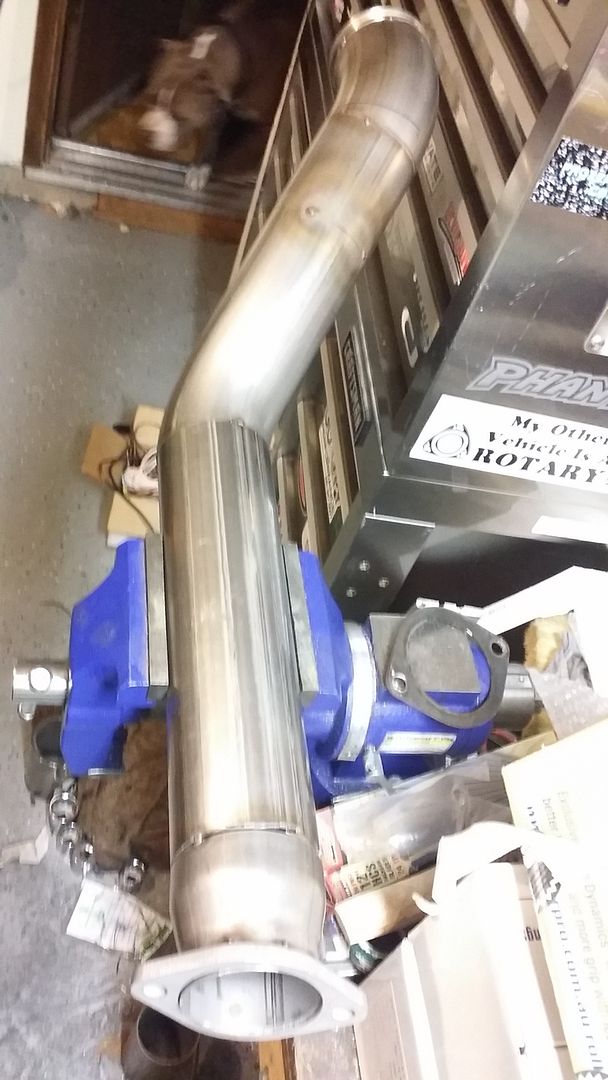
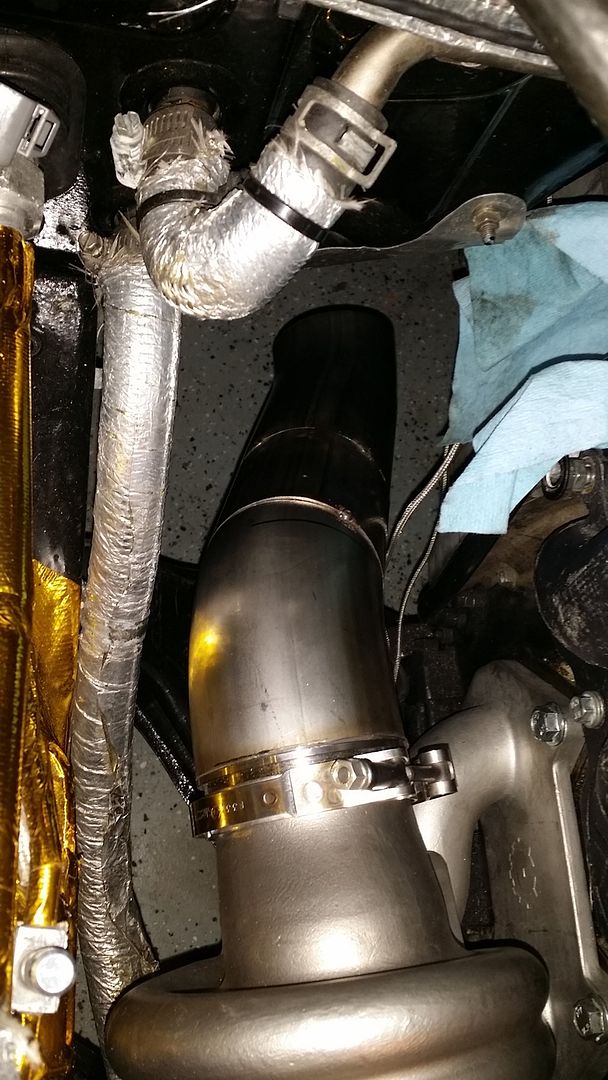
Then Zico and I worked on making the downpipe. We got most of the way finished, down to the last piece, but things got kinda weird cutting that piece lol. I'm hoping I won't need to get another 2ft piece. This is what we ended with for the night.
Image

User avatar
speedjunkie
Senior Member
Posts: 5290
Joined: Wed Jan 02, 2008 9:14
Location: Colorado Springs
Contact:

Re: Build thread

Postby speedjunkie » Thu Mar 31, 2016 9:14

We finished tacking the downpipe tonight. Such a PITA. Hopefully it will get welded tomorrow and then ceramic coated soon after. It's not the most beautiful thing, but considering what we had to work with I think it turned out pretty well so far.
Image

User avatar
Shadowden
Posts: 2288
Joined: Fri Aug 05, 2011 9:14
Location: Highlands Ranch
Contact:

Re: Build thread

Postby Shadowden » Fri Apr 01, 2016 9:14

I think once it is welded it will look great. Nice work on it.

User avatar
RX-7 Chris
Posts: 7800
Joined: Tue Oct 02, 2007 9:14
Location: Colorado Springs
Contact:

Re: Build thread

Postby RX-7 Chris » Fri Apr 01, 2016 9:14

Looks good. Where will you take it to have it welded?
1984 RX-7 GSL-SE [size=84]My restomod project[/SIZE]


1964 Ford Galaxie 500XL flat black w/ white interior, 2 dr fastback, 390 thunderbird, C6 auto, 2500 rpm high stall converter, shift kit, AC, Holley 750 cfm

[size=100]RIP 1983 RX-7[/SIZE]

My Car Blog

FDEEZ
Senior Member
Posts: 235
Joined: Sun Aug 11, 2013 9:14
Location: Colorado Springs

Re: Build thread

Postby FDEEZ » Fri Apr 01, 2016 9:14

Getting those angles correct so the DP mates up to your existing exhaust system must've been a painstaking chore. The result turned out good though. If it's stainless, hopefully your welder backpurges the pipe when he does the final weld.

User avatar
speedjunkie
Senior Member
Posts: 5290
Joined: Wed Jan 02, 2008 9:14
Location: Colorado Springs
Contact:

Re: Build thread

Postby speedjunkie » Sat Apr 02, 2016 9:14

Shadowden wrote:I think once it is welded it will look great. Nice work on it.


Yeah I hope so. Hopefully the joints where it's not lined up too well will look better. Thanks!

RX-7 Chris wrote:Looks good. Where will you take it to have it welded?


Thanks! Zico is going to take it to his buddy that has a TIG welder that's going to weld up his intake pipe. We were supposed to drop it off Thursday but we ran a little late. I was hoping he could do it tonight but that didn't happen either. And chances are tomorrow won't happen either.

FDEEZ wrote:Getting those angles correct so the DP mates up to your existing exhaust system must've been a painstaking chore. The result turned out good though. If it's stainless, hopefully your welder backpurges the pipe when he does the final weld.


Yeah that was such a pain. I had the flange bolted to the midpipe and had the midpipe held up by the jack to where I wanted it. Unfortunately the catback runs very close to the diff cradle/brace, about 1/16" away from it as a matter of fact. I hope it doesn't make contact. It's stainless, but I'll leave that up to Zico's buddy lol. We had some issues with the welder and we were using 75% argon when you're supposed to use at least 98%, so that's why the tacks aren't as good.


I decided this afternoon to just run a wire directly from the steering column to the horns to get them to work. So I did that and also rerouted the low washer fluid wire which I had previously run through the engine bay and wasn't too pleased with it. I ran them both under the driver's side fender and hid the wires as well as I could. That's all I managed to finish tonight. Tomorrow I'm thinking about reinstalling the dash and running the wires for the backup camera and verifying it works, along with verifying the horns and blower motor work now.

User avatar
speedjunkie
Senior Member
Posts: 5290
Joined: Wed Jan 02, 2008 9:14
Location: Colorado Springs
Contact:

Re: Build thread

Postby speedjunkie » Sun Apr 03, 2016 9:14

Zico wasn't able to get ahold of his buddy so I texted Mitch about welding the downpipe and he quoted me $100. Then Zico mentioned Sean Gunn being able to do it so I dropped it off with him this afternoon after drilling the hole for the O2 bung. Then I went to Pep Boys and picked up more titanium exhaust wrap. I'm going to wrap the downpipe after getting it ceramic coated, just for extra heat protection (especially with how close it runs to the transmission). I might have David coat the pipe on the RB dual tip also and then wrap it again since it's close to the fuel filters.

I installed the dash today too so I could verify a few things. First I tried to find a new place to mount the coupler for the tuning cable but that didn't work out so I abandoned that. Tonight I finally got around to verifying everything.

First was the horns. They still don't work even though I have them wired directly from the steering column to the horns. But it's obvious to me now why that didn't work. That wire has no power to it. I need to tap a power wire into it first. And now that I think about it, maybe that will be the only thing I need to do, maybe the stock wiring will work after that, maybe not having power to it is my only issue. But just in case I'll leave everything else wired up first.

Then I tested the blower for HVAC. That works, WOOHOO!!! Now I can get the AC lines made and have AC again. I already have heat again but it's not great during the winter lol. My cooling system works a little too well for the coolant to get hot enough to provide sufficient heat.

Next I hooked up the stereo and tested the backup camera. Just a couple notes first; the red wire built into the AV cable is just a pass-through, as I thought. I'm not sure if I posted about this part, but the white connector is X-19 and the red wire is the reverse wire, and it does indeed work. Just for testing I grounded the camera ground wire straight to the battery, and ran the power wire to the red wire in the AV cable and from there to the spade terminal in the top of the fuse box by the driver's left foot. I tested in reverse and also just using camera view through the stereo and they both worked. I'll be wiring it up this way when I install the camera permanently, other than maybe using the power going to the stereo to power the camera instead of running it to the fuse box.

Last I tested the new antenna I got. It's a boosted AM/FM antenna, and my previous hidden antenna is just FM. I verified that this antenna does pick up at least the one AM station I listen to, and the FM stations come in clearer. I still want to hide this one too but I'm not sure if it will function as well. I'm going to try it regardless. I also tested the rear speakers while I was at it and they work great, it's a lot of extra sound.

Overall I'm very happy tonight. I can finally finish up the interior and put it back together. Then I can get started on finishing the engine bay and suspension and get this sucker back on the road.

Also, there is a guy on facebook selling a set of AME TM02s in 18x9 +15, I think I'm going to get these and widen them to 11.5". I was going to do 12" all around but there is quite a bit more tire selection in 285 than 295, and it's only another half inch anyway, not to mention I'd be very upset if I got them and they didn't fit lol.

User avatar
speedjunkie
Senior Member
Posts: 5290
Joined: Wed Jan 02, 2008 9:14
Location: Colorado Springs
Contact:

Re: Build thread

Postby speedjunkie » Sun Apr 03, 2016 9:14

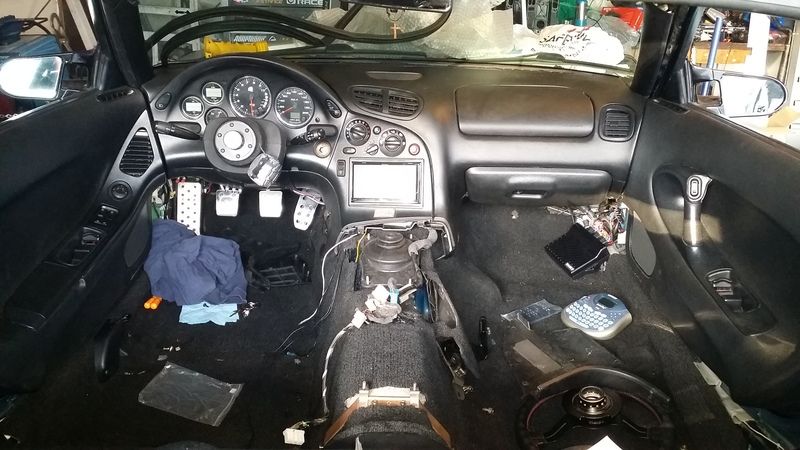
I did quite a bit today. I got the dash completely back in, wired up the stereo, the new antenna, and the backup camera, and put together part of the interior.

With the stereo I noticed that when power was removed it didn't save my settings so I ran a new wire from the battery directly to the yellow wire in the harness (the wire that is supposed to have power no matter what position the key is in).

The one thing I still didn't fix was the horn issue. First I disconnected the wire I installed yesterday and tried running switched power directly to the steering column and that didn't work. So I reconnected the wire from yesterday and ran a wire from switched power to it and the horn is constantly on as soon as the key is turned. I'll address this again later.

I tested the antenna in the rear of the car, covered by body panels and it didn't pick up the AM signal so I put it at the top of the windshield and it works great there. I had to move my radar detector over and I'm not crazy about that but it's working alright.

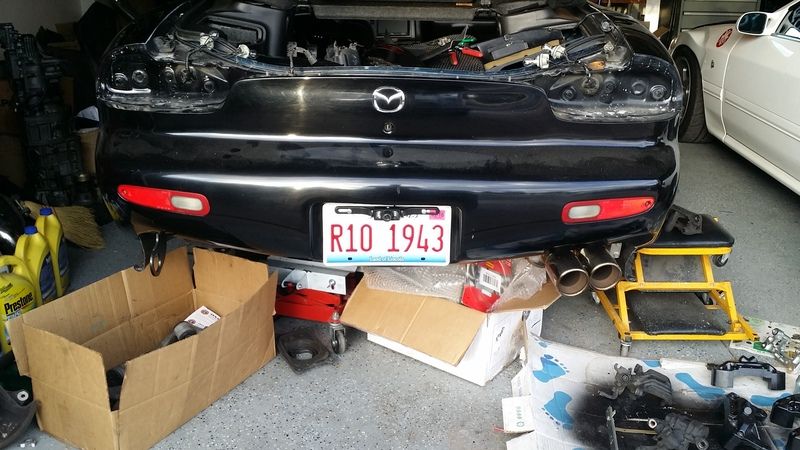
The backup camera wiring is temporary the way I ran it. To do it the way I want I need to remove the bumper and I'm not ready to do that yet. I plan to swap the bumper because of the two bulges on each side (I'm guessing due to the diffuser pulling down on it), but I'm skipping body work this time. Maybe next winter. And when I swap the bumper I'll change the camera wiring. I'm also going to figure out a mounting solution for the diffuser so it's not pulling down on the bumper anymore. I already have a couple ideas. As for the camera, I'm not crazy about how big and noticeable it is, but whatever. I guess I just need to get a dark license plate.

Oh, I also bought the extra set of TM02s from the guy on Facebook, who it turns out also owns an FD. The main reason I did this is because I feel like these are going to take forever getting widened and I don't want to just be waiting on the wheels now. Had I thought this through a few months ago I would have sent mine off and had them back a long time ago already. It would have saved me a lot of money.

Image

Image

Image

User avatar
RX-7 Chris
Posts: 7800
Joined: Tue Oct 02, 2007 9:14
Location: Colorado Springs
Contact:

Re: Build thread

Postby RX-7 Chris » Mon Apr 04, 2016 9:14

I really like the look of the RB dual tip exhaust. It makes it look like an FB, lol.
1984 RX-7 GSL-SE [size=84]My restomod project[/SIZE]


1964 Ford Galaxie 500XL flat black w/ white interior, 2 dr fastback, 390 thunderbird, C6 auto, 2500 rpm high stall converter, shift kit, AC, Holley 750 cfm

[size=100]RIP 1983 RX-7[/SIZE]

My Car Blog


Return to “Rotary Vehicle”

Who is online

Users browsing this forum: No registered users and 55 guests