Posted: Mon Oct 08, 2007 9:14
Installing the Mazdaspeed Rear Strut Bar.
1. Remove the tire puncture repait kit. Just loosen the strap and toss it aside.
2. Remove all of the fasteners for the trunk lining. These are a pain, tiny little plastic screws that will strip if you look at ‘em wrong. Take your time. I broke a couple.
3. Remove the damper bracket nuts. 2 14mm nuts. A small 3” extension helps to clear the tower brace.
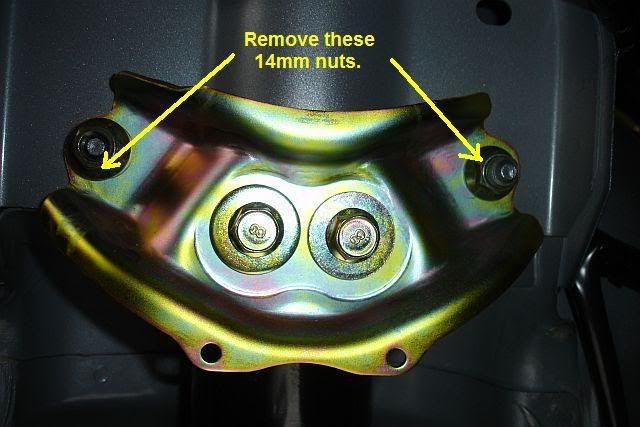
Note: The entire strut bar comes assembled with the brackets installed on the bar. To remove, you’ll need a 17mm socket, and the correct Allen key (which I didn’t have, appears to be about ¼” or 5/16” head. Otherwise, you can use some vise grips, as the area is easy to grip. You need to remove the brackets for install.
4. Install bracket and tighten to 27.4 -38.8 ft-lb.
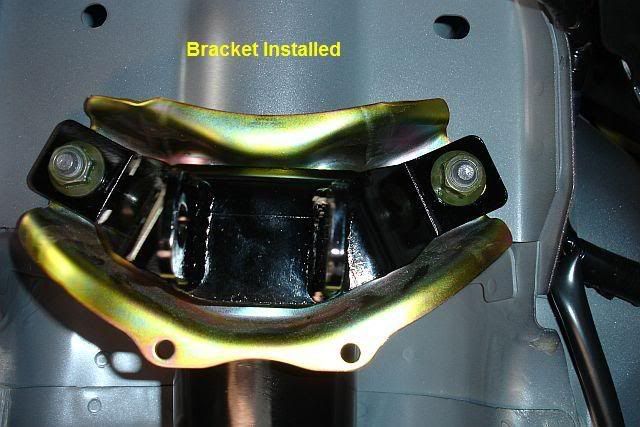
5. The fun part: trim the trunk lining appropriately with a box cutter to expose the brackets. Be patient.
6. Reinstall the trim pieces and fasteners.
7. Install the main bar to the brackets. Tighten the 17mm bolts to 27-38 ft-lb.
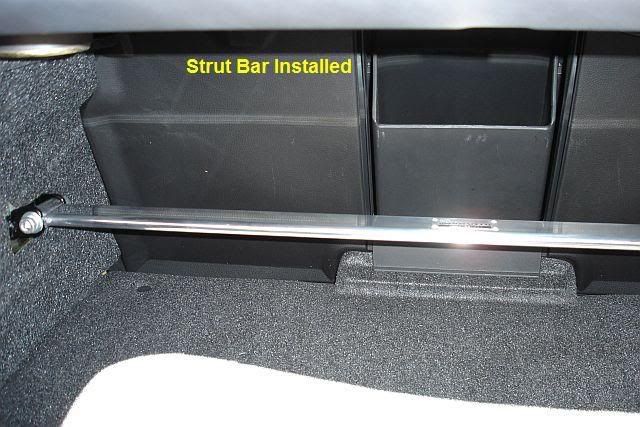
8. Reinstall the tire puncture repair kit. I used the strap, and attached it behind the strut bar.
If you trimmed too much of the lining, which I did, use some sheet styrene, or other plastic you may have available and make some trim to surround the brackets. I’ll take pictures of that once I complete it.
1. Remove the tire puncture repait kit. Just loosen the strap and toss it aside.
2. Remove all of the fasteners for the trunk lining. These are a pain, tiny little plastic screws that will strip if you look at ‘em wrong. Take your time. I broke a couple.
3. Remove the damper bracket nuts. 2 14mm nuts. A small 3” extension helps to clear the tower brace.
Note: The entire strut bar comes assembled with the brackets installed on the bar. To remove, you’ll need a 17mm socket, and the correct Allen key (which I didn’t have, appears to be about ¼” or 5/16” head. Otherwise, you can use some vise grips, as the area is easy to grip. You need to remove the brackets for install.
4. Install bracket and tighten to 27.4 -38.8 ft-lb.
5. The fun part: trim the trunk lining appropriately with a box cutter to expose the brackets. Be patient.
6. Reinstall the trim pieces and fasteners.
7. Install the main bar to the brackets. Tighten the 17mm bolts to 27-38 ft-lb.
8. Reinstall the tire puncture repair kit. I used the strap, and attached it behind the strut bar.
If you trimmed too much of the lining, which I did, use some sheet styrene, or other plastic you may have available and make some trim to surround the brackets. I’ll take pictures of that once I complete it.