Aren't you glad you didn't get screwed over this time? LOL
Glad everything is working well for you!
Did your stuff from Banzai come by Fedex? They left a note on my door today and I think it's the OLED Commander.
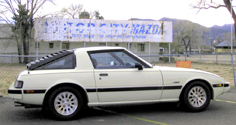
My new car!
-
speedjunkie

- Senior Member
- Posts: 5337
- Joined: Wed Jan 02, 2008 9:14
- Location: Colorado Springs
- Contact:
-
chickenwafer
- Posts: 2515
- Joined: Wed Mar 11, 2009 9:14
- Location: Greeley
The PFC came via FedEx but the plugs and block off plates came USPS. They sent me the tracking numbers for both and CC'ed me on the update emails.
I did notice I think I have an issue with the PFC however. When I key the car on, the Commander is displaying -150 mmHG without the engine running...obviously it should as close to 0 as possible.
Then I also noticed during my runs I am hitting 10psi, but the Commander is displaying 0.49kg/cm2 as my max boost, which is 6.9psi so about 3psi which is a big difference. I tried a different scale and offset for the MAP sensor and got it zeroed out with the engine off, but it won't run right after that...so I'm not positive how to calibrate it right now.

-
chickenwafer
- Posts: 2515
- Joined: Wed Mar 11, 2009 9:14
- Location: Greeley
So I knew the PFC was reading the factory 2bar MAP sensor and it is reading low because it is calibrated to sea level which has more atmospheric pressure than we do (14.7psi vs our 12.8psi) and the difference is correct. My boost gauge reads in PSIG which means it reads regards of altitude since it is self-calibrating.
So since the factory MAP sensor is an absolute pressure sensor (PSIA) type, they are both technically correct. According to my AEM gauge, I am adding 10psi above my current atmosphere, and according to the factory MAP sensor, I am adding 7psi above sea level pressure, so both are correct.
All this means is I'm not really concerned about recalibrating the MAP sensor since it is technically accurate. I'll just learn that when the Commander shows I hit 0.49kg/cm2 I really hit 10psi and not indicated 7psi. Not really a big deal since pressure is pressure.
Furthermore, I was running rich during close loop cruising as well, around 12:1. This was hurting my fuel mileage horribly, obviously. I got fed up with it on the way home from Matt's house so I pulled over, plugged in the laptop to the Datalogit, and leaned out the entire closed loop section of the base injection map.
Success! I now cruise around high 14's to low 15's in most spots. There are a few load cells that result in richer AFRs than I want, but better than lean! I am also pulling pretty consistent 11.0:1 AFRs in boost, sometimes even closer to 10.5, but for a rough tune, I'll take it!
-
chickenwafer
- Posts: 2515
- Joined: Wed Mar 11, 2009 9:14
- Location: Greeley
Put the RX7Store resonated midpipe in this afternoon. It didn't line up too well with my Pettit 3" downpipe and Blitz NUR Spec catback. The custom 3" catless midpipe I already had in lined up perfectly without issue.
So on the first attempt I discovered a rather massive exhaust leak at the downpipe/midpipe flange. Jack the car back up and I put in the hardware RX7Store supplies with instead of my own. The nuts and bolts I was using are grade 8 stainless 3/8" shanks so they are pretty tough. RX7Store supplied these 1/4" shank Chinese bolts that felt like they would break at 60ft-lbs of torquing. Nonetheless, I tried them, and actually had to end up using one on the rear midpipe/catback flange because it lines so horribly my larger diameter bolts couldn't fit.
Second attempt, still a leak, albeit smaller, at the downpipe/midpipe flange. So I put on 2 gaskets and used my hardware since I knew I torque the shit out of them, being much higher quality than the supplies crap. I torqued them by hand with plenty of force (no room for a torque wrench anyways) and fired her up again, and finally, no more leaking! There maybe a tiny tiny leak, but it's not very noticeable.
Biggest difference for sure is how much quieter the exhaust is. Before it was pretty loud, but mostly only at idle or WOT. But after an hour or so on the highway it would get pretty "droney". This new midpipe eliminates all of that. It sounds great now, if even too quiet. I'm sure my hearing will adjust soon.
Also found out the current tune I have on the PFC needs some work for cold start, so I just loaded in the PFC base map tune cold start calibrations and fueling (PFC does it's timing for idle) and it works much better. Also did some fine tuning on closed loop cruising as I still have some rich pockets in the map. Played with the sequential twin turbo transition some more and I have it pretty darn close now to how the OEM ECU controls the twins. Not sure it makes any difference in actual speed but it's cool and fun to adjust the settings.
Lastly, since I got my catless midpipe out, I can put my Magnaflow California-legal cat in it. Only problem, the midpipe is bent in such a way I don't think I can! This is now getting real aggravating! There is a small chance it will still work but now I may need to buy a whole other midpipe and cat setup or some more money at a fab shop getting mine to fit. Oh joy.
-
chickenwafer
- Posts: 2515
- Joined: Wed Mar 11, 2009 9:14
- Location: Greeley


-
speedjunkie
- Senior Member
- Posts: 5337
- Joined: Wed Jan 02, 2008 9:14
- Location: Colorado Springs
- Contact:
-
RX-7 Chris
- Posts: 7800
- Joined: Tue Oct 02, 2007 9:14
- Location: Colorado Springs
- Contact:
Since you have the black dash like that, the black rear seat will definitely look good.
1984 RX-7 GSL-SE [size=84]My restomod project[/SIZE]
1964 Ford Galaxie 500XL flat black w/ white interior, 2 dr fastback, 390 thunderbird, C6 auto, 2500 rpm high stall converter, shift kit, AC, Holley 750 cfm
[size=100]RIP 1983 RX-7[/SIZE]
My Car Blog
-
speedjunkie
- Senior Member
- Posts: 5337
- Joined: Wed Jan 02, 2008 9:14
- Location: Colorado Springs
- Contact:
-
chickenwafer
- Posts: 2515
- Joined: Wed Mar 11, 2009 9:14
- Location: Greeley
i plan on getting the currently tan front seats recovered in black leather with perforated inserts, blue stitching, and seat heaters (maybe, not 100% on that yet). So the only items that will still be tan in my interior will be the carpet, floor mats, and headliner.
But for now, I'm keeping the front seats tan until I can afford to get them recovered. I've been on a buying spree as of late so I'm holding off on any major car part purchases until after my wedding.
But for now, I'm keeping the front seats tan until I can afford to get them recovered. I've been on a buying spree as of late so I'm holding off on any major car part purchases until after my wedding.
-
chickenwafer
- Posts: 2515
- Joined: Wed Mar 11, 2009 9:14
- Location: Greeley
Small updates:
Got my Hallman Pro RX manual boost controllers in today. Had the time to fab up a quick bracket. I'm quite happy with the results, both aesthetically and functionally fantastic. Now I just need to run vacuum lines:


Stripped all the interior panels are started prepping them for dye. Some door panels and various trim pieces all stripped and ready!

Yes, I painted on my trash can haha:


The end result (for now) as the panels are under my lights to cure overnight. I'm happy with the results coverage wise and color wise but finish wise (i.e. gloss) they are too shiny to match OEM. Not sure if I could hit them with a flat clear coat to dull them up to a satin finish like OEM or if I'll just leave them glossy.
Really, it's not too difficult to pull everything to touch it up, so I'm going to throw them in as-is and see how I like it. Obviously if I like it, I'll keep them, otherwise I'll try a satin clear coat or just have to re-dye them.
Also got a cheap IBM ThinkPad laptop off eBay (I'm a full on eBay addict now) for cheap which arrived today. Works fine and will be great for tuning (only reason I got it, it will stay in the car)
Got my Hallman Pro RX manual boost controllers in today. Had the time to fab up a quick bracket. I'm quite happy with the results, both aesthetically and functionally fantastic. Now I just need to run vacuum lines:
Stripped all the interior panels are started prepping them for dye. Some door panels and various trim pieces all stripped and ready!
Yes, I painted on my trash can haha:
The end result (for now) as the panels are under my lights to cure overnight. I'm happy with the results coverage wise and color wise but finish wise (i.e. gloss) they are too shiny to match OEM. Not sure if I could hit them with a flat clear coat to dull them up to a satin finish like OEM or if I'll just leave them glossy.
Really, it's not too difficult to pull everything to touch it up, so I'm going to throw them in as-is and see how I like it. Obviously if I like it, I'll keep them, otherwise I'll try a satin clear coat or just have to re-dye them.
Also got a cheap IBM ThinkPad laptop off eBay (I'm a full on eBay addict now) for cheap which arrived today. Works fine and will be great for tuning (only reason I got it, it will stay in the car)

-
chickenwafer
- Posts: 2515
- Joined: Wed Mar 11, 2009 9:14
- Location: Greeley
Dupli-Color vinyl and fabric dye. It's cheap and readily available. Also has built in adhesion promoter so no need to spray extra primer or anything. And it dries real fast and works well.
The panels seemed cured enough so I put them on the car. The glossiness isn't too bad but the dyed panels are defiantly more glossy than the OEM black panels such as the dashboard. Thus far it isn't a big deal to me, but we'll see how it wears on me.
It's too dark and the car is huddled up in the garage to get good pictures so I will get some up tomorrow hopefully with the nice weather.
-
speedjunkie
- Senior Member
- Posts: 5337
- Joined: Wed Jan 02, 2008 9:14
- Location: Colorado Springs
- Contact:
Dave, a few things.
-If you want your seats redone, I know JUST the old lady...LOL.
-I think "fabbing a bracket" consists of more than using a stock airbox bracket and clamps LOL!!! All kidding aside, that was a great idea and I love it.
-I work with a guy that buys EVERYTHING from eBay, including razors and probably shoestrings lol.
Ian, I have an extra doo doo maroon interior if you want it haha.

-
chickenwafer
- Posts: 2515
- Joined: Wed Mar 11, 2009 9:14
- Location: Greeley
Here are some quick teaser seats of the JDM rear seat install. Big thanks to Matt (Alpha) for helping me!

The seats themselves are difficult to get pictures of since the front seats block them. But I can confirm Matt, who is roughly 6'3", can fit back there in an emergency situation!

One of the real reasons I got them, however, isn't for people but for my two small dogs. Here is Harley trying them out. Room to spare!

Edit: Damn, Eric, I knew you see that was the stock airbox bracket! Hey, I did have to put it in my vise and use my MAP gas torch to bend it slightly! And the cushioned hose clamps came with the boost controllers since the housings are machined aluminum and have no mounting holes. I still really like it!
The seats themselves are difficult to get pictures of since the front seats block them. But I can confirm Matt, who is roughly 6'3", can fit back there in an emergency situation!
One of the real reasons I got them, however, isn't for people but for my two small dogs. Here is Harley trying them out. Room to spare!
Edit: Damn, Eric, I knew you see that was the stock airbox bracket! Hey, I did have to put it in my vise and use my MAP gas torch to bend it slightly! And the cushioned hose clamps came with the boost controllers since the housings are machined aluminum and have no mounting holes. I still really like it!
Very nice.
Thanks for the info on the dye. I hate my tan interior panels and I'm seriously considering painting/dyeing them a different. I fell in love when I saw a thread on 6crew of someone who painted some of his interior the color as his 6 (blazing copper <3)
Thanks for the info on the dye. I hate my tan interior panels and I'm seriously considering painting/dyeing them a different. I fell in love when I saw a thread on 6crew of someone who painted some of his interior the color as his 6 (blazing copper <3)

[color="Blue"]2008 Subaru Legacy 2.5i PZEV - Current Ride, 100% stock[/color]
[color="Gray"]2005 Mazda 6i Pebble Ash Metallic - Dead[/color]
Who is online
Users browsing this forum: No registered users and 71 guests