He has 125 amp now. We might be able to open up the ceiling in the living room to get the wiring from the back wall of the living room to the garage. It would be a 20-30 foot run of wire.
My biggest fear is the breaker box. I really need to take a good look at it.
The biggest problem is he has a LX112-24 by the Federal Pacific Electric Company
https://www.angieslist.com/articles/are ... s-safe.htm
Not really what you want to see Eric.
Build thread
-
RX-7 Chris
- Posts: 7800
- Joined: Tue Oct 02, 2007 9:14
- Location: Colorado Springs
- Contact:
Re: Build thread
1984 RX-7 GSL-SE [size=84]My restomod project[/SIZE]
1964 Ford Galaxie 500XL flat black w/ white interior, 2 dr fastback, 390 thunderbird, C6 auto, 2500 rpm high stall converter, shift kit, AC, Holley 750 cfm
[size=100]RIP 1983 RX-7[/SIZE]
My Car Blog
-
speedjunkie

- Senior Member
- Posts: 5337
- Joined: Wed Jan 02, 2008 9:14
- Location: Colorado Springs
- Contact:
Re: Build thread
Shadowden wrote:Not to belabor the point of electrical simplicity, but if you could add a subpanel in the garage and take power from your current panel to that, then you may have a better solution for the garage as a whole. I don't know how your house is laid out though; if your garage isn't close to your living room (opposite wall so to say) and you can't run power down through a basement it may be tough. I had to have an electrician upgrade my entire service panel and add a subpanel in my garage to make things work. If your service Panel is 200 amp now, adding a subpanel may be a good answer, especially if it is close to the garage and you can take the breakers currently running garage functions and move them into the garage as well opening up the space for the subpanel breaker in the current service panel.
Chris pretty much explained everything. The box isn't super far from the garage, but the problem is my house was built in 77 and is a 125a FPE box. I would LOVE to have 220 in the garage, but I'm not sure it's worth the upgrade if I don't plan on staying here forever. Also, while the house is probably twice as large as I need it to be (I have several rooms I don't even use lol), I'm expanding past what the garage can handle. I need more space in the worst way. Sooooo I guess the only option is to turn the family room behind the garage into more garage space lol.
RX-7 Chris wrote:He has 125 amp now. We might be able to open up the ceiling in the living room to get the wiring from the back wall of the living room to the garage. It would be a 20-30 foot run of wire.
My biggest fear is the breaker box. I really need to take a good look at it.
The biggest problem is he has a LX112-24 by the Federal Pacific Electric Company
https://www.angieslist.com/articles/are ... s-safe.htm
Not really what you want to see Eric.
Yeah that's really not what I wanted to see lol. Although it's been 38 years, so maybe I'm good LOL. I just jinxed myself.
-
RX-7 Chris
- Posts: 7800
- Joined: Tue Oct 02, 2007 9:14
- Location: Colorado Springs
- Contact:
Re: Build thread
One thing to think about is when you go to sell they are going to make you replace the box. Like I had said before is it will be a $2-3k job. You would at least be able to get some use out of it instead of replacing it for the next owner.
1984 RX-7 GSL-SE [size=84]My restomod project[/SIZE]
1964 Ford Galaxie 500XL flat black w/ white interior, 2 dr fastback, 390 thunderbird, C6 auto, 2500 rpm high stall converter, shift kit, AC, Holley 750 cfm
[size=100]RIP 1983 RX-7[/SIZE]
My Car Blog
-
speedjunkie
- Senior Member
- Posts: 5337
- Joined: Wed Jan 02, 2008 9:14
- Location: Colorado Springs
- Contact:
Re: Build thread
Why would they make me replace it? Did they discover that they were faulty since 2010? Because they didn't make the previous seller replace the box when I bought the house.
I got a few things done tonight but not much. Actually I had a couple setbacks.
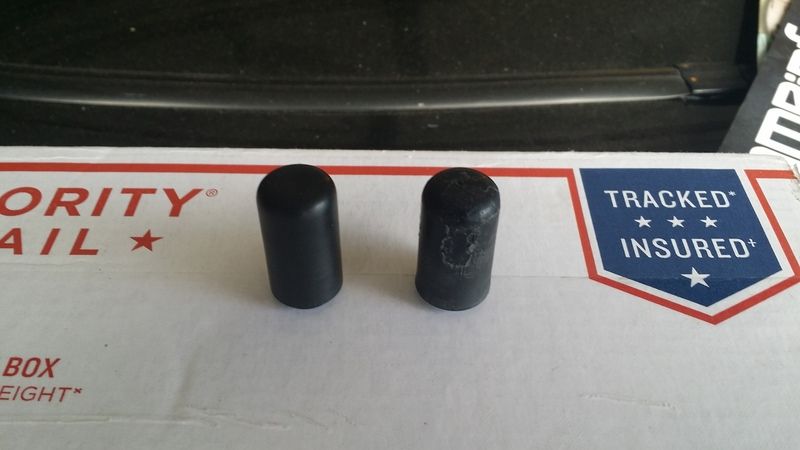
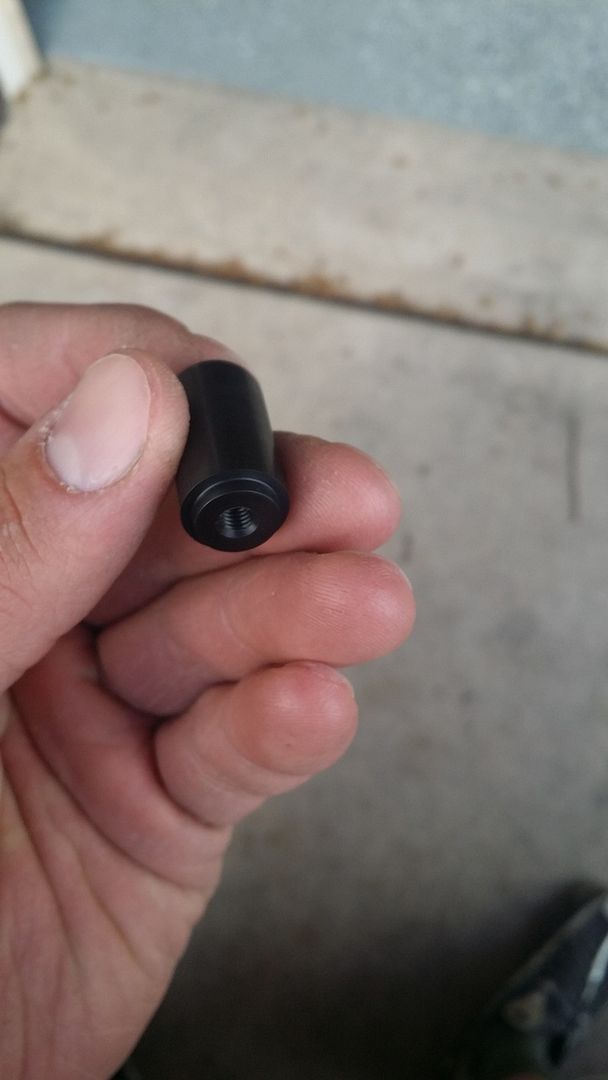
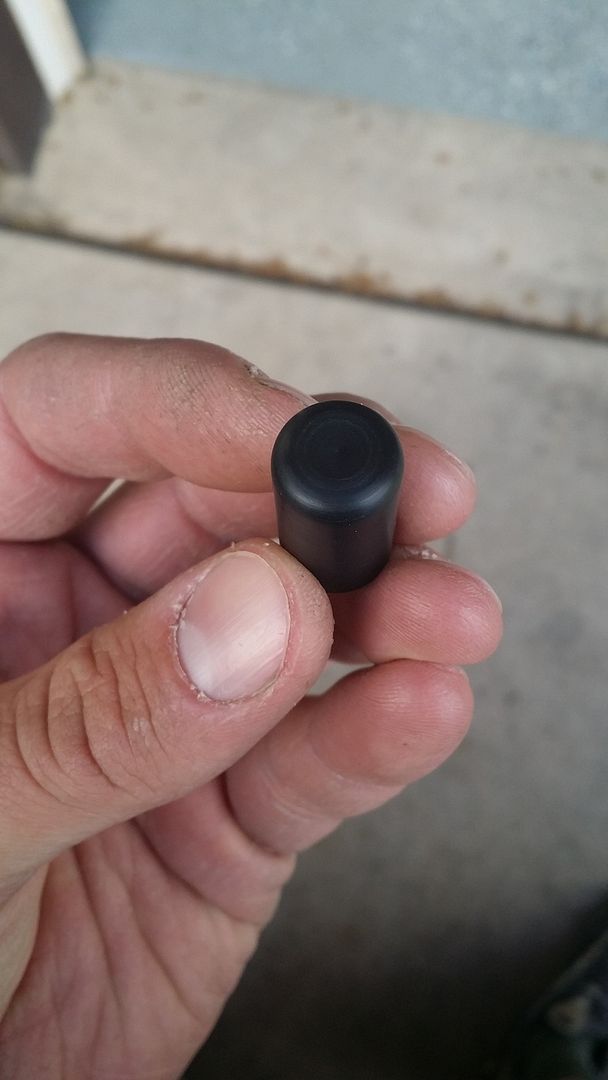
I bought a new ebrake button from LRB Speed (Landon Balk) because mine was kinda beat up. I had first talked to him about it a few years ago and I was going to get a new horn button too with the same logo I used on the gauges and ebrake and shift knobs, the turbo rotor logo. But he said the other day that horn buttons are too difficult to make, so I just got the ebrake button. This new one is made of Delrin so it should last a long time.
Then I started to finish the blasting cabinet, finally. All I had left was to put the glass in the top. I had it sitting on the hatch and then an old friend stopped by so I went out to talk to him. SMASH. It slid off the hatch and hit the ground, shattered it. Well dammit. I'm going to call Harbor Freight's parts division tomorrow and see if I can get just the glass.
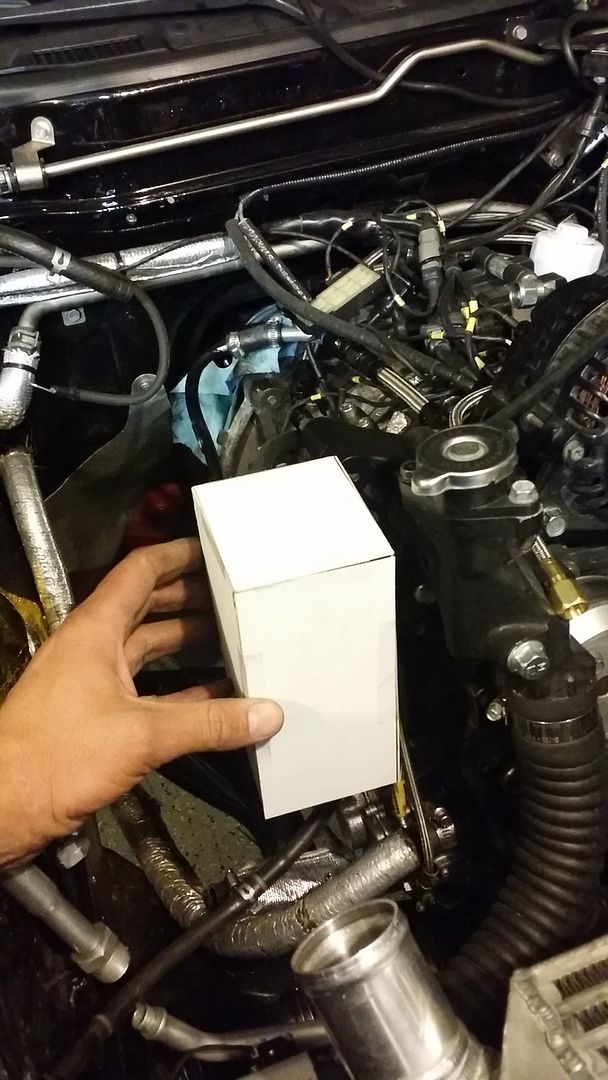
I cleaned the top of the engine a little. As I'm sure most other rotary owners know, a lot of nastiness ends up on top of the engine where the LIM comes together with the engine. It's not great but it'll do. I just didn't want to leave all the gunk there for when I get the LIM and turbo/exhaust parts back.
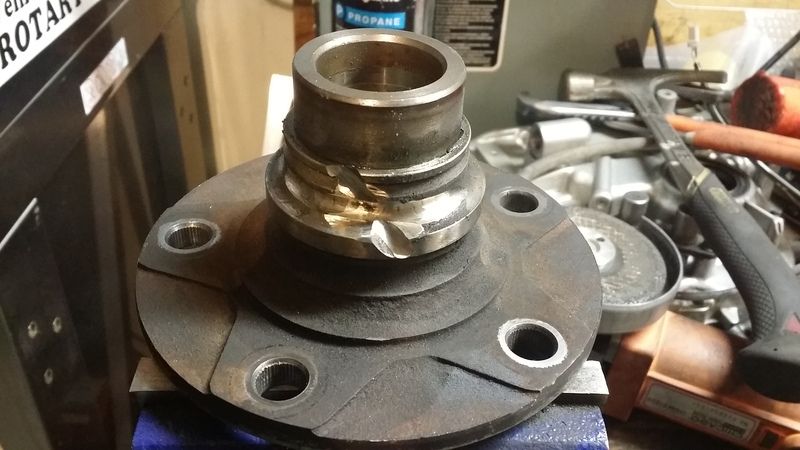
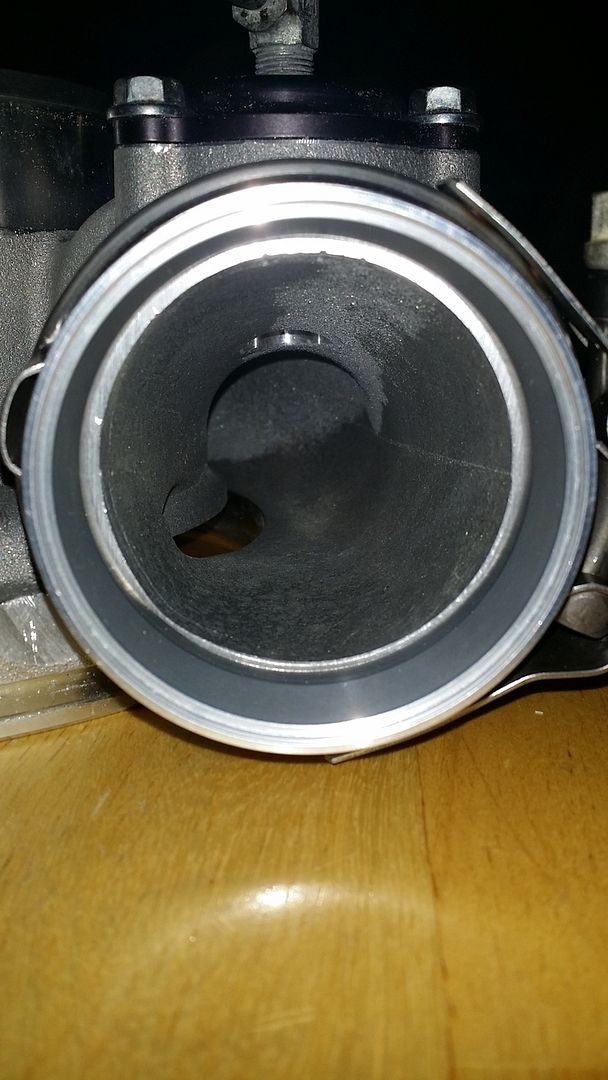
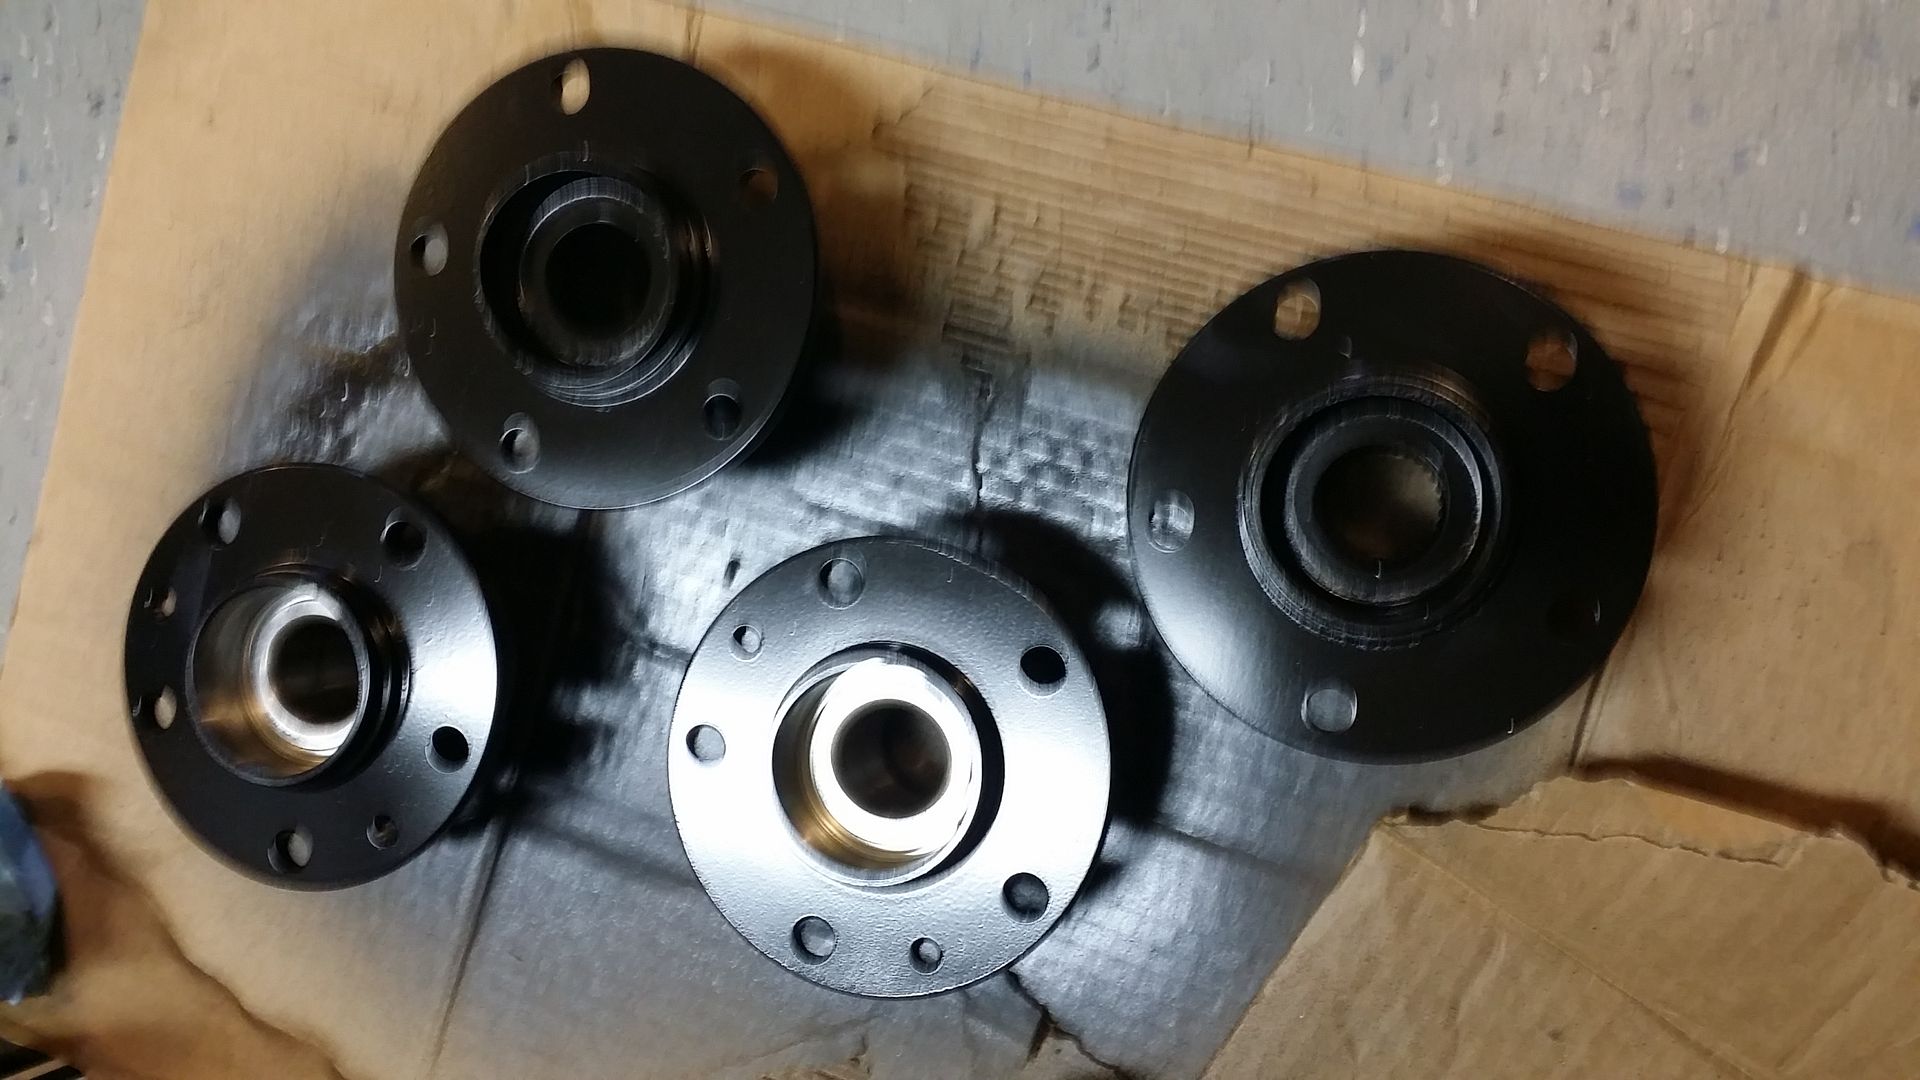
Then I tried getting the bearing races off the hubs. First I heated it with a torch for about 20 minutes, but it wouldn't budge. Then I tried what the FSM says, to grind a slot in the side and use a chisel to try to break it apart. That didn't work either. I'm feeling pretty defeated about this. I might just see if Tom can get those off. And I think I'll just take my stuff to his shop to blast it and take the compressor housing along so Tom can chop off the outlet. Here is what the one race looks like now.
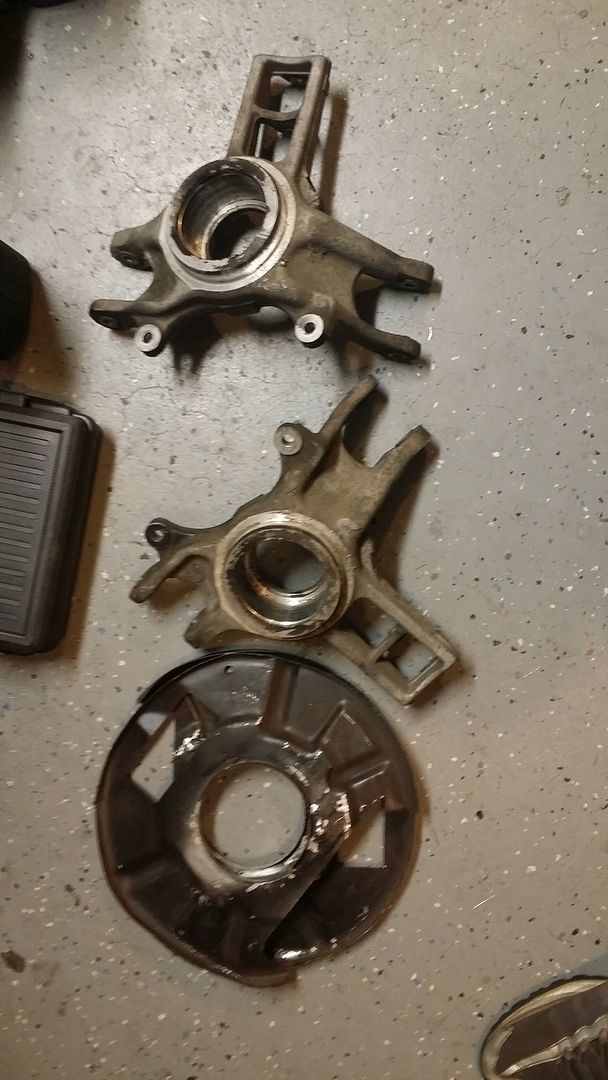
Then I got the dust shields off the knuckles, that was fairly easy. I test fit the new shields and bearings just to be sure. The shields I wasn't so worried about, but the bearings could have been wrong.
I've been emailing with someone at Harris, it looks like I might have a job already. It's too soon to tell, but the job is exactly what I've been doing for the past few years but on Army equipment. I sent my resume, I'm just waiting to hear back. I'm hoping I won't have to start right away because I was really looking forward to the next three months off, but I will if I have to. At least I'll be double dipping if I have to start right away, making two paychecks for those three months. And I have Sleep Apnea so that should be 50% disability, but I haven't made a claim with the VA yet.
I got a few things done tonight but not much. Actually I had a couple setbacks.
I bought a new ebrake button from LRB Speed (Landon Balk) because mine was kinda beat up. I had first talked to him about it a few years ago and I was going to get a new horn button too with the same logo I used on the gauges and ebrake and shift knobs, the turbo rotor logo. But he said the other day that horn buttons are too difficult to make, so I just got the ebrake button. This new one is made of Delrin so it should last a long time.


Then I started to finish the blasting cabinet, finally. All I had left was to put the glass in the top. I had it sitting on the hatch and then an old friend stopped by so I went out to talk to him. SMASH. It slid off the hatch and hit the ground, shattered it. Well dammit. I'm going to call Harbor Freight's parts division tomorrow and see if I can get just the glass.
I cleaned the top of the engine a little. As I'm sure most other rotary owners know, a lot of nastiness ends up on top of the engine where the LIM comes together with the engine. It's not great but it'll do. I just didn't want to leave all the gunk there for when I get the LIM and turbo/exhaust parts back.
Then I tried getting the bearing races off the hubs. First I heated it with a torch for about 20 minutes, but it wouldn't budge. Then I tried what the FSM says, to grind a slot in the side and use a chisel to try to break it apart. That didn't work either. I'm feeling pretty defeated about this. I might just see if Tom can get those off. And I think I'll just take my stuff to his shop to blast it and take the compressor housing along so Tom can chop off the outlet. Here is what the one race looks like now.

Then I got the dust shields off the knuckles, that was fairly easy. I test fit the new shields and bearings just to be sure. The shields I wasn't so worried about, but the bearings could have been wrong.

I've been emailing with someone at Harris, it looks like I might have a job already. It's too soon to tell, but the job is exactly what I've been doing for the past few years but on Army equipment. I sent my resume, I'm just waiting to hear back. I'm hoping I won't have to start right away because I was really looking forward to the next three months off, but I will if I have to. At least I'll be double dipping if I have to start right away, making two paychecks for those three months. And I have Sleep Apnea so that should be 50% disability, but I haven't made a claim with the VA yet.
Re: Build thread
When we bought our house in the springs that was one of the things our inspector told us. That if it has a Federal pacific box to put that in our demands of stuff to be done before we would buy. He insisted it be a deal breaker.
-
speedjunkie
- Senior Member
- Posts: 5337
- Joined: Wed Jan 02, 2008 9:14
- Location: Colorado Springs
- Contact:
Re: Build thread
Well I'm really disappointed with my inspector now. I just verified that it is in fact a FP box. I guess I'll add that to the list of things I'm going to upgrade then.
-
RX-7 Chris
- Posts: 7800
- Joined: Tue Oct 02, 2007 9:14
- Location: Colorado Springs
- Contact:
Re: Build thread
Dwduc wrote:When we bought our house in the springs that was one of the things our inspector told us. That if it has a Federal pacific box to put that in our demands of stuff to be done before we would buy. He insisted it be a deal breaker.
Exactly!
When we sold out house that was one of the first things out Realtor asked us. Luckily we didn't have one of those even though we had a house of the right era.
You could probably get away with using the dryer outlet for now with an extension cord. I wouldn't recommend adding any load to that box.
1984 RX-7 GSL-SE [size=84]My restomod project[/SIZE]
1964 Ford Galaxie 500XL flat black w/ white interior, 2 dr fastback, 390 thunderbird, C6 auto, 2500 rpm high stall converter, shift kit, AC, Holley 750 cfm
[size=100]RIP 1983 RX-7[/SIZE]
My Car Blog

Re: Build thread
Not that it helps given the new information, but I have 20' of wire that would work well for adding the subpanel if you are interested.
-
speedjunkie
- Senior Member
- Posts: 5337
- Joined: Wed Jan 02, 2008 9:14
- Location: Colorado Springs
- Contact:
Re: Build thread
Well, if I swap the box and add the provisions for a 220 outlet in the garage I might take you up on that. Although now that I think about it, I think I'll need more than 20' lol.
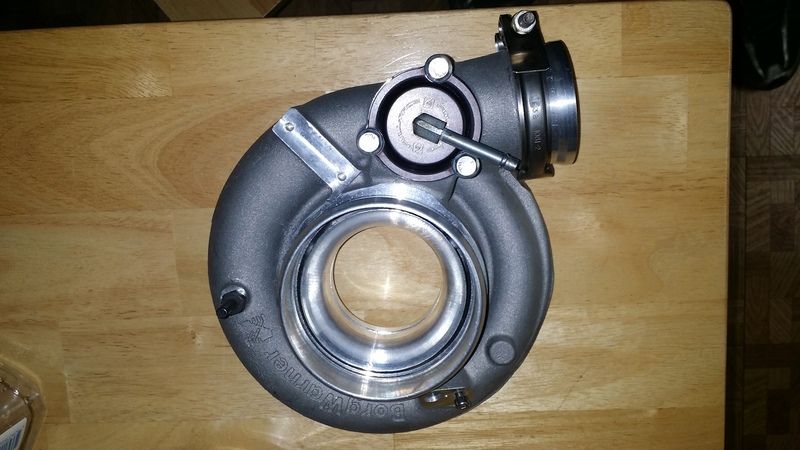
I took the hubs and compressor housing to Tom's today. We agreed that I'd come down on Saturday morning to sandblast all my stuff and then he'd take care of these two things but he did them today. He got the races off and cut off the compressor outlet all in about 10 minutes lol. I picked up the proper clamp from Andy for the compressor outlet, and it's definitely what I needed. It's super low profile, fits like a dream.
I did absolutely nothing else on the car tonight haha. I'm kinda running out of things to do anyway. I need to put the diffuser back on but I kinda don't want to do that until I get the exhaust all back in there. I'm also going to make the heat shield before I put the turbo and LIM back on the car, that way I can do it on the workbench. I'm still waiting for the other interior plastics to get here so I can finish putting the interior back together. It would be awesome if I could make a bracket to mount the racing seat but I'm not super concerned with that right now. There are certain things that I keep forgetting, like getting with Mitch about making the OMP tank. That could be going now. I just feel like this is taking a lot longer than it should because I can't keep my thoughts straight.
I took the hubs and compressor housing to Tom's today. We agreed that I'd come down on Saturday morning to sandblast all my stuff and then he'd take care of these two things but he did them today. He got the races off and cut off the compressor outlet all in about 10 minutes lol. I picked up the proper clamp from Andy for the compressor outlet, and it's definitely what I needed. It's super low profile, fits like a dream.


I did absolutely nothing else on the car tonight haha. I'm kinda running out of things to do anyway. I need to put the diffuser back on but I kinda don't want to do that until I get the exhaust all back in there. I'm also going to make the heat shield before I put the turbo and LIM back on the car, that way I can do it on the workbench. I'm still waiting for the other interior plastics to get here so I can finish putting the interior back together. It would be awesome if I could make a bracket to mount the racing seat but I'm not super concerned with that right now. There are certain things that I keep forgetting, like getting with Mitch about making the OMP tank. That could be going now. I just feel like this is taking a lot longer than it should because I can't keep my thoughts straight.
-
speedjunkie
- Senior Member
- Posts: 5337
- Joined: Wed Jan 02, 2008 9:14
- Location: Colorado Springs
- Contact:
Re: Build thread
This car just never wants to be easy, that's for sure.
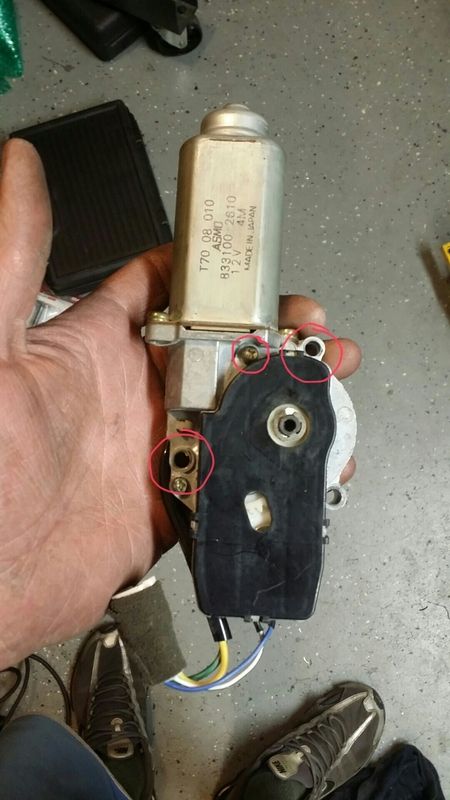
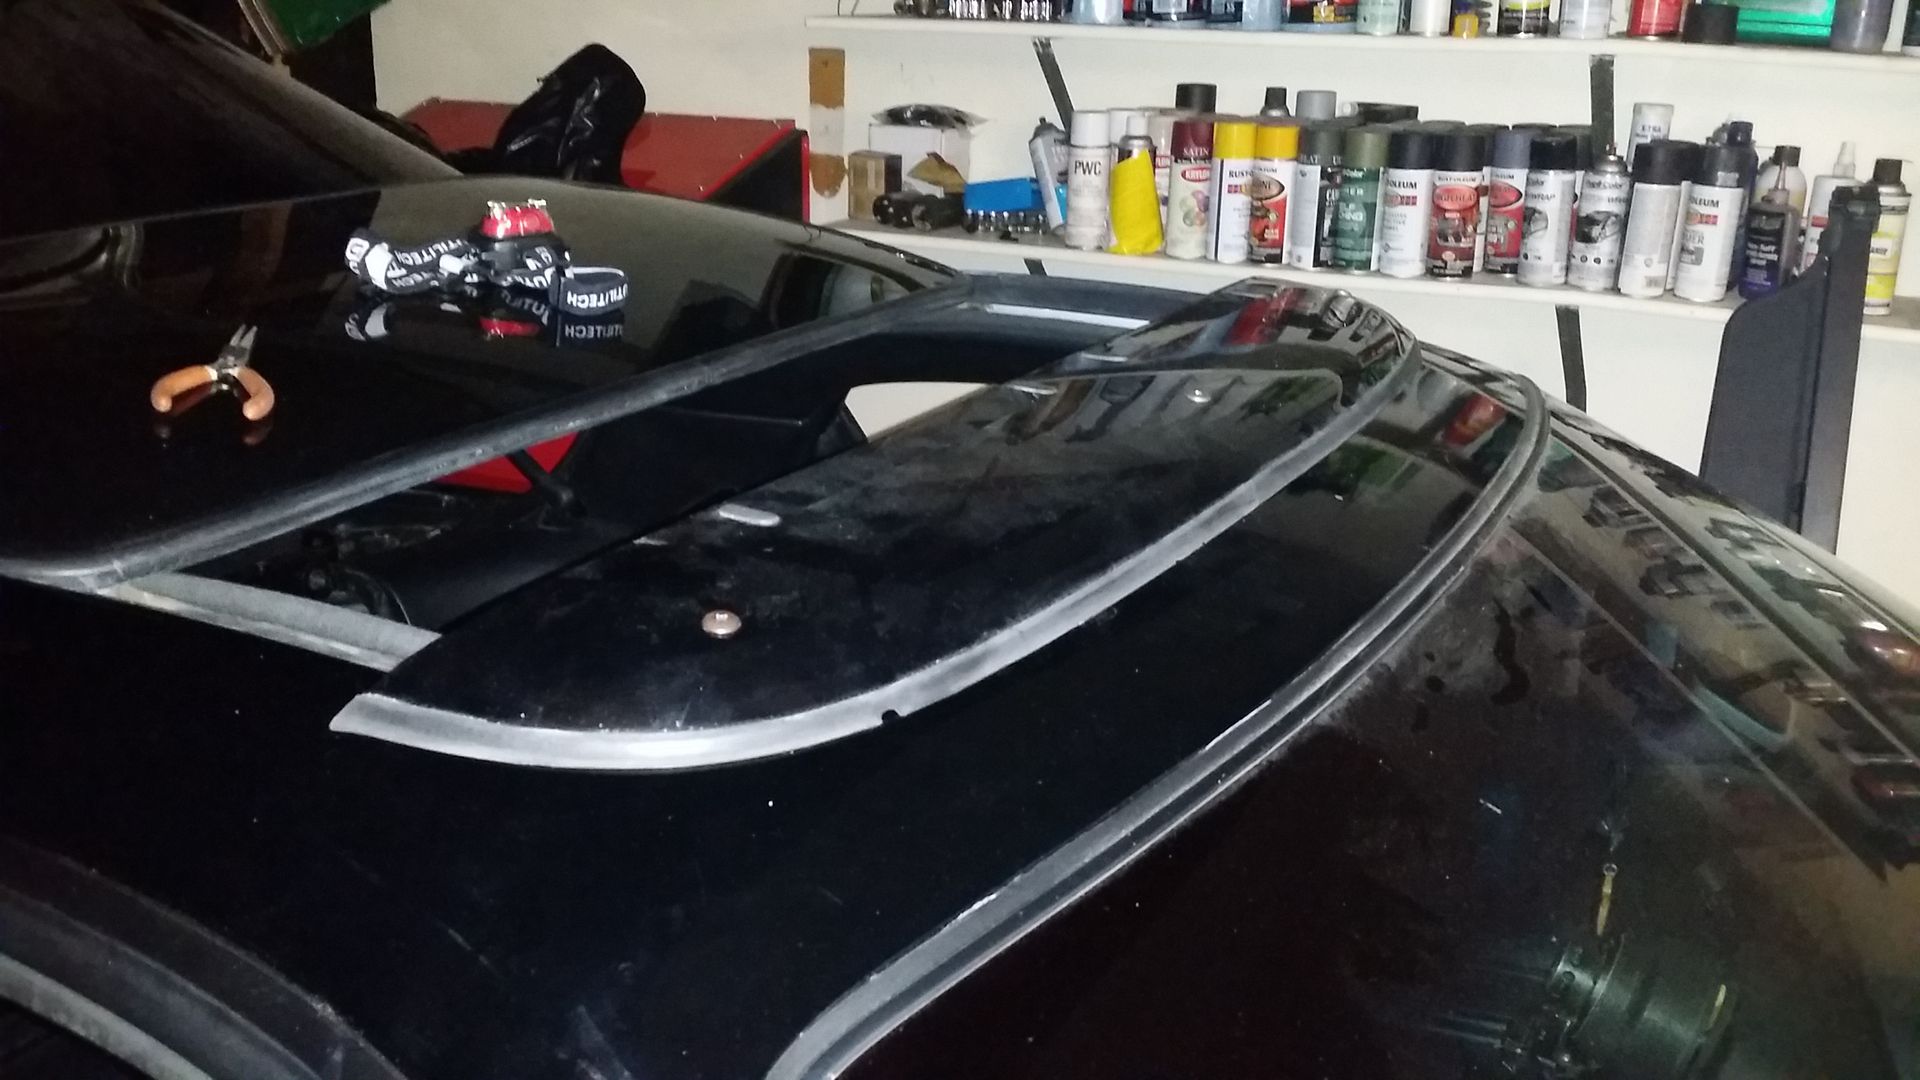
I got the speaker covers and hatch piece today. Installed the hatch piece, put the speaker covers into the rear quarters, and just as I was starting to put the quarters back in I realized I might as well swap the moonroof motor. It works ok once the roof is up, but I have to nudge it when I first push the button to get it up out of the hole. It's been that way the whole time I've owned the car. I dropped the headliner just enough to get access to the motor, and that's when I discovered that someone tried to replace it already, but they stripped two of the screw heads. I decided I'd just remove the bracket the motor is attached to so I could get more access to those screw heads. Unfortunately the two bolts I removed didn't really do much because I believe the bracket is tacked to the main assembly. Then I decided I'd just remove the gear section to get more access to at least one of the screws, and that's when I stripped the third (smaller) screw head. Tomorrow I'm going to pull the headliner completely and drop the whole moonroof assembly. I WILL NOT let this thing win. Well, I might. lol
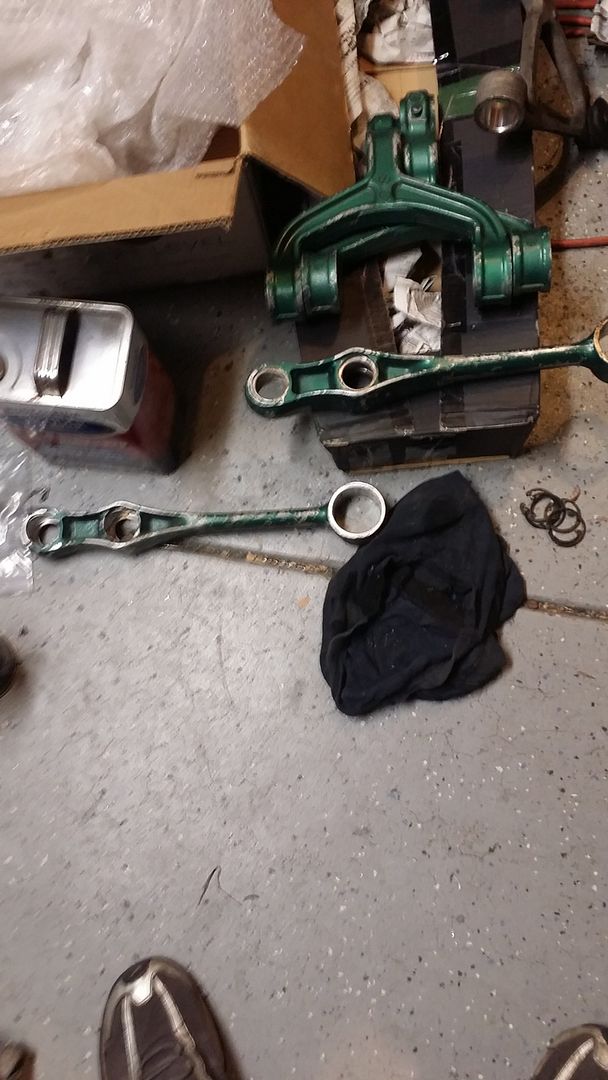
I tried to get the green paint off the rear suspension arms before taking them to blast tomorrow morning, but it was too time consuming, so I decided against that.
I also pressed the bushings out of one of the front upper suspension arms I bought because when Jesse and I were removing the bushings on the other arms we chewed into the arm with a saw blade and gouged it where the lip of the bushing will rest. Although I just remembered the arms aren't the same on both sides and I'm not sure if I did the correct one lol.
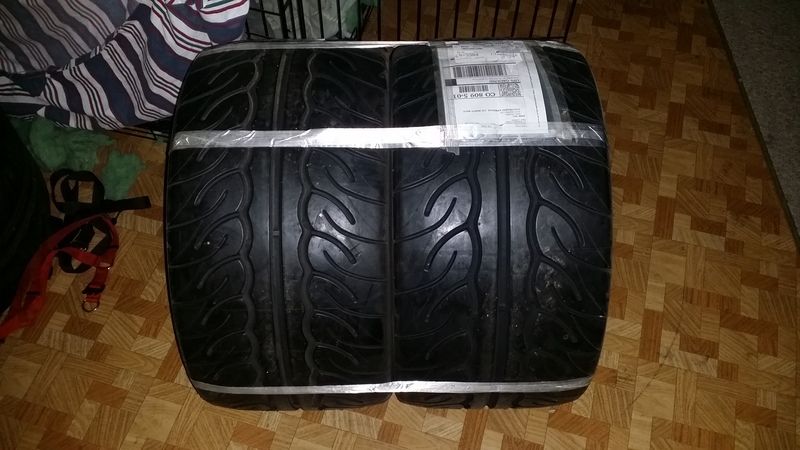
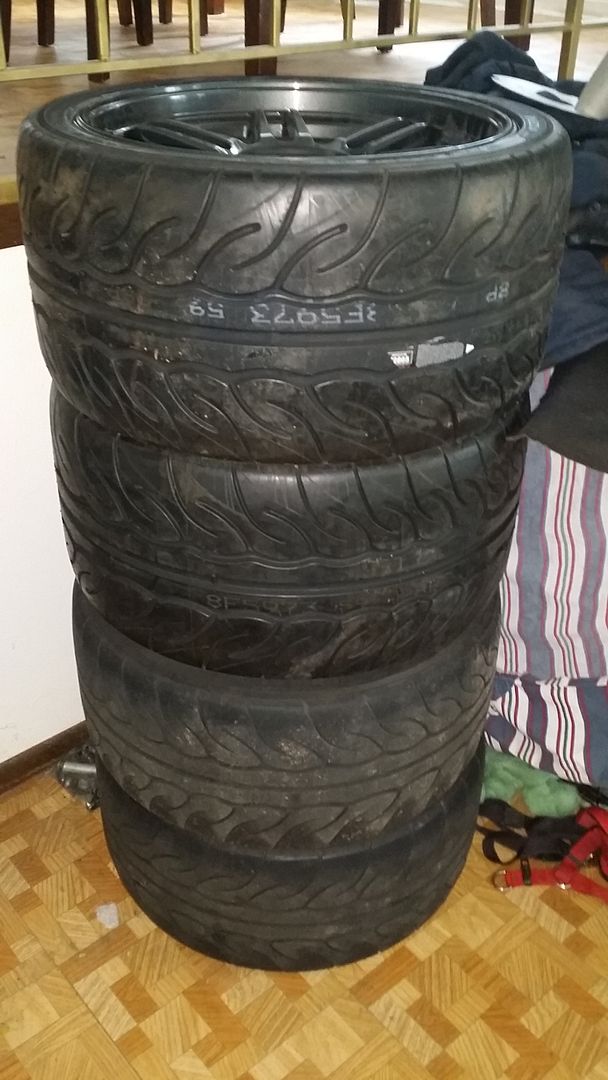
I got the new rear tires today, I'll take those to Big O tomorrow so Brett can put them on.
I cut some template pieces for the OMP tank and taped them together. Although I'm thinking it might interfere with either the turbo or the IC pipe from the turbo to IC, or possibly even the intake pipe.
I got the speaker covers and hatch piece today. Installed the hatch piece, put the speaker covers into the rear quarters, and just as I was starting to put the quarters back in I realized I might as well swap the moonroof motor. It works ok once the roof is up, but I have to nudge it when I first push the button to get it up out of the hole. It's been that way the whole time I've owned the car. I dropped the headliner just enough to get access to the motor, and that's when I discovered that someone tried to replace it already, but they stripped two of the screw heads. I decided I'd just remove the bracket the motor is attached to so I could get more access to those screw heads. Unfortunately the two bolts I removed didn't really do much because I believe the bracket is tacked to the main assembly. Then I decided I'd just remove the gear section to get more access to at least one of the screws, and that's when I stripped the third (smaller) screw head. Tomorrow I'm going to pull the headliner completely and drop the whole moonroof assembly. I WILL NOT let this thing win. Well, I might. lol

I tried to get the green paint off the rear suspension arms before taking them to blast tomorrow morning, but it was too time consuming, so I decided against that.

I also pressed the bushings out of one of the front upper suspension arms I bought because when Jesse and I were removing the bushings on the other arms we chewed into the arm with a saw blade and gouged it where the lip of the bushing will rest. Although I just remembered the arms aren't the same on both sides and I'm not sure if I did the correct one lol.
I got the new rear tires today, I'll take those to Big O tomorrow so Brett can put them on.

I cut some template pieces for the OMP tank and taped them together. Although I'm thinking it might interfere with either the turbo or the IC pipe from the turbo to IC, or possibly even the intake pipe.

-
speedjunkie
- Senior Member
- Posts: 5337
- Joined: Wed Jan 02, 2008 9:14
- Location: Colorado Springs
- Contact:
Re: Build thread
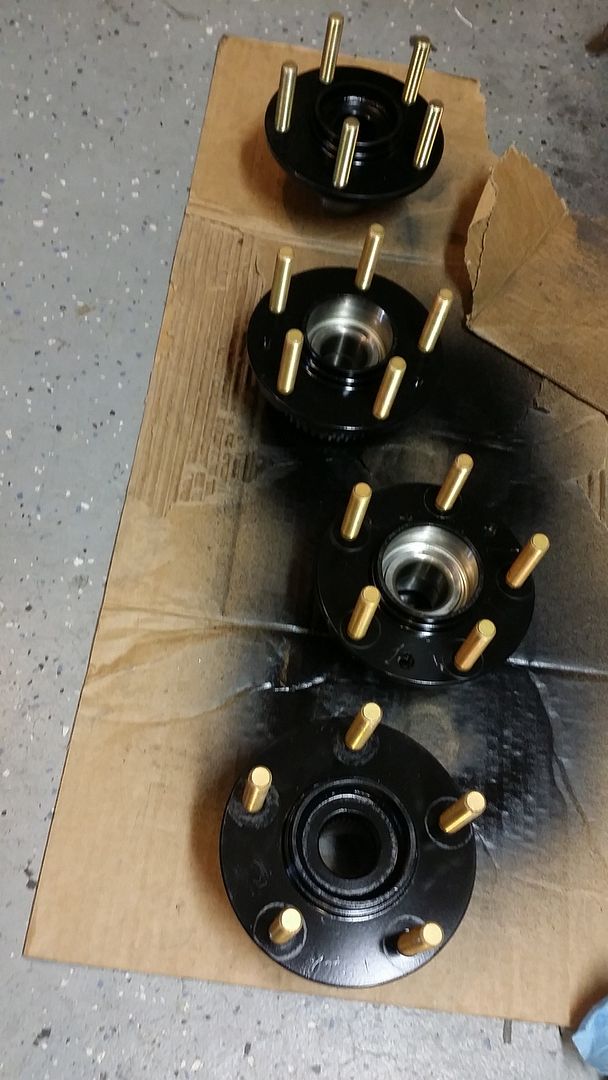
I took the suspension arms and some other stuff to Beauchamp Racing today to clean in the parts washer and sandblast today. I'm glad to finally have that done. Everything is with David now, just waiting for powder coat. I feel like I'm on the final stretch. I blasted the rear hubs too to get the rust off. I was going to leave them raw, but I decided to paint them so hopefully they don't rust again, although I'm sure they'll find a way lol. I pressed the lugs out of the rears the other day, and I pressed them out of the front hubs tonight and painted those too. Tomorrow I'll press the ARP studs into both sets of hubs so they're ready to go.
I didn't touch the headliner or sunroof at all today. I just wasn't feeling it. Tom told me to check the tracks, maybe they're causing the sunroof to bind right away. I know they're pretty gunked up. I cleaned them off back in 09 I think but I never lubed them again. Maybe I'll try that before changing the motor. Or maybe I'll just change the motor at the same time. Or maybe I'll just leave the damn thing in there since it still works for the most part lol. I'd rather go ahead and take care of it though while I have the plastics off.
I also loaded up the wheels and tires to take to Brett at Big O but I didn't realize they closed at 4 on Saturdays, so I missed him. I'm taking them to Firestone tomorrow probably because I don't feel like hauling them around in the car until Monday.
Last edited by speedjunkie on Sun Apr 17, 2016 9:14, edited 1 time in total.
-
speedjunkie
- Senior Member
- Posts: 5337
- Joined: Wed Jan 02, 2008 9:14
- Location: Colorado Springs
- Contact:
Re: Build thread
I went to Firestone today and got the new tires mounted. I love seeing new rubber on wheels. When I'd look at the wear on the front tires compared to the old tires on the rear, they still looked new. Now when I compare them to the new tires I realize they're half worn lol. That's OK though, I figure by the time these rears are gone the fronts should be too.
Then I started pressing the ARP lugs into the wheel hubs. I got the first one half way in and noticed I bent the handle on my vise. Oops. So I took the rest down to Jesse's house and we used his press to put them in. On the way there I realized I really need to pay attention to make sure I put them in the right way, and when I got there Jesse noted that I pressed the first one in the wrong way lol. We got them in pretty easy with his press, but the paint didn't hold up too well in some places. He mentioned there is a product that goes over the lugs and keeps the mounting surface from corroding. Technically it's for between the wheel and brake rotor, but I'm going to see if I can find one for both surfaces.
Then this afternoon when I got home I put the screws back in the moonroof motor and put the headliner back up. I decided to wait since it's still working. I cleaned the tracks and re-lubed them with White Lithium grease and cleaned up the excess. It moves a little better, it doesn't shudder anymore when opening. It still binds initially, but I think that's due to it being bolted in too far back, because the back seems to be catching on the metal. At some point I'll loosen the nuts and try to slide it forward a bit and tighten them back down. I just don't want to do it right now because the plastics that cover the nuts already had some broken tabs the last time I took them off and I'm nervous about breaking more.
I put the rear quarter plastics back in and bolted the seatbelts down. Tomorrow I'll probably put the seats back in, or at least the passenger side. I'd really like to mount the racing seat in there, but I need to get the mount made.

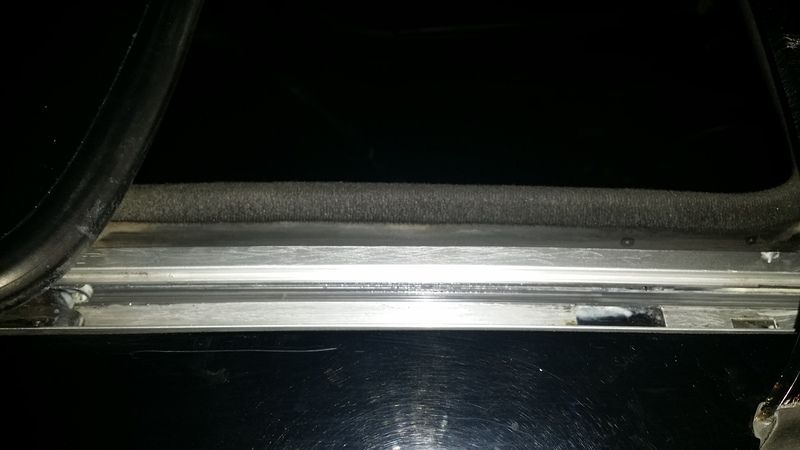
Then I put the moonroof deflector on. I figured I might as well mount it and see how it works even if I do have reason to believe the AC will work ok. I still need to get the AC lines made anyway. Once I get that done and the AC charged and tested, I'll take this off and store it if the AC works well.
Yesterday when I dropped off the suspension arms with David, he asked me what I wanted to do with the front arms since they still had the rubber boots covering the ball joints. I gave him an extra arm to test and he said today that it came out well, the rubber didn't melt but the grease burned. No biggie, I'm going to put more grease in there anyway with the new boots. I asked him for an ETIC on completed work and he said he's doing the ceramic stuff this week and the rest of it right after that. I might be finishing up with this project sooner than I expected. Hopefully.
Another thing with having the headliner down, it got me thinking about which dash cam to get. I've still been looking at the Blackvue dual channel (not the one with the LCD screen) that has the rear camera and I was going to run that wire over the headliner, but I can't decide for sure if that's the one. If anyone has an idea or has a dash cam and wants to give their review, I'm all ears. I'm looking for dual channel (front and rear) if possible, and something that isn't too big and noticeable.

Then I started pressing the ARP lugs into the wheel hubs. I got the first one half way in and noticed I bent the handle on my vise. Oops. So I took the rest down to Jesse's house and we used his press to put them in. On the way there I realized I really need to pay attention to make sure I put them in the right way, and when I got there Jesse noted that I pressed the first one in the wrong way lol. We got them in pretty easy with his press, but the paint didn't hold up too well in some places. He mentioned there is a product that goes over the lugs and keeps the mounting surface from corroding. Technically it's for between the wheel and brake rotor, but I'm going to see if I can find one for both surfaces.

Then this afternoon when I got home I put the screws back in the moonroof motor and put the headliner back up. I decided to wait since it's still working. I cleaned the tracks and re-lubed them with White Lithium grease and cleaned up the excess. It moves a little better, it doesn't shudder anymore when opening. It still binds initially, but I think that's due to it being bolted in too far back, because the back seems to be catching on the metal. At some point I'll loosen the nuts and try to slide it forward a bit and tighten them back down. I just don't want to do it right now because the plastics that cover the nuts already had some broken tabs the last time I took them off and I'm nervous about breaking more.

I put the rear quarter plastics back in and bolted the seatbelts down. Tomorrow I'll probably put the seats back in, or at least the passenger side. I'd really like to mount the racing seat in there, but I need to get the mount made.

Then I put the moonroof deflector on. I figured I might as well mount it and see how it works even if I do have reason to believe the AC will work ok. I still need to get the AC lines made anyway. Once I get that done and the AC charged and tested, I'll take this off and store it if the AC works well.

Yesterday when I dropped off the suspension arms with David, he asked me what I wanted to do with the front arms since they still had the rubber boots covering the ball joints. I gave him an extra arm to test and he said today that it came out well, the rubber didn't melt but the grease burned. No biggie, I'm going to put more grease in there anyway with the new boots. I asked him for an ETIC on completed work and he said he's doing the ceramic stuff this week and the rest of it right after that. I might be finishing up with this project sooner than I expected. Hopefully.
Another thing with having the headliner down, it got me thinking about which dash cam to get. I've still been looking at the Blackvue dual channel (not the one with the LCD screen) that has the rear camera and I was going to run that wire over the headliner, but I can't decide for sure if that's the one. If anyone has an idea or has a dash cam and wants to give their review, I'm all ears. I'm looking for dual channel (front and rear) if possible, and something that isn't too big and noticeable.
-
speedjunkie
- Senior Member
- Posts: 5337
- Joined: Wed Jan 02, 2008 9:14
- Location: Colorado Springs
- Contact:
Re: Build thread
I finished the interior aside from the seats. I also picked up a 6th gen iPod Touch to use with the stereo since I couldn't get the iPad to link with it using Car Play, but little did I know Car Play has nothing to do with mirroring the screens, and Mirror Link apparently only works with phones. So now I need to get a lightning digital AV adapter and use an HDMI cable. Unfortunately I'm pretty sure I won't be able to change boost or traction control on the stereo screen but at least I'll be able to see the gauges I hope. And I doubt I'll be changing boost or traction that often, and when I do the iPod will be easy enough to get to.
-
speedjunkie
- Senior Member
- Posts: 5337
- Joined: Wed Jan 02, 2008 9:14
- Location: Colorado Springs
- Contact:
Re: Build thread
Great success!
I've had the iPad mini set up with the app for a while now, but it wouldn't link with the stereo using Car Play. Even if it had I don't think it would work that way. So I set up the app on the iPod Touch and that still wouldn't work through Car Play, and Mirror Link didn't show up as an option for Apple but it did for Android.
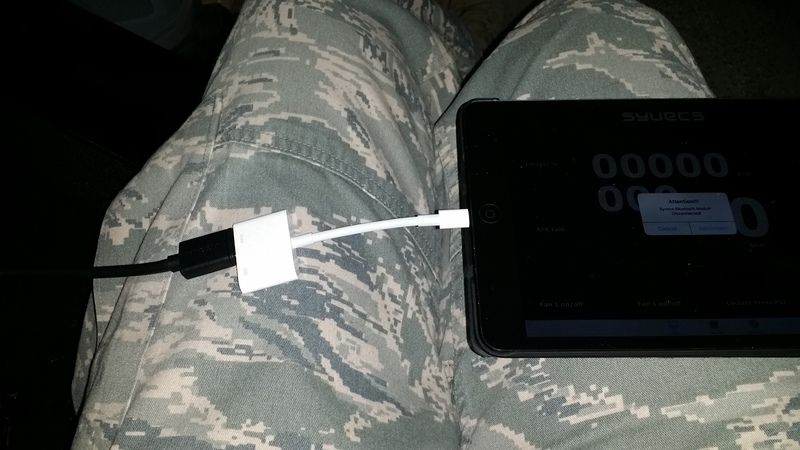
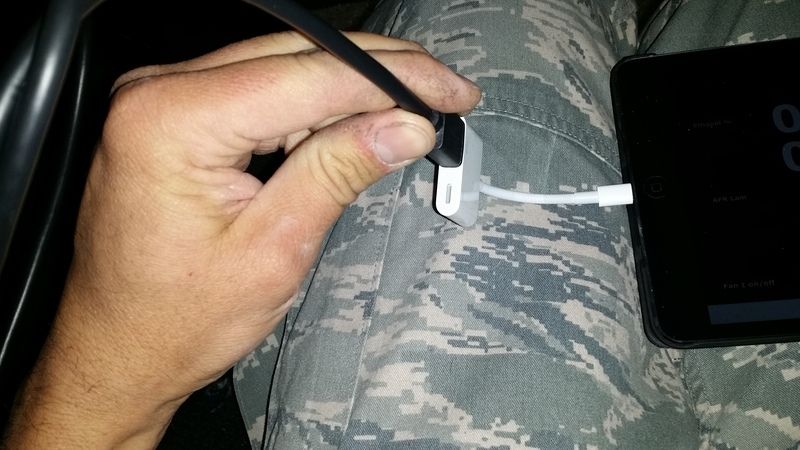
I picked up a lightning digital AV adapter and ran an HDMI cable from the stereo to it and then plugged the adapter into the iPod and iPad and it worked on both.
There are a couple drawbacks.
1. Since it merely shows what's on screen I have to still make any changes/adjustments through the iPod or iPad. No biggie.
2. No music is played while the HDMI port is chosen. I don't usually listen to anything while I'm driving anyway, but I'm still going to see if I can find another remedy. I'll see if I can get Mirror Link to work somehow.
Another thing to note...using the iPod offsets the screen to the left, but the iPad puts it right in the center of the stereo screen. Also, the adapter has a lightning port so you can charge the iPod or whatever at the same time.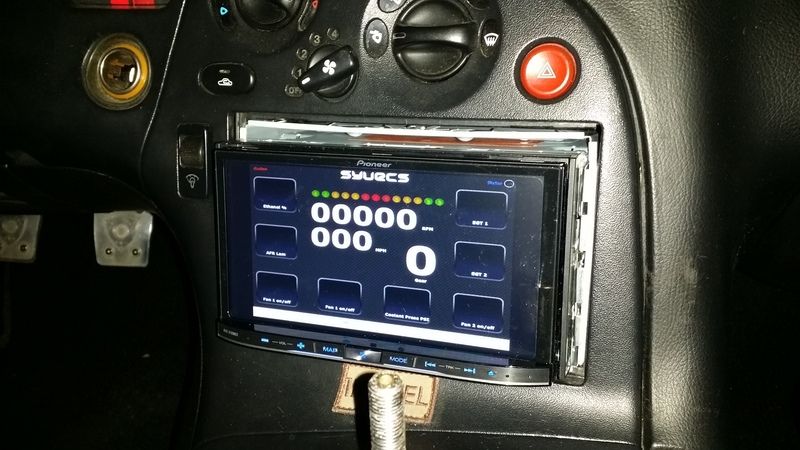
I've had the iPad mini set up with the app for a while now, but it wouldn't link with the stereo using Car Play. Even if it had I don't think it would work that way. So I set up the app on the iPod Touch and that still wouldn't work through Car Play, and Mirror Link didn't show up as an option for Apple but it did for Android.
I picked up a lightning digital AV adapter and ran an HDMI cable from the stereo to it and then plugged the adapter into the iPod and iPad and it worked on both.
There are a couple drawbacks.
1. Since it merely shows what's on screen I have to still make any changes/adjustments through the iPod or iPad. No biggie.
2. No music is played while the HDMI port is chosen. I don't usually listen to anything while I'm driving anyway, but I'm still going to see if I can find another remedy. I'll see if I can get Mirror Link to work somehow.
Another thing to note...using the iPod offsets the screen to the left, but the iPad puts it right in the center of the stereo screen. Also, the adapter has a lightning port so you can charge the iPod or whatever at the same time.


-
speedjunkie
- Senior Member
- Posts: 5337
- Joined: Wed Jan 02, 2008 9:14
- Location: Colorado Springs
- Contact:
Re: Build thread
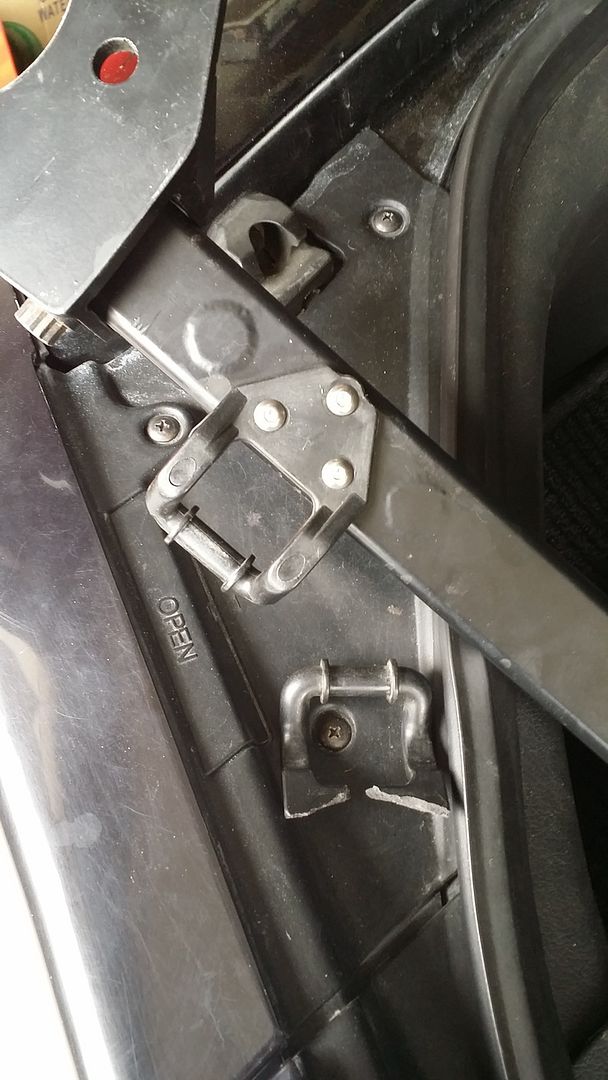
Two steps forward, one step back. I repeated an incident I had before. I'm looking to see if someone makes these out of metal because these stock wet paper ones are pissing me off.
I took the dash apart again and pushed the stereo back in and fixed the issue with the idiot lights, but I got it all back together again. While I was in there I also double checked the wiring for the circuit card to fix cruise control to verify continuity, and I'm going to verify again that they're hooked up to the right wires.
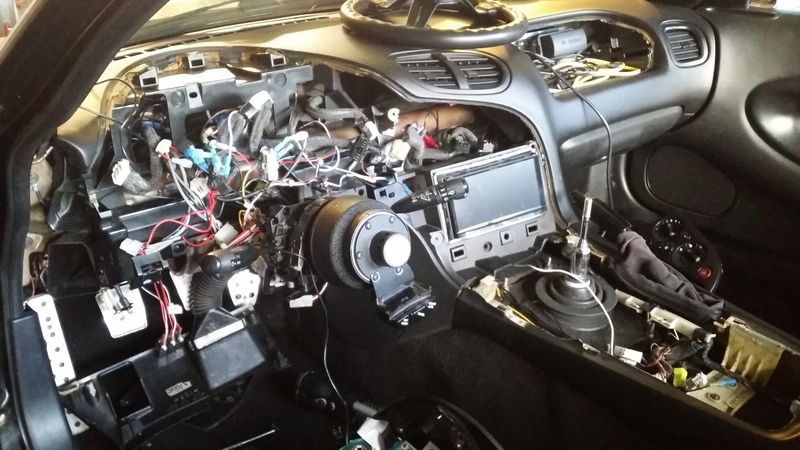

I took the dash apart again and pushed the stereo back in and fixed the issue with the idiot lights, but I got it all back together again. While I was in there I also double checked the wiring for the circuit card to fix cruise control to verify continuity, and I'm going to verify again that they're hooked up to the right wires.

Who is online
Users browsing this forum: No registered users and 52 guests