Build thread

Talk about your Rotaries!
User avatar
speedjunkie
Senior Member
Posts: 5337
Joined: Wed Jan 02, 2008 9:14
Location: Colorado Springs
Contact:

Re: Build thread

Postby speedjunkie » Tue Jan 26, 2016 9:14

Saul_Good wrote:You need these. They allow the seat to sit the lowest.
http://garagestar.com/blog/?product=gar ... seat-rails


Yeah I think I'll try a set of those. I've seen them on someone's FD on the forums. Maybe those will work. Either way I'm going to swap to the Imolas because I realized that I already fit pretty tight and it might be a hindrance to have the leg bolsters squeezing my legs together under the steering wheel. Also, it was a pain getting in and out even with the steering wheel removed. I kinda anticipated that part, but I decided it was more of a nuisance than I thought it would be lol.

RX-7 Chris wrote:I'm running MOOG steering parts all the way around. They are great quality. They are actually higher quality than the OEM FB parts.


Awesome! I'm glad I made the right choice then.

User avatar
speedjunkie
Senior Member
Posts: 5337
Joined: Wed Jan 02, 2008 9:14
Location: Colorado Springs
Contact:

Re: Build thread

Postby speedjunkie » Tue Jan 26, 2016 9:14

I was looking into coating options for the lips on the wheels and came across black chrome PVD. I'll be going with that. Hopefully there is a place in Denver or somewhere else nearby that does it. I'll probably get the engine bay stuff coated in that too, the manifolds, piping, IC, etc. I'll have to see what temperature it can handle though.
http://infinitiforum.net/infiniti-forum ... hp?t=10805

I was also talking to Sergey last night, the guy I was planning on getting the lips, barrels, and hardware from. He's not doing wheels anymore. Fantastic lol.

User avatar
Saul_Good
Senior Member
Posts: 480
Joined: Sun Jul 22, 2012 9:14
Location: Cerritos, CA (DW says i can't play here anymore...)
Contact:

Re: Build thread

Postby Saul_Good » Tue Jan 26, 2016 9:14

speedjunkie wrote:
Saul_Good wrote:You need these. They allow the seat to sit the lowest.
http://garagestar.com/blog/?product=gar ... seat-rails


Yeah I think I'll try a set of those. I've seen them on someone's FD on the forums. Maybe those will work. Either way I'm going to swap to the Imolas because I realized that I already fit pretty tight and it might be a hindrance to have the leg bolsters squeezing my legs together under the steering wheel. Also, it was a pain getting in and out even with the steering wheel removed. I kinda anticipated that part, but I decided it was more of a nuisance than I thought it would be lol.

RX-7 Chris wrote:I'm running MOOG steering parts all the way around. They are great quality. They are actually higher quality than the OEM FB parts.


Awesome! I'm glad I made the right choice then.


You need to practice jumping into the seat using the leg bolsters as a anchor point :9b5bde:

User avatar
speedjunkie
Senior Member
Posts: 5337
Joined: Wed Jan 02, 2008 9:14
Location: Colorado Springs
Contact:

Re: Build thread

Postby speedjunkie » Tue Jan 26, 2016 9:14

I'm not sure I follow what you mean lol.

User avatar
speedjunkie
Senior Member
Posts: 5337
Joined: Wed Jan 02, 2008 9:14
Location: Colorado Springs
Contact:

Re: Build thread

Postby speedjunkie » Thu Jan 28, 2016 9:14

I pulled the ECU and shipped it back to Chris tonight. Hopefully it doesn't take too long to get the replacement and hopefully it works as it should and has all the functions finally.

I got the MOOG tie rod ends today, they look to be good quality.

On Saturday I'm going up to Wine Country to take the seats back and see if I can order some Imolas. I also need to go to David Motley's so we can compare the color swatches he got the other day with the brake rotors and see what's closest. If we can't find anything close I may just do black again and then do the wheel faces in a dark blue of some kind. Although I should probably do a different color to contrast, but blue is just about all I like lol. I'll also continue to work on getting the rear axles out.

I started pulling the exhaust out the other night, but without taking the diffuser off. Which is stupid because I was planning on pulling it off anyway so I can try to repair it and beef it up lol. So I'll pull that on Saturday as well and finish getting the exhaust out.

I also asked Brickhouse about one of their GPS trackers and they said there is a $25 monthly fee. Scratch that lol. I'm looking again for something else.

User avatar
RX-7 Chris
Posts: 7800
Joined: Tue Oct 02, 2007 9:14
Location: Colorado Springs
Contact:

Re: Build thread

Postby RX-7 Chris » Fri Jan 29, 2016 9:14

Are you going to do the turbo swap while the ECU is gone?

Will you have the car ready for summer?
1984 RX-7 GSL-SE [size=84]My restomod project[/SIZE]


1964 Ford Galaxie 500XL flat black w/ white interior, 2 dr fastback, 390 thunderbird, C6 auto, 2500 rpm high stall converter, shift kit, AC, Holley 750 cfm

[size=100]RIP 1983 RX-7[/SIZE]

My Car Blog

User avatar
speedjunkie
Senior Member
Posts: 5337
Joined: Wed Jan 02, 2008 9:14
Location: Colorado Springs
Contact:

Re: Build thread

Postby speedjunkie » Fri Jan 29, 2016 9:14

Yep, I've already started pulling the turbo out. I'll probably finish that tonight. Yeah I'm hopeful it'll be ready by summer. I've been so concerned about getting the ECU back that I forgot the wheels will probably end up taking the longest. I could always put the current ones back on but I'm trying not to.

User avatar
speedjunkie
Senior Member
Posts: 5337
Joined: Wed Jan 02, 2008 9:14
Location: Colorado Springs
Contact:

Re: Build thread

Postby speedjunkie » Fri Jan 29, 2016 9:14

Well I guess I'm just not meant to race this car.

I'm taking the seats back to Wine Country tomorrow and I figured I'd just test out the seat itself in the car without a rail. STILL sits only as low as the stock seat. I don't get much more room if I lean the seat back really far, which is actually pretty comfortable. Not only that, with the seat all the way back against the bins, the leg bolsters still hit the door panel and the tranny tunnel, even with the tunnel cover removed, and the shoulder bolster also hits the door panel. I guess that one makes sense because the door panel curves in more as it goes back. Regarding headroom, the only way I might fit is taking the foam out of the bottom, but what I would gain would be lost by whatever rail I had, unless I made one specifically for this seat and it really did put it right on the floor. I took measurements of where the bolts are in regards to the bottom of the seat. The front bolts are 1.5" from the bottom, and the rear bolts are 1.75" from the bottom. I'm really just adding those measurements in case I need to come back later and look lol.

Then I sat directly on the floor and actually wasn't far off haha. If I put a couple inches of seat under my butt, then it puts my head too close to the roof to wear a helmet. Maybe the sunroof-less FD would have just enough additional clearance.

I thought about keeping these seats just in case I get another car that they fit in lol. I really love them.

Aside from that, I had nothing else to do with the car tonight haha. I had planned on wrenching when I got home, but I'll save that for tomorrow I guess.

User avatar
speedjunkie
Senior Member
Posts: 5337
Joined: Wed Jan 02, 2008 9:14
Location: Colorado Springs
Contact:

Re: Build thread

Postby speedjunkie » Mon Feb 01, 2016 9:14

I didn't take the seats back Saturday. I ended up running around town all day. I dropped off my IC and one of the pipes with Mitch. The pipe so he can weld the water injector bung into it. While he's fixing the IC he's going to hack off the 2" inlet and weld on a 2.5" inlet. Then we'll just have to make another new pipe. I also stopped by David Motley's house to check out the swatches. None of them are close haha, so I'm going to either do a gloss black, or maybe crinkle black, or black chrome or some other color. I'm not really sure yet, but I'm not going to try to match it anymore. It's practically impossible, especially since it'll be too noticeable if they're not the same with them right next to each other.

I got the turbo and manifold off yesterday, along with the exhaust and the diffuser. I forgot how light the exhaust is lol, I almost don't want to change it out now haha. The diffuser needs A LOT of work, I'm not sure if I want to see if it can be fixed and beefed up or just scrap it and get a new one. I bent one of the fins on the compressor wheel on the turbo the other day. I think my glove caught it as I was doing stuff under the turbo. It just bent the tip but it's bad enough. I was planning on seeing if I could get it rebuilt but I'd rather not have to pay for a new wheel too.

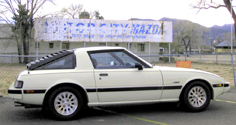
I removed the fuel rails and took the top hats off the primary injectors and got some spacers and bolts from ACE today and test fit them. It worked perfectly! At least I think it did, I haven't pressurized the system yet to check lol. I could be in for a big surprise. Either way I have so much room now even without the spacer between the engine and LIM. It's hard to see in this pic, but it's there where I marked it. Just about where those two lines are, they used to press against each other. I don't know why I never thought about doing this before.
Image

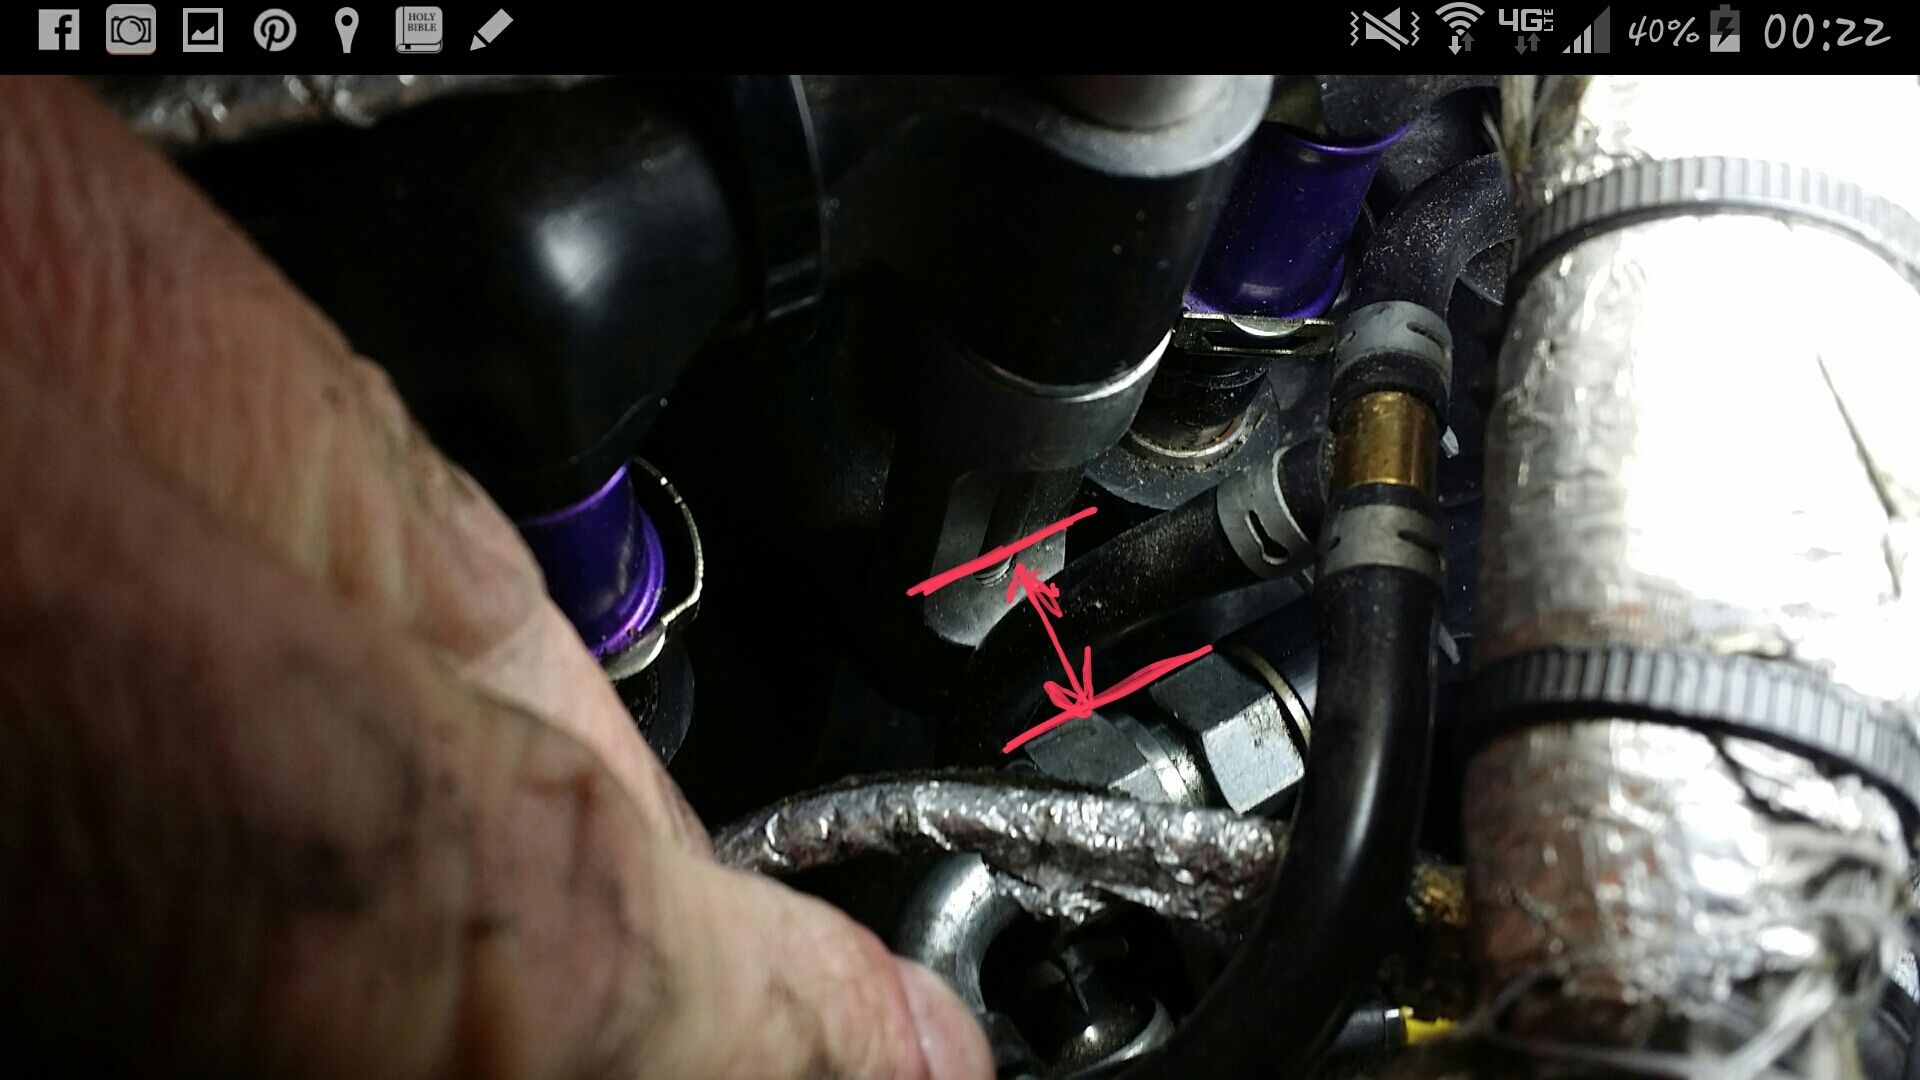
I test fit the new manifold and turbo on the car. The Vband on the compressor housing hits where I circled it, but not too bad actually. I'm going to grind down the outside of the LIM a little bit to clear it. I thought about taking material off the mating surface of the LIM, but if I do that it will push the UIM, elbow and IC pipe even closer to the firewall and it's already a bit closer since I removed the spacer. This will also cause some problems with the water lines, I'll have to make a new oil drain, and probably a new downpipe since the turbo will be angled, and I have NO idea why they did that.
Image

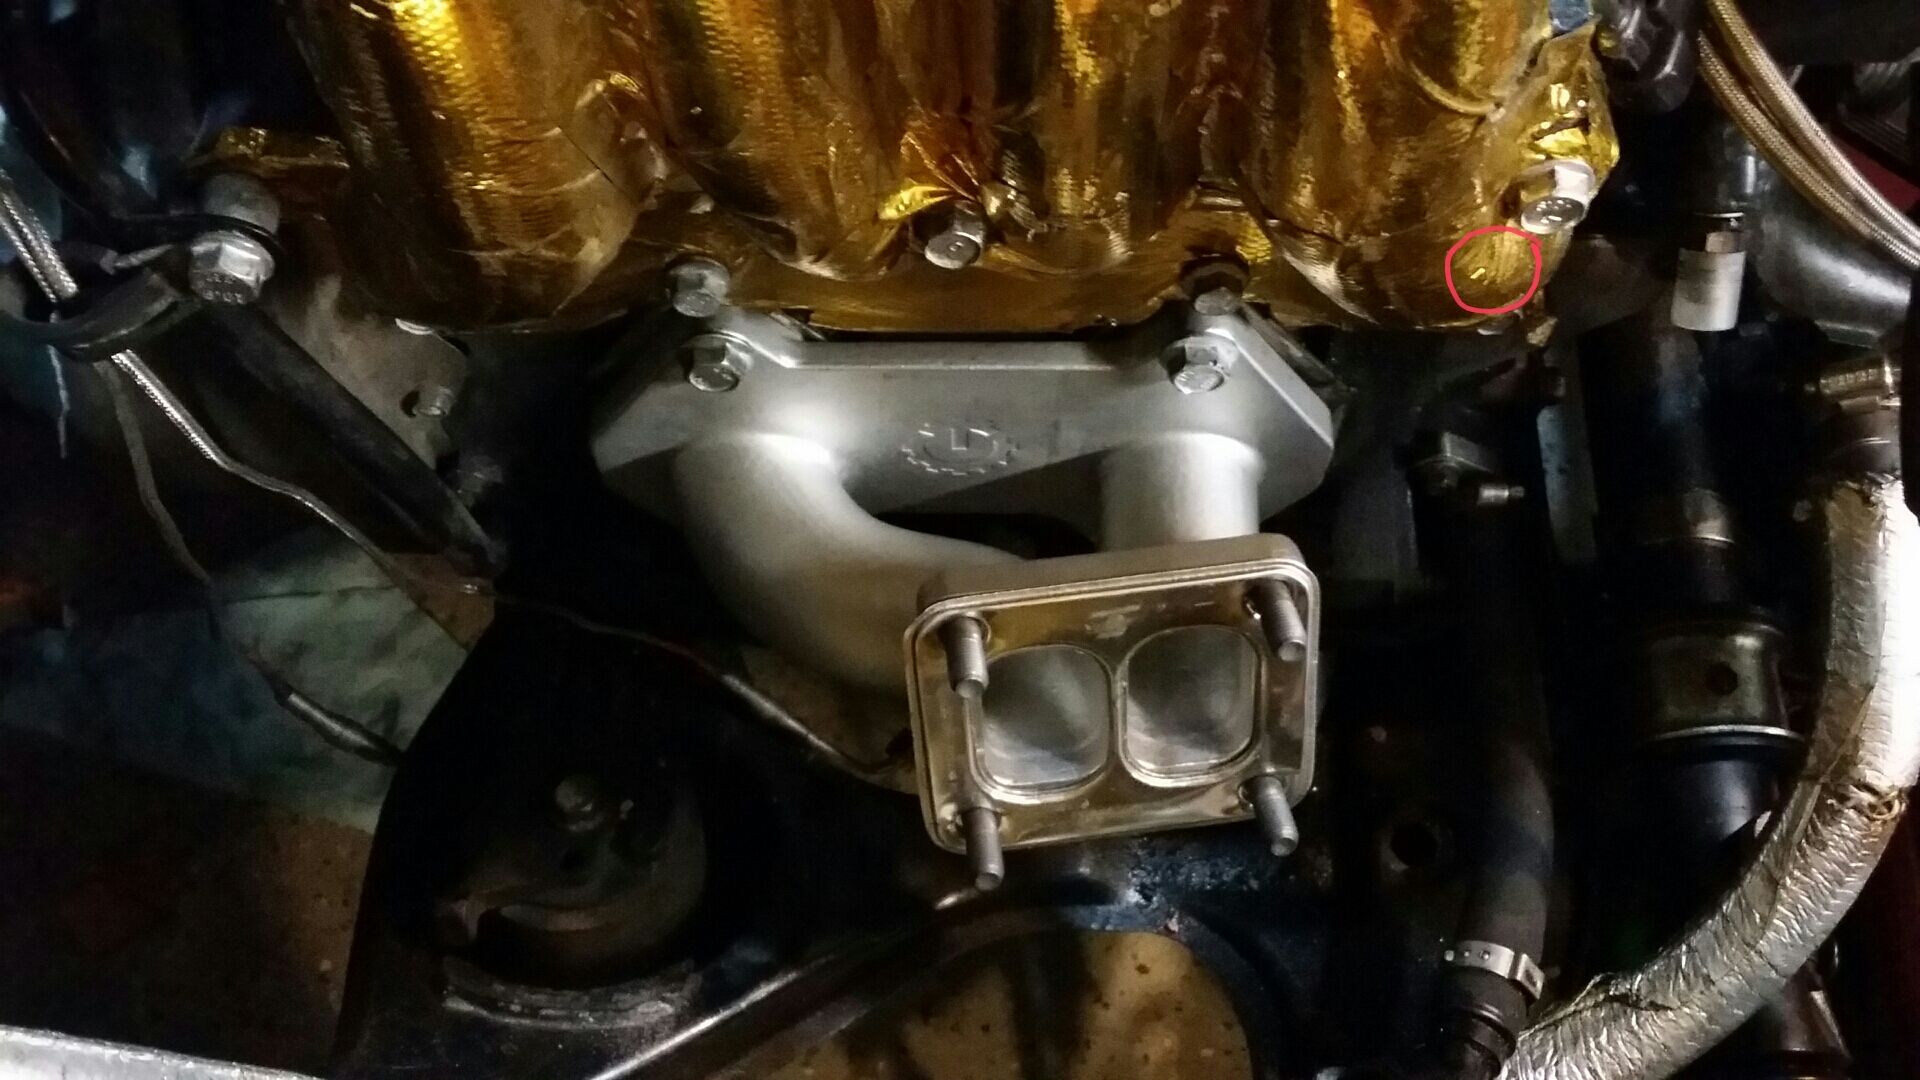
Jason finished fixing the CAD for the new wheel faces, and I think they look awesome. I'll take them to a machinist soon. I'm super stoked for this haha. I talked to the guy I was going to be getting the lips, barrels and hardware from and he's no longer doing wheels, and might not ever get back to it. Figures, lol.
Image

I started talking to another guy that a coworker told me about regarding the wheels, and he put me in touch with a company that sells forged blanks. So I requested a quote from them. This guy designs wheels and who knows what else, sends the design to one of these companies and then they make the wheels and ship them out. He says it's called private label. I've never heard of it before but it sounds awesome. He said that's how ADV1 does their wheels, but maybe that's why they have so many problems with customer service lol.

User avatar
speedjunkie
Senior Member
Posts: 5337
Joined: Wed Jan 02, 2008 9:14
Location: Colorado Springs
Contact:

Re: Build thread

Postby speedjunkie » Mon Feb 01, 2016 9:14

They closed Peterson today (and it's closed tomorrow too WOOHOO!), so I did a little work on the car. Not as much as I'd like, but it was something.

I made some calls around to see if I could find a shop with a CNC machine. I believe I called the shop that I stopped by several months ago but they didn't pick up. I called a few other places and they either didn't have a CNC machine or they did and didn't do that kind of work. So I'm on the hunt still. I'll probably have to go to Denver.

I painted the CHRA of the new turbo and transferred a couple things over to it. Then I clocked both the housings and tightened them down, and then remembered I still have to take the compressor housing to get the sensor port drilled haha. I took a pic of the finished product but then it wasn't on my phone, so whatever.

I also cleaned up the front two coilovers and put the Swift springs on them. They're ready to go back on the car.
Image

I'll pull the rear coilovers tomorrow probably and do them. I still need to try to get the rear disassembled the rest of the way. Ugh, I'm dreading that lol. I'm also dreading grinding on the LIM to get the turbo to fit. But maybe I'll do that tomorrow too. I still need to pull the dash and replace the power and ground cables for the battery, along with a million other things.

I put the springs next to each other to compare height. They're pretty close.
Image

User avatar
speedjunkie
Senior Member
Posts: 5337
Joined: Wed Jan 02, 2008 9:14
Location: Colorado Springs
Contact:

Re: Build thread

Postby speedjunkie » Wed Feb 03, 2016 9:14

Once again today I was lazy and did hardly anything with the car haha. I removed the rear coilovers tonight and cleaned them and swapped the springs out. All of them are done now and ready to go back into the car.
Image

Compared spring heights again.
Image

I now have all the suspension arms out except for this SOB. I think the bolt is rusted to the bushing sleeve. It won't come out and as I turn the bolt, the sleeve turns with it. Between this and not being able to remove the hubs, I'm about to burn the car down lol. Looks like I might be dropping the whole rear subframe. Ugh. On the plus side, if there is one, it makes sense that this would have been the bushing squeaking because it squeaks as I turn the bolt back and forth and the sleeve turns with it.
Image

I also brought in enough housings and plates to mock up an engine on the workbench so I can put the turbo manifold and LIM on there and start test fitting the turbo and grinding off the LIM. I did not get to that today though because, as I said, I was lazy lol.

User avatar
speedjunkie
Senior Member
Posts: 5337
Joined: Wed Jan 02, 2008 9:14
Location: Colorado Springs
Contact:

Re: Build thread

Postby speedjunkie » Thu Feb 04, 2016 9:14

I finally got around to working on the car around 1030 tonight lol. Here is how the CHRA painting project turned out.
Image
Image

I basically just pushed the turbo into the LIM until it ripped the gold barrier, then I scratched it with a scribe. You can kinda see the scratch here, in the very center of the pic.
Image

The first grinds weren't too bad, it got me pretty close, between .025" and .020". However, I plan to get these either powder coated or PVD coated in black chrome, and I'm not sure how thick that coating will be. So I decided to take some more off after this.
Image
Image
Image

Now I'm not sure how this is possible, but after grinding more off I had LESS space. I couldn't even get the thinnest feeler gauge through there.
Image

So I went at it again, and this time it came out pretty good, around a full 1mm. I imagine that will be good enough, but I'll figure out how thick the coating is going to be and grind some more if I need to. I'm just concerned that I'll take too much off and put a hole in the LIM. And at that point I'm going to call Turblown and say some very bad things for a couple reasons. First, for being bone headed and not making this manifold to fit a LIM as popular as the Xcessive equal length LIM, or for not at least testing this with this LIM and telling people it won't work. And second, for telling me to grind on the LIM to make the turbo fit. I think this will work though.
Image

lOOkatme
Senior Member
Posts: 163
Joined: Thu Jun 20, 2013 9:14
Location: COS

Re: Build thread

Postby lOOkatme » Sat Feb 06, 2016 9:14

I am glad you got the EFR 8374 to fit on your car. I think you will be really fast with this turbo as the power delivery is so smooth.

User avatar
speedjunkie
Senior Member
Posts: 5337
Joined: Wed Jan 02, 2008 9:14
Location: Colorado Springs
Contact:

Re: Build thread

Postby speedjunkie » Sun Feb 07, 2016 9:14

Yeah I'm eager to see what it feels like on my car. I just hope it has close to the same low end grunt as the 7670. If it doesn't, I'm definitely switching back.

I took the Suzuka seats back to Wine Country today. While I was there, the salesman convinced me to try an OMP HTE-R xl.
http://www.competitionmotorsport.com/OM ... AoTE8P8HAQ

It feels great, and he said Miata guys use these seats, so I figured if it fits in a Miata it HAS to fit in an FD. Wrong. I test fit it in the passenger side and it still doesn't fit. I think the leg bolster area might be pretty close to fitting, but the halo around the top hits the door frame and would possibly hit the window too. And that's just with it sitting directly on the floor. So I'll be taking that back next weekend probably.

I also went to the swap meet to the Applied Plastics booth and talked to them about options for the manifolds and IC piping. They have a thin coating that goes over polished pieces to protect it and make it easier to clean, and this also saves you the hassle of having to polish the metal over and over. And they also have some heat barrier coatings that are good to 2000 degrees.

I was also going to stop by 3R to get some Redline premix oil for E-85 but I got to talking to my buddy that went along and we missed the exit, so I'll just stop by there next weekend. I'm going to get some of that oil, and some other types and do a test with E-85 in some jars and see which one stays mixed the longest.

I did a little work on the new turbo setup tonight. I drilled the hole for the speed sensor. I'm not sure if the sensor is hitting the wheel or not as it spins, but I think I hear a faint tapping sound. I can just barely feel the sensor sticking out a little further as I rub a finger over it. I tried sanding it down a little bit but it didn't work. I wanted to see if I could remove the LIM without removing the turbo setup, and I can, so that's a win. I test fit the turbo setup back into the engine bay to figure out the coolant line routing and if I needed to order anything, and I wanted to fab up the oil drain on the mock engine on the workbench, but I can't find another front cover in the storage shed. I know I have at least one out there, I just can't remember where I put it. I test fit the downpipe and it won't work, so I think I'll get some more pipe from Frozen Boost and make another one. I might do a 3.5" downpipe this time to help with backpressure, since I have to do a new one anyway. And I need to get more 4" aluminum piping to make the intake pipe, along with 2.5" aluminum pipe for the turbo to IC pipe. And I'm seriously thinking about doing something similar to Wiggins clamps before I take all the pieces to get powder coated. I couldn't get the EGT bungs out of the old turbo manifold despite having used anti-seize, so I have to order some of those. Although Rice Racing posted a link on RCC to the diesel EGT probes he uses and they're pretty much just as fast reacting as my open tip sensors and they're more durable since they're closed tip. I might get some of those but I don't really feel like swapping them again. I might as well though since I'll have the dash out anyway. I got the actuator bracket adapter today, it's ridiculously expensive for what it is but I didn't feel like trying to find a machinist to fab something up. And I'm going to get the Turbosmart IWG-75 actuator because with that one I can run between 3psi and 28psi I think, whereas with the supplied actuator I can only run like 10psi to 18psi. They have three different actuators- low, medium and high- and my turbo came with medium. I'm trying to figure out if I should get the Turbosmart BOV too to run higher boost, but I think the one I have now should get me to 24psi, so I'm not going to get that unless I need to.

User avatar
RX-7 Chris
Posts: 7800
Joined: Tue Oct 02, 2007 9:14
Location: Colorado Springs
Contact:

Re: Build thread

Postby RX-7 Chris » Mon Feb 08, 2016 9:14

Time for a custom center console, lol.
1984 RX-7 GSL-SE [size=84]My restomod project[/SIZE]


1964 Ford Galaxie 500XL flat black w/ white interior, 2 dr fastback, 390 thunderbird, C6 auto, 2500 rpm high stall converter, shift kit, AC, Holley 750 cfm

[size=100]RIP 1983 RX-7[/SIZE]

My Car Blog


Return to “Rotary Vehicle”

Who is online

Users browsing this forum: No registered users and 40 guests