Build thread

Talk about your Rotaries!
User avatar
speedjunkie
Senior Member
Posts: 5297
Joined: Wed Jan 02, 2008 9:14
Location: Colorado Springs
Contact:

Postby speedjunkie » Tue Aug 19, 2014 9:14

I got most of the stuff from Summit Racing today, and I realized that I need to wait to make the oil cooler lines until I get the engine in lol. However, I can make the fuel lines from the tank to the hardlines, including the pressure sensors, etc. That will allow me to reinstall the side piece in the hatch, and the quarter panels in the cabin.
Image

I put the rear bins back in tonight too. First I drilled holes for the circuit breakers and wired those up, and drilled holes to mount a couple other things. I the hole for the coil harness relay too close to the circuit breakers and couldn't attach the coil fuse there too, but oh well. Here is a pic of the finished product...
Image

I've also been thinking about doing the FFE crank trigger kit. I have several things I can sell...two Bosch 044 fuel pumps and the lower part of the CJ Motorsports fuel pump hanger that goes with it, Kenne Bell boost a pump, brand new Yellow Top Optima, ABS delete kit, and possibly the HPP in-tank surge tank. Zico might be buying the ABS delete kit, but we'll see. If anyone wants to buy some of this stuff, just let me know.

So if I have time tomorrow, I might go ahead and finish the fuel lines from the tank to the hardlines.
Image

User avatar
speedjunkie
Senior Member
Posts: 5297
Joined: Wed Jan 02, 2008 9:14
Location: Colorado Springs
Contact:

Postby speedjunkie » Wed Aug 20, 2014 9:14

Today I got the fuel pump and circuit breakers. Most of the circuit breakers are just spares, but I needed one or two of them.
Image
Image

I tried to finish the fuel lines on the fuel tank end until I realized the check valves are on back order, and then I realized the pressure sensors are too big to fit under the cover that goes over the opening for the fuel tank cover. So I'll have to make some adjustments to how I do this, which doesn't make me very happy. But oh well. And I realized I need to order a fitting that's over 90* for the fuel return because a 90* hits the opening above the fuel tank cover.

I was able to complete the wiring for the water injection circuit breakers. I ended up drilling holes in the cover under the dash and put them in there.
Image

I keep forgetting I also need to pull the gauge cluster hood back up and pull the light for the ABS since I pulled all the ABS system out.
Image

User avatar
speedjunkie
Senior Member
Posts: 5297
Joined: Wed Jan 02, 2008 9:14
Location: Colorado Springs
Contact:

Postby speedjunkie » Thu Aug 21, 2014 9:14

I took the wires for the fuel pumps and the fuel level sensor to work today and soldered the terminals on and stopped by Pep Boys after work and picked up some submersible fuel injection hose and finished the fuel pump hanger assembly and installed it tonight. After it was all in, I discovered I forgot to install a plastic clip on the inside connector before I pushed the wires into the connector lol. Oh well, it's not like it holds a seal in place anyway.
Image
Image
Image
Image
Image

I'm still not sure what I'm going to do for a surge tank. I guess I'll either try to make a lid for the stock bottom part or wait for CJ Motorsports to come out with their new system they're working on. It's hard telling how long that will be though. Supposedly it should be within the next month or two, but they told me that early this year and we all now how these things go lol.

I also got some more parts in. The Goopy apex seals (READY TO BUILD THE ENGINE!), a couple 6an couplers from Summit, and the Oetiker clamps from Pegasus Racing for the oil cooler hoses and turbo coolant hoses. To be honest, I'm really not sure how to use the specialty tool on these clamps lol, and these clamps aren't exactly what I thought they were going to be. So we'll see how this goes.
Image
Image

User avatar
RX-7 Chris
Posts: 7800
Joined: Tue Oct 02, 2007 9:14
Location: Colorado Springs
Contact:

Postby RX-7 Chris » Fri Aug 22, 2014 9:14

the clamps are easy. those are actually the same clamps that you use on irrigation systems, lol. Give me a call and I can explain.
1984 RX-7 GSL-SE [size=84]My restomod project[/SIZE]


1964 Ford Galaxie 500XL flat black w/ white interior, 2 dr fastback, 390 thunderbird, C6 auto, 2500 rpm high stall converter, shift kit, AC, Holley 750 cfm

[size=100]RIP 1983 RX-7[/SIZE]

My Car Blog

User avatar
speedjunkie
Senior Member
Posts: 5297
Joined: Wed Jan 02, 2008 9:14
Location: Colorado Springs
Contact:

Postby speedjunkie » Fri Aug 22, 2014 9:14

I watched a video on youtube last night lol. I was expecting the clamps that have the little tabs to hold it tight, so this kinda threw me off. I had an idea of how I was supposed to do it and I was right, but I had to verify first. Thanks though! Maybe I'll talk to you about it anyway just to be sure lol. Supposedly you don't need clamps with the push-lok hoses and fittings I'm going to use, but I have heard of some blowing off, so I'd like the added peace of mind.
Image

User avatar
RX-7 Chris
Posts: 7800
Joined: Tue Oct 02, 2007 9:14
Location: Colorado Springs
Contact:

Postby RX-7 Chris » Fri Aug 22, 2014 9:14

Usually when those clamps are used, you have to cut them off to remove.
1984 RX-7 GSL-SE [size=84]My restomod project[/SIZE]


1964 Ford Galaxie 500XL flat black w/ white interior, 2 dr fastback, 390 thunderbird, C6 auto, 2500 rpm high stall converter, shift kit, AC, Holley 750 cfm

[size=100]RIP 1983 RX-7[/SIZE]

My Car Blog

User avatar
speedjunkie
Senior Member
Posts: 5297
Joined: Wed Jan 02, 2008 9:14
Location: Colorado Springs
Contact:

Postby speedjunkie » Fri Aug 22, 2014 9:14

Well it doesn't matter much, I discovered tonight that the clamps are too big. Apparently the -10 or whatever the number at the end of the part number on the Pegasus website does not denote the size of the AN line lol.

I made the return line for between the hardlines and the fuel pump hanger, and put a fitting on the return line in the engine bay so it can connect to the hardlines. And I removed the the last oil cooler line and sold them to Geoff. That's about all I did tonight lol.

I talked to Tom today and he said to come get my water pump housing tomorrow. So I guess I'll do that, clean the rotors in his parts washer, sandblast the water pump housing and possibly the front cover, cut off the last nipple on the housing before I drop it off to get powdercoated (probably Monday), clean the transmission, and maybe clean the garage so it will be ready to build the engine, and maybe build the engine starting tomorrow night or wait until Sunday, or maybe next weekend. Not sure yet.
Image

User avatar
speedjunkie
Senior Member
Posts: 5297
Joined: Wed Jan 02, 2008 9:14
Location: Colorado Springs
Contact:

Postby speedjunkie » Sun Aug 24, 2014 9:14

I picked up the water pump housing from Tom yesterday and sand blasted it, and scrubbed the rotors and front cover in his parts washer, although the rotors were still gunked with carbon. And I talked to Jason (JTurton) about his oil cooler lines and if he used Oetiker clamps and he said he got them from Lowe's. I couldn't find the right ones there so I went to Home Depot and found some. I even found some for the lines I'm going to make for the turbo coolant. Gotta love being able to get parts local, especially after you spend $70 on some that won't work lol. Although about half of that price was the tool. Other than that, I didn't get much done yesterday lol. I got more done today after church and tonight lol.

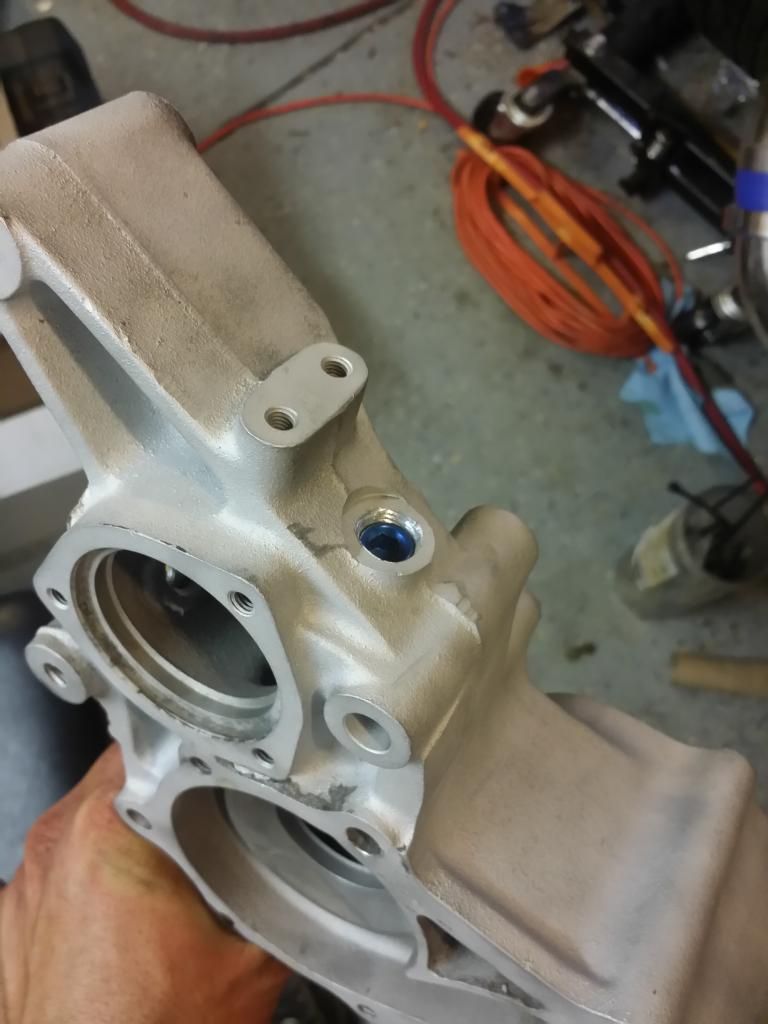
First, here is the water pump housing. Here are the two holes Tom drilled and tapped, but he built up the material around them first so they wouldn't crack.
Image

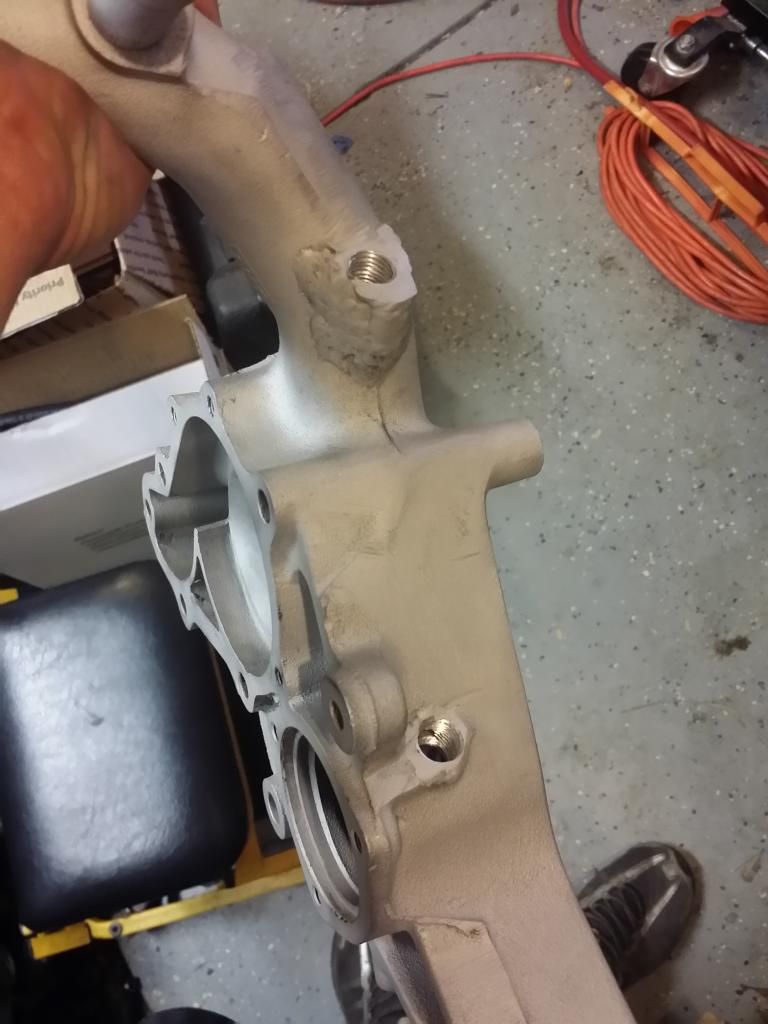
And here I cut off the other coolant nipple on top that I won't be using, and I drilled the hole and tapped it, but I got carried away and tried to do it too fast and almost ruined the whole thing to the point that it would have to be welded shut. You can see how far down the plug sits. I just hope it seals.
Image

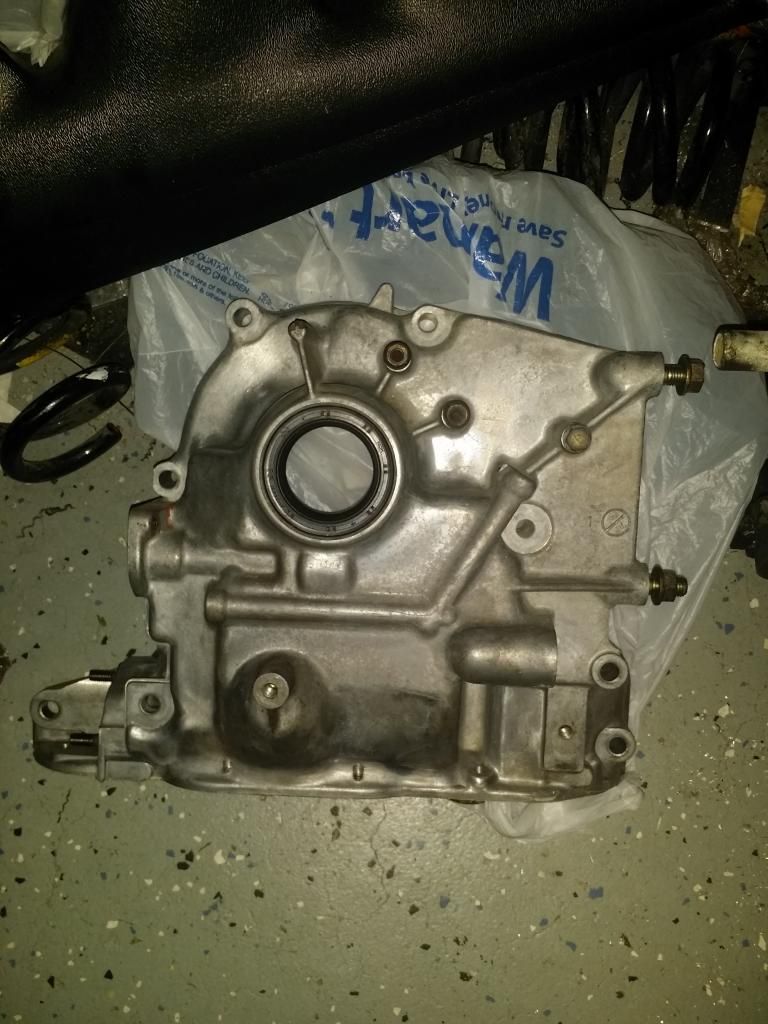
Here is the front cover. I got it pretty clean, and I was going to sand blast it and then clear coat it like the housings, but I think I'm going to paint it black to match the front plate, what do you guys think?
EDIT: I'm about to lose my mind on photobucket. I purposely flipped this picture and it still shows up upside down, even though in photobucket it's right side up. ARGH!!!!
Image

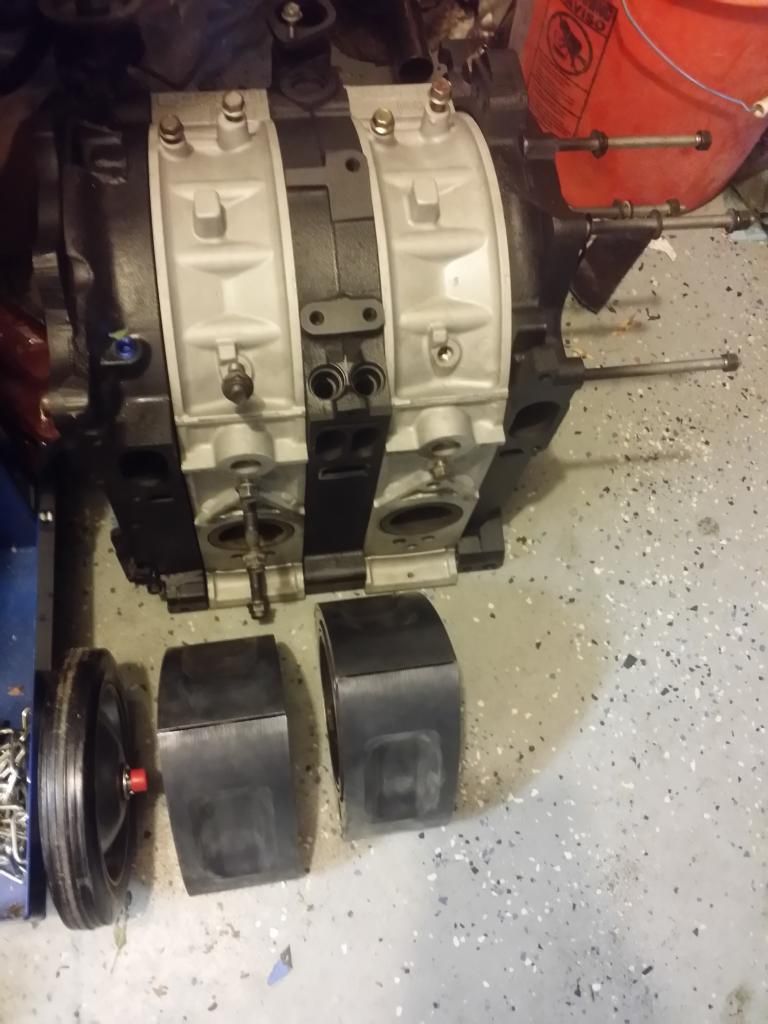
And I cleaned the rotors the rest of the way. I ended up having to use a wire wheel to get through the carbon. And you can see how the engine will look too.
Image

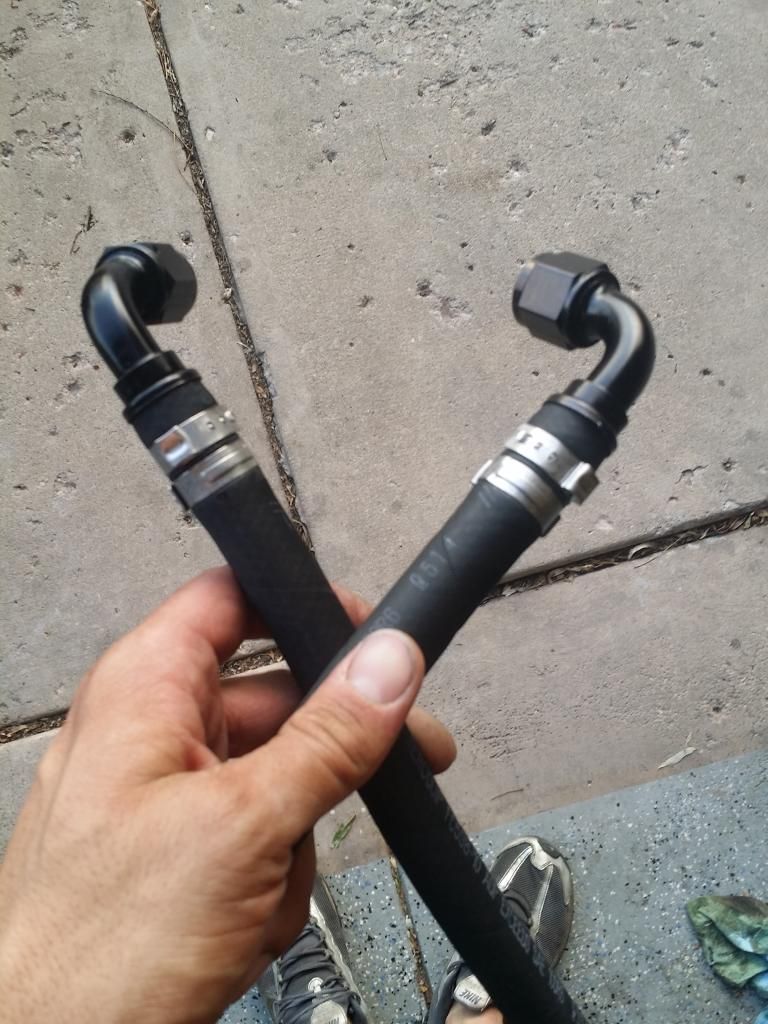
And here is the first oil cooler line, the one that runs through the bumper support and connects the two coolers, with the clamps I got from Home Depot. I had to oil the line to slide the clamps into place since they fit so tight already, just like Jason had to do with his, but they slid into place and clamped nice and tight. I just hope they don't eventually cut into the line.
Image

And as of right now, I'm planning on cleaning my garage this week and building the engine this next Saturday, for anyone that wants to come over to help or just watch. I'll probably grill burgers and hot dogs for lunch also. And if I can finish it in time I'm down to go ahead and drop it into the car, especially if there are extra hands to make sure it doesn't crash into the fresh paint in the engine bay. That way I can order what I need to finish up the engine bay fuel lines and try to finish everything else. I'm still trying to decide if I want to just wire up the new coils also and skip using the PFC for first start and go straight to the Adaptronic, or go with PFC and stock coils first.

I just remembered I need to make the spark plug wires and wastegate coolant hardlines after the engine is built. So it may not go into the car Saturday. Hmmmmm...
Image

User avatar
RX-7 Chris
Posts: 7800
Joined: Tue Oct 02, 2007 9:14
Location: Colorado Springs
Contact:

Postby RX-7 Chris » Mon Aug 25, 2014 9:14

I should be able to stop by on Saturday. I'll let you know.
1984 RX-7 GSL-SE [size=84]My restomod project[/SIZE]


1964 Ford Galaxie 500XL flat black w/ white interior, 2 dr fastback, 390 thunderbird, C6 auto, 2500 rpm high stall converter, shift kit, AC, Holley 750 cfm

[size=100]RIP 1983 RX-7[/SIZE]

My Car Blog

User avatar
speedjunkie
Senior Member
Posts: 5297
Joined: Wed Jan 02, 2008 9:14
Location: Colorado Springs
Contact:

Postby speedjunkie » Mon Aug 25, 2014 9:14

Cool!
Image

lOOkatme
Senior Member
Posts: 163
Joined: Thu Jun 20, 2013 9:14
Location: COS

Postby lOOkatme » Mon Aug 25, 2014 9:14

Keep up the progress! looking good.

User avatar
speedjunkie
Senior Member
Posts: 5297
Joined: Wed Jan 02, 2008 9:14
Location: Colorado Springs
Contact:

Postby speedjunkie » Mon Aug 25, 2014 9:14

Thanks!

I took the water pump housing to get powdercoated today and they finished it right away, so I picked it up this afternoon after work and put all the fittings, sensors, and the plug back in. That's all I did tonight lol.
Image
Image
Image

The hose ends are on the coolant fittings just so they don't get dinked up if it falls or something.

I discovered today when getting money to pay for the powdercoat that I have $20 and 1/4 tank of gas until Friday, so I won't be buying anything car related for the rest of the week lol. Even next week or this weekend I'll only get what I need to finish the fuel system, etc.

Also, I'm going to have to replace the fuel line in the fuel tank. I went to Pep Boys yesterday and while I was there I asked them if it was submersible hose and the kid said "yeah, it says fuel injection hose". Uh, yeah, not the same thing. So he asked his manager and the manager said it was. I still didn't trust them and I'm glad I checked. I emailed the company that makes the hose and they said it's not. So...out the pumps will come yet again. Ugh.

And it wouldn't hurt replacing the o-rings on the sensors I installed tonight either, but we'll see if I remember that lol.

Oh yeah, but check out the sweet table that I got from one of Lani's old neighbors. For Free.99.
Image
Image

User avatar
speedjunkie
Senior Member
Posts: 5297
Joined: Wed Jan 02, 2008 9:14
Location: Colorado Springs
Contact:

Postby speedjunkie » Thu Aug 28, 2014 9:14

I didn't do anything but clean the garage a bit last night, trying to make room for building the engine.

Tonight all I did was make my spark plug wires. I started on them around 1130 or so and just finished them. It took me a bit to get started but once I did, I was rolling along pretty well. I thought it would be easier to put the boot on first and then the clamp. That's exactly opposite. It was WAY easier to put the clamp on first and then slide the boot over it.

The shorter wires are 19ohms and the longer wires are 25ohms. Well, one is 25 and one is 26, but they're the exact same length. Either way, resistance is really low. I just now thought about measuring the resistance on the stock wires, but I'll do that tomorrow.

Image

I was going to wait until getting the engine built to make these wires and make the hardlines for wastegate coolant, until it dawned on me that I could easily mock up an engine on the workbench and make these things while I have not much else to do. Tomorrow night I'll probably make the hardlines.

Also, I'm thinking about actually building the engine tomorrow instead of Friday when everyone is at the house. Mainly because when so many people are over I don't get near as much accomplished and I'd like to drop the engine in Saturday while people are there to help. I only need one set of hands to help during the build. Although if people want to see a rotary going together, that's another thing.
Image

User avatar
RX-7 Chris
Posts: 7800
Joined: Tue Oct 02, 2007 9:14
Location: Colorado Springs
Contact:

Postby RX-7 Chris » Thu Aug 28, 2014 9:14

looks really clean.
1984 RX-7 GSL-SE [size=84]My restomod project[/SIZE]


1964 Ford Galaxie 500XL flat black w/ white interior, 2 dr fastback, 390 thunderbird, C6 auto, 2500 rpm high stall converter, shift kit, AC, Holley 750 cfm

[size=100]RIP 1983 RX-7[/SIZE]

My Car Blog

User avatar
VRx8
Senior Member
Posts: 755
Joined: Sat Jul 04, 2009 9:14
Location: San Antonio, TX

Postby VRx8 » Thu Aug 28, 2014 9:14

That looks real nice. You should me a few more brackets lol


Return to “Rotary Vehicle”

Who is online

Users browsing this forum: No registered users and 75 guests